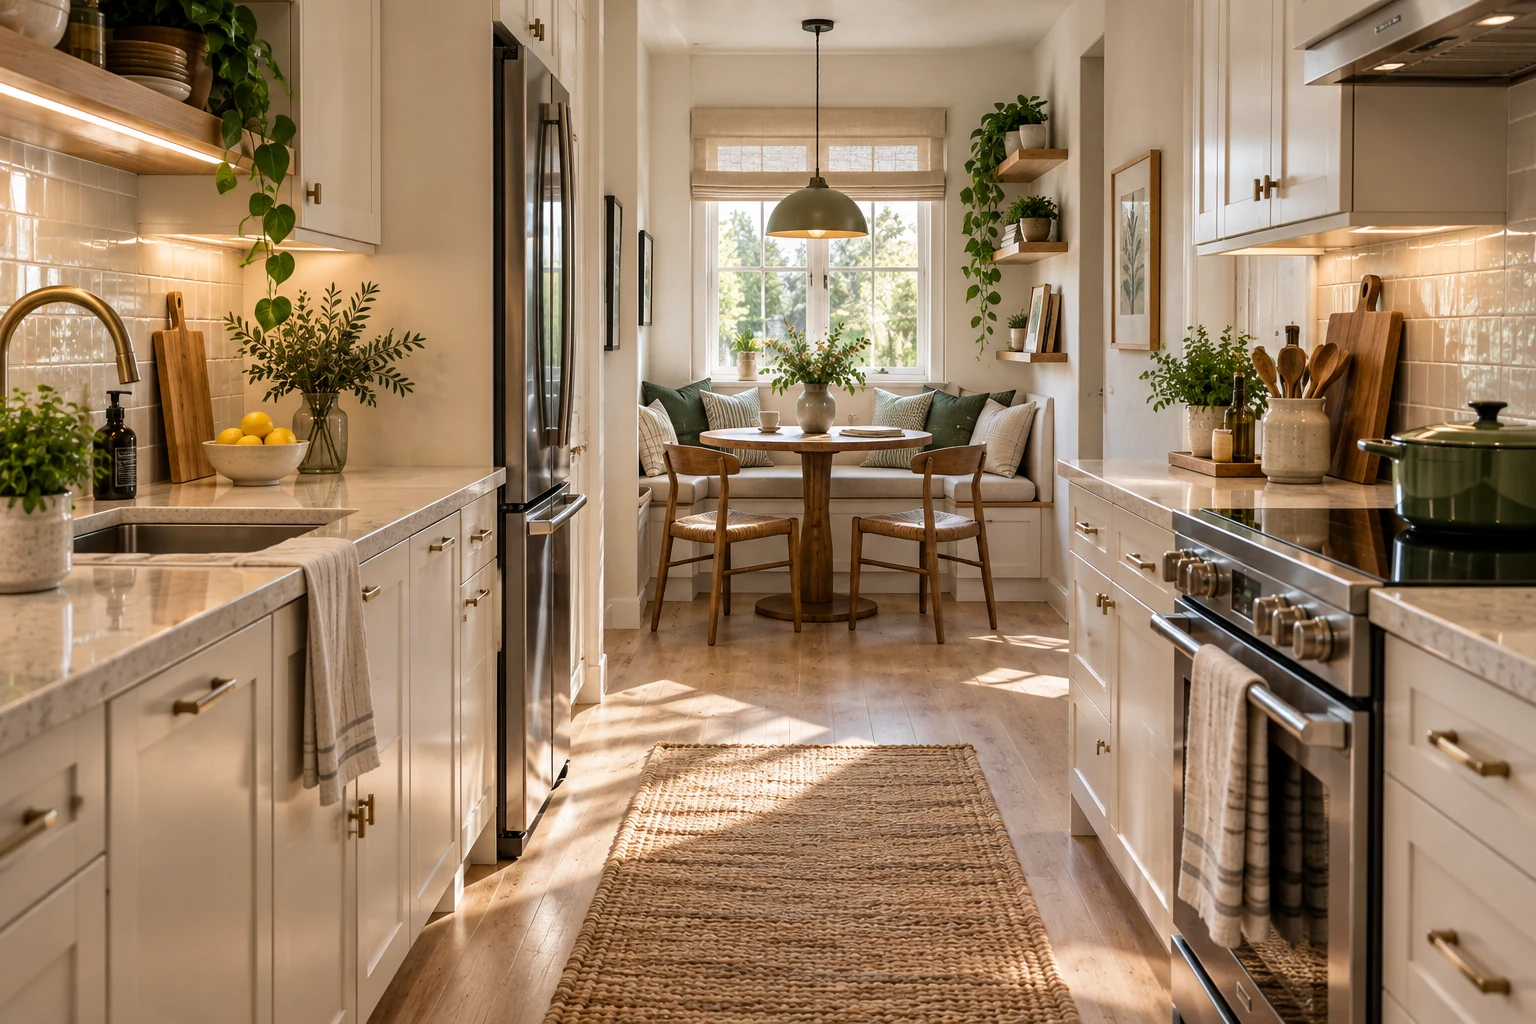
A breakfast nook can work in a galley kitchen when the seating sits outside the main cooking path and does not block appliance, cabinet, or door movement. The best locations are usually at the end of the galley, beside a window, in an existing alcove, or along one wall where a shallow bench and compact table can live without narrowing the working aisle.
The useful entity chain is galley width → work zone → end wall or window → seating depth → table shape → chair or bench clearance → appliance access → lighting → storage → upholstery.
1. End-wall banquette
The end of a galley kitchen is often the cleanest place for a true breakfast nook because seating can sit beyond the primary cabinet and appliance run.
A straight bench against the end wall can pair with a small pedestal table and one or two movable chairs. The bench saves chair pull-back space on one side, while the pedestal base can make it easier to slide in and out than a table with four corner legs.
Before building anything, check the end wall for windows, radiators, HVAC, outlets, and door conflicts.
2. Window-side bench
If the galley terminates at a window, a bench can turn that natural focal point into a dining spot.
Check:
- whether the window still opens fully;
- where handles and locks sit;
- curtain or shade clearance;
- whether a radiator or register sits below the window;
- seat-back height relative to the sill;
- how the table affects the route to the window.
Do not cover ventilation or heating equipment simply to create the bench.
3. Single-wall bench with a pedestal table
A bench along one wall can work when the galley is slightly wider or when the dining zone begins after the main work run.
The advantage is that the bench does not need chair pull-back space. The disadvantage is that the seat itself still occupies depth, and people need enough room to enter and leave without blocking the kitchen.
For bench proportions, seating comfort and storage tradeoffs, use our Breakfast Nook & Banquette Guide.
4. Compact L-shaped banquette
An L-shaped bench can use a corner efficiently when the galley opens into a wider breakfast area or adjacent room.
The corner seat may not be the easiest place to enter, so test how many people the nook truly needs to seat. A smaller straight bench plus chairs can sometimes be more comfortable than forcing every wall into an L shape.
5. Freestanding bistro table at the end of the galley
A small freestanding table is the lowest-commitment option. It works well for renters and for homeowners who want to test whether the dining zone feels natural before investing in built-ins.
Round or softly shaped tables can reduce sharp corners in a tight circulation area. Square and rectangular tables can sit closer to a wall when that relationship is more useful.
The right shape depends on the room, not on a universal rule that round tables are always better in small spaces.
6. Bench plus drop-leaf table
A drop-leaf table can keep the everyday footprint compact while allowing more surface when needed.
Check the table in both modes:
- closed footprint;
- open footprint;
- leaf support;
- leg position;
- chair placement;
- whether an open leaf enters the kitchen path.
A table that is beautifully compact when closed can still be a poor choice if the open mode blocks the dishwasher or refrigerator.
7. Backless bench where visual openness matters
A backless bench can make a tiny nook feel less visually heavy and can tuck farther under some tables.
It is less supportive for long meals or work sessions, so use it when compactness matters more than lounge-like comfort. A wall cushion or upholstered panel can add comfort without building a full high-backed banquette.
8. Two-person corner nook
Not every breakfast nook needs family-table capacity. A compact two-person setup can be enough for coffee, breakfast, or a laptop session.
Reducing the intended seat count often creates a much better galley layout than forcing four seats into a space that only works comfortably for two.
9. Nook that doubles as a homework or laptop zone
A breakfast nook can support homework or occasional laptop use if the seating and table are comfortable enough for more than a quick meal.
Think about:
- back support;
- table height;
- task lighting;
- nearby charging;
- whether work items can be cleared before meals;
- storage for notebooks and supplies.
Do not route permanent electrical wiring casually through a bench. Resolve outlets and hardwired lighting according to applicable electrical requirements.
10. Storage banquette for rarely used items
Storage under a bench can be useful, but access method matters.
Drawers are convenient when there is enough room in front to open them. Lift-up seats can use more of the interior volume but require the cushion and tabletop arrangement to allow access.
Use the storage for items that do not need constant access, such as table linens, seasonal serving pieces, or backup supplies. Avoid making the only storage for everyday objects difficult to reach.
How large should the nook be?
Start with the people and furniture, not a preset nook dimension. Measure the actual table, bench, and chairs in their usable positions, then check the remaining kitchen path.
For seating at a counter or table, NKBA planning guidance is a useful reference for diner width and knee space, but a banquette adds different seat-depth and table relationships. Use the actual banquette and table geometry together.
For built-in bench proportions, storage tradeoffs and seating comfort, continue with our Breakfast Nook & Banquette Guide.
Choose the table after the seating layout
The table has to work with how people enter the nook.
| Table type | Useful when | Check |
|---|---|---|
| Pedestal | Bench access is tight | Base footprint and stability |
| Round | Corner clearance is important | Diameter and usable surface |
| Rectangular | The nook follows a long wall | Corner projection and leg positions |
| Square | The nook is compact and symmetrical | Seat count and wall clearance |
| Drop-leaf | The surface needs to shrink | Open mode and support |
Do not let the nook interrupt the kitchen workflow
The traditional work-triangle idea is less important than the actual route between refrigerator, sink, cooking surface, prep zones, and storage.
Watch the room during a normal meal-prep routine. Where does the refrigerator door open? Where does someone stand at the dishwasher? Does a seated person block a drawer or oven?
The breakfast nook should sit beside the workflow, not inside it.
Use upholstery that suits kitchen life
Banquette fabric should be chosen around spills, friction, sunlight, pets, and cleaning requirements.
Useful attributes include:
- removable cushion covers;
- manufacturer cleaning code;
- abrasion resistance where published;
- color and pattern that disguise minor wear;
- lightfastness near a strong window;
- comfort for the intended sitting time.
Do not assume an outdoor fabric is automatically appropriate indoors or that every stain-resistant marketing claim means the same thing.
Lighting should serve the table without crowding the galley
A pendant can define the nook when ceiling height and table position make it practical. Wall sconces or existing ambient lighting can be better when the passage is tight.
Place fixtures around the finished table position, not the empty floor area. New hardwired lighting should be planned before built-in seating and follow applicable electrical requirements.
Use color to connect the nook to the kitchen
The nook does not need a separate theme. Repeat one or two attributes from the kitchen, such as cabinet color, wood tone, metal finish, backsplash color, or flooring.
A stronger cushion fabric, painted bench, wallpaper, or artwork can then provide the focal point without making the dining area feel unrelated to the room.
Renter-friendly breakfast nook options
A renter can test the concept without built-ins:
- freestanding bench plus compact table;
- small bistro set at the end of the galley;
- storage bench that can move to another room;
- drop-leaf table;
- plug-in or rechargeable lighting;
- removable wall art where compatible with the surface.
A successful renter setup should be easy to remove and should not depend on unsafe adhesive support for heavy furniture or wall-mounted surfaces.
What to avoid
- Blocking appliance or cabinet doors.
- Forcing a four-person nook into a two-person space.
- Using arbitrary 36-inch or 42-inch aisle numbers without considering the actual kitchen and applicable requirements.
- Building over HVAC or heating components.
- Deep storage drawers that cannot open because the table is in front of them.
- Permanent electrical work hidden inside seating without proper planning.
- A table base that traps the person sitting in the corner.
- Adding so much upper storage above the bench that the nook feels cramped.
A practical planning checklist
- Map the galley work zone and appliance swings.
- Identify the quietest end, corner, or window area.
- Decide how many people the nook truly needs to seat.
- Mock the bench and table footprints with tape.
- Test entry and exit from each seat.
- Check table legs or pedestal placement.
- Decide whether storage is worth the added bulk.
- Plan lighting after the table position is fixed.
- Choose upholstery around cleaning and use.
- Walk through a normal kitchen routine before building anything.
For more compact-kitchen planning, see our small-kitchen breakfast bar guide, Breakfast Nook & Banquette Guide, and Dwelanor Room Guides.