
Bedding Layers
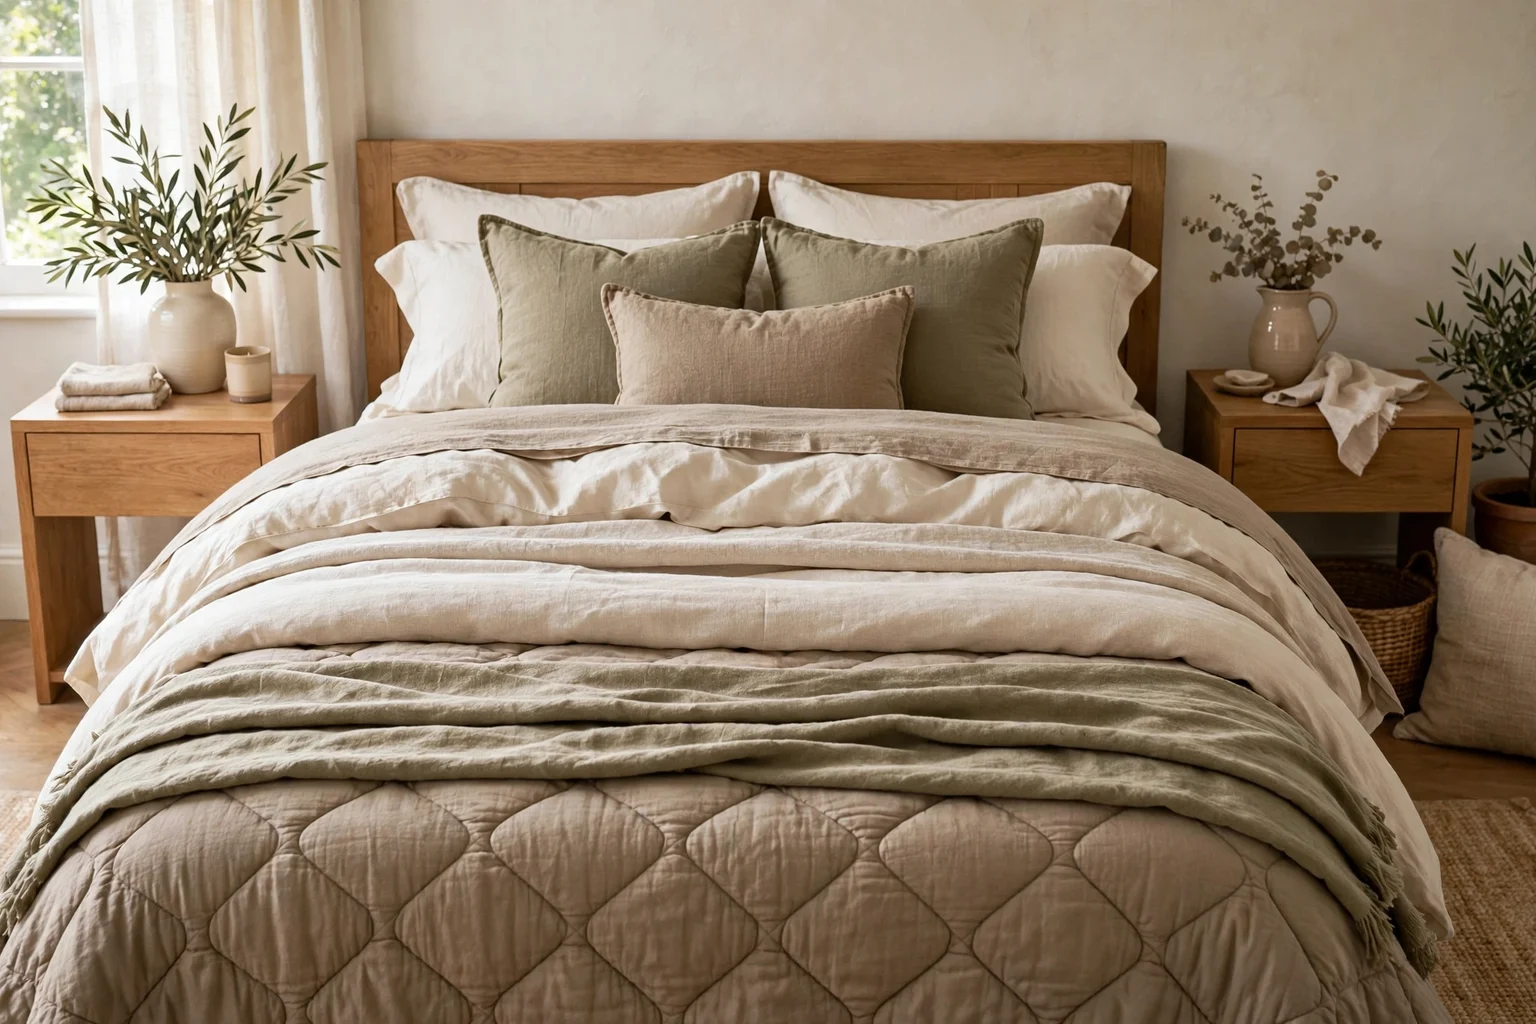
Layer a bed from the sleeping layer outward, then stop when every extra textile has a purpose. The most polished beds are not necessarily the ones with the most pieces. Sheets manage skin contact, the duvet provides loft, a coverlet can add a lighter layer, and a throw introduces texture or quick warmth.
Fit sheets → add duvet → decide coverlet position → add one useful blanket → place a throw → build pillows → edit anything that has no job.
1. Start with fitted and top sheets
Make the base layer smooth and properly sized to the mattress depth. If you use a top sheet, decide whether it folds over the duvet or stays mostly hidden.
The fitted sheet and pillowcases usually benefit most from fabrics chosen for comfort and laundering rather than purely decorative texture.
2. Add the duvet as the main volume
Use the duvet to create the bed’s primary loft. Shake the insert into the corners of its cover and distribute filling evenly before styling folds.
If the duvet overhang looks sparse, solve insert and cover sizing rather than trying to hide the problem with more pillows.
3. Use a coverlet as a lighter plane
A coverlet can run over the whole bed under the duvet or fold across the lower half. It adds color and a flatter texture that contrasts with the duvet’s loft.
In warm climates, it can also become the practical sleep layer when the duvet is too heavy.
4. Add one blanket with a clear purpose
Place a blanket or quilt across the lower third for extra warmth or texture. Fold it neatly if its pattern is strong; allow a softer drape if the material has attractive movement.
Avoid stacking multiple heavy blankets simply because styled photos do; the bed still has to function.
5. Use the throw for texture, not coverage
A smaller throw works well folded, loosely draped or placed across one corner. It can introduce a contrasting material such as wool, boucle or a lightweight woven textile.
Keep it proportionate to the bed so it reads as an accent rather than an undersized blanket.
6. Build pillows from sleeping to decorative
Place sleeping pillows where they can be reached easily, then add supportive shams or decorative squares and one smaller accent if desired.
Leave enough visible headboard and bed width that the pillows do not overwhelm the mattress.
7. Repeat color quietly
Pull one or two tones through the duvet, coverlet, pillows and throw instead of matching every piece exactly. A restrained palette lets texture create depth.
Use pattern at different scales so stripes, checks or florals do not compete in the same visual frequency.
8. Edit the nightly routine
Make the bed, then remove what you would realistically take off before sleeping. If several decorative layers end up permanently on a chair, reduce the setup.
A good layered bed should reset quickly in the morning and still look intentional when one or two pieces shift.
Planning table
| Check | What to test | Why it matters |
|---|---|---|
| Sheets | Mattress depth and sleep comfort | Creates base layer |
| Duvet | Insert/cover fit and overhang | Creates main loft |
| Coverlet | Full-bed or folded position | Adds lighter structure |
| Blanket | Warmth and texture | Adds practical layer |
| Throw/pillows | Accent scale and nightly routine | Controls styling load |
Related Dwelanor guides
- Home Textiles Guide — choose bedding and fabric types
- Duvet Insert Size Guide — plan loft and overhang
- Throw Pillow Size Guide — scale decorative pillows
- Bedroom Design Guide — coordinate the full room
- Cottagecore Bedroom Ideas — see a more romantic layering direction
- Rental Bedroom Styling Guide — use textiles for visual upgrade
Bottom line
Layer a bed by function first and styling second. Use the duvet for volume, a coverlet or blanket for contrast and warmth, and a throw or pillows for texture, then edit until the bed remains easy to live with.