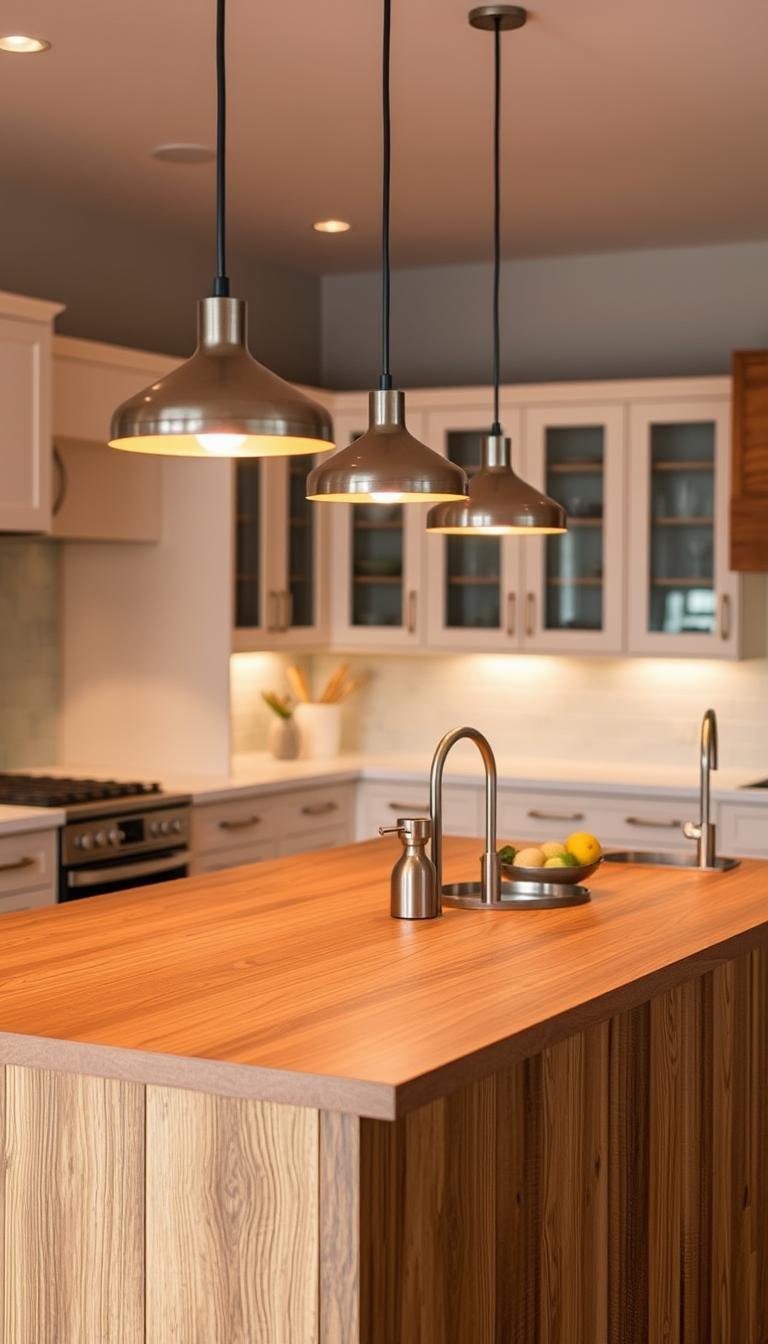
For most kitchen islands, start with the bottom of the pendant about 30 to 36 inches above the countertop, then adjust for the fixture, sightlines and how the island is actually used. That range is a planning starting point, not a rule that overrides fixture scale, user height, glare or the room’s other lighting.
The useful relationship is countertop height → pendant bottom → fixture size → user sightline → task-light spread → ceiling/electrical point.
Why 30 to 36 inches is a useful starting point
Kichler currently recommends roughly 30 to 36 inches between a kitchen counter and the bottom of a pendant. Lumens gives a similar general range for kitchen pendants. The point of that range is to keep the fixture close enough to contribute useful light without dropping it directly into normal sightlines.
See Kichler’s current kitchen lighting guidance.
Do not treat the number as automatic. A wide opaque shade, exposed bulb, low ceiling, very tall user or island seating arrangement can all change where the pendant feels comfortable.
Measure from the finished countertop
Use the top of the finished island surface as the vertical reference. Measure to the lowest point of the pendant, including any diffuser or decorative element that extends below the shade.
This gives you one consistent dimension to compare across different fixtures and keeps the pendant relationship tied to the actual work surface.
Check the seated and standing sightlines
Kitchen islands often serve several roles: food prep, homework, conversation, serving and seating. A pendant that looks perfect while the room is empty can sit directly between two people’s faces once stools are occupied.
Test the proposed height from:
- the main prep position;
- each stool or seating position;
- the adjacent dining or living room;
- the main circulation path through the kitchen.
If the fixture blocks faces or becomes visually heavy, raise it within a sensible range or choose a smaller/lighter shade.
Fixture size changes how low it can comfortably hang
A small mini pendant and a 20-inch dome do not have the same visual weight. Larger shades often need more breathing room above the island because they occupy more of the field of view.
Consider:
- shade diameter;
- shade height;
- whether the material is clear, translucent or opaque;
- whether the bulb itself is visible;
- how many pendants are in the row.
The goal is not to make every fixture bottom identical across every kitchen. It is to create a comfortable relationship between the island and the lighting above it.
Ceiling height affects scale more than it affects the counter relationship
A taller ceiling gives you more vertical space above the pendant, but it does not automatically require the fixture to drop lower toward the countertop. The work-surface relationship still matters most.
With a high ceiling, you may choose:
- a taller fixture body;
- a larger shade;
- a longer stem or cord while keeping the fixture bottom comfortable;
- a multi-light composition that fills more vertical volume.
With a low ceiling, a compact pendant or semi-flush approach may work better if a hanging fixture would feel crowded.
Glare can matter more than the exact height
If a bright bulb is visible at seated eye level, moving the pendant an inch or two may not solve the real problem. Shade design, diffuser quality, bulb position and dimming all affect visual comfort.
Before final installation, test whether the light source is visible from the stools and the main walking path. A frosted diffuser or deeper shade can sometimes improve comfort more than changing the drop.
Task lighting should be layered
Pendants are only one layer of kitchen lighting. The island may also receive light from recessed fixtures, adjacent under-cabinet lighting and daylight.
A successful plan usually combines:
- ambient lighting for the room overall;
- task lighting for food prep and detailed work;
- decorative/accent lighting for visual character.
Do not force the pendants to provide all three jobs by themselves.
Adjustable drops are useful
If the fixture allows cord or stem adjustment, leave enough flexibility to fine-tune the bottom height after the island, stools and bulbs are actually in place.
That is especially useful when:
- the fixture has exposed bulbs;
- the island has seating;
- the ceiling is vaulted;
- the shade is larger than expected;
- the kitchen opens directly into another room.
Keep multiple pendants at the same finished height
When several matching pendants form one row, their bottoms should normally align unless the design intentionally uses staggered heights.
Small differences become obvious across a long island. Measure from the countertop after installation rather than trusting equal cord lengths alone, especially on a ceiling that is not perfectly level.
What about two large pendants versus three smaller ones?
Fixture count changes the visual mass above the island but does not change the basic height logic. Two larger pendants may need to sit slightly higher because their shades occupy more of the view. Three smaller fixtures may feel lighter at the same bottom height.
The separate question of spacing is covered in our 9-foot island pendant spacing guide.
Dimming and color temperature
Dimming gives the island more than one role. Brighter settings can support prep and cleanup, while lower settings can make the same fixtures feel calmer during meals or conversation.
Coordinate the color temperature with the rest of the kitchen. A very warm pendant paired with noticeably cooler recessed or under-cabinet lighting can make surfaces look inconsistent.
If the fixture and lamps are dimmable, verify compatibility between the light source, driver and dimmer.
Electrical installation comes before decoration
The fixture must be supported and wired according to its manufacturer instructions and the requirements that apply to the electrical installation.
If the ceiling box needs to move, the fixture is heavy, the ceiling is sloped, or the existing wiring is uncertain, use an appropriate electrician or installer. Do not compromise support or wiring simply to force a perfectly symmetrical visual layout.
A practical height-setting sequence
- Measure the finished island height.
- Mark the 30 to 36 inch planning zone above the counter.
- Mock up the actual pendant diameter and height.
- Test standing and seated sightlines.
- Check whether the bulb or diffuser causes glare.
- Confirm the fixture clears cabinet doors and nearby architectural elements.
- Compare the pendant with the room’s other task and ambient lighting.
- Confirm the electrical support and installation requirements.
- Install, then fine-tune adjustable drops if the fixture allows it.
The simplest answer
For most kitchen islands, 30 to 36 inches from countertop to the bottom of the pendant is a sensible starting range. Finalize the height only after you test fixture scale, sightlines, glare and the way the island is used.
Continue with our 9-foot island pendant spacing guide, sink pendant height guide, under-cabinet lighting guide, and the Dwelanor Room Guides.