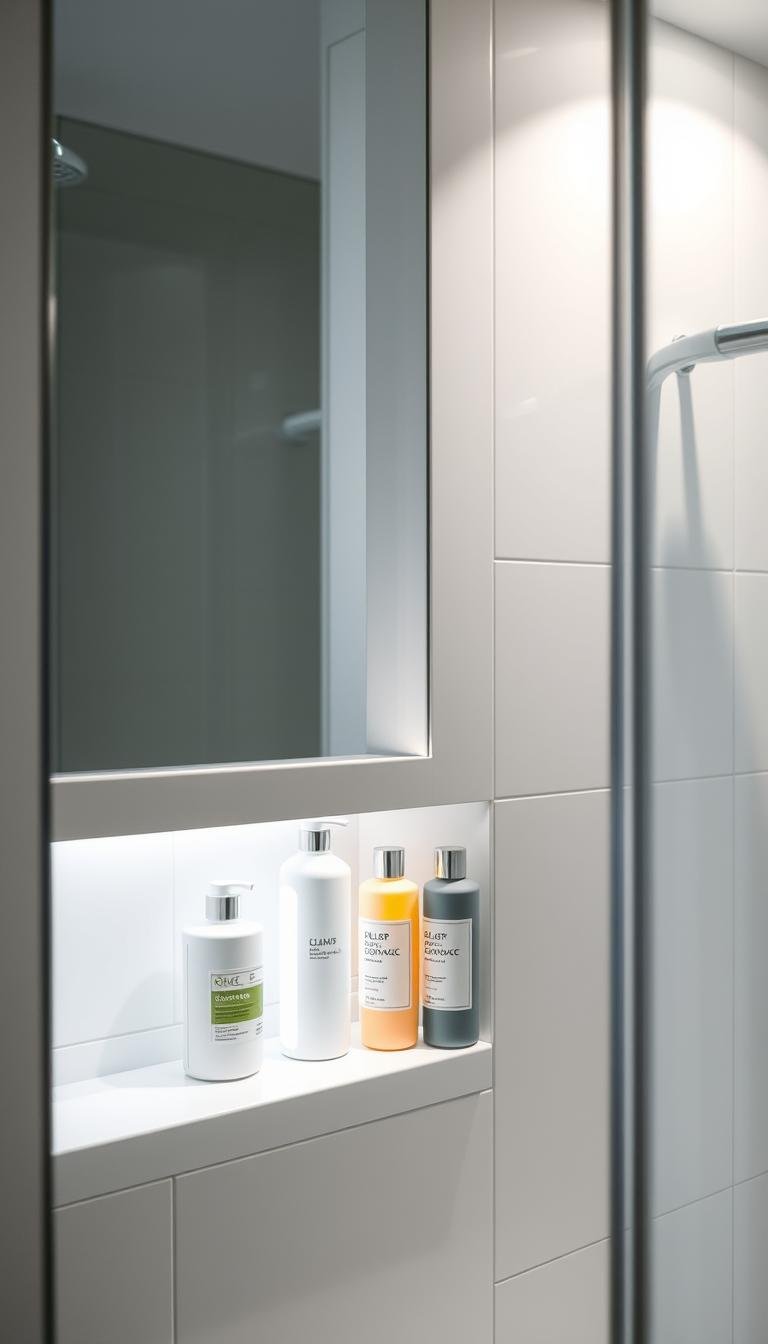
The right shower niche size starts with the bottles you actually use—not a universal 12×20-inch rule. Measure the tallest pump bottle, the widest container, and the space your hand needs to lift each item out comfortably. Then plan the finished interior dimensions of the niche after tile, setting material, shelf thickness and trim are accounted for.
For most households, the useful question is not “What is the standard shower niche size?” but “What finished width, height and depth will hold our products without crowding them?”
Measure the products before the wall opening
Gather the shampoo, conditioner, body wash, cleanser, razor, soap and any other items that normally live in the shower. Measure the largest examples rather than the average ones.
| What to measure | Why it matters |
|---|---|
| Tallest bottle including pump | Sets the minimum clear shelf height |
| Widest bottle or jar | Helps determine usable shelf width |
| Deepest container | Tests whether the finished niche depth is practical |
| Hand clearance above and around bottles | Makes items easier to grasp and replace |
| Number of daily-use products | Determines whether one shelf or several tiers make sense |
Add a little working room rather than sizing the cavity to the exact bottle dimensions. Packaging changes, pump heads need space, and a shelf that technically fits six bottles can still be annoying if every item must be rearranged to reach the one behind it.
Plan around finished interior dimensions
A shower niche has several layers: framing or a prefabricated niche body, waterproofing, setting material, tile or another finish, shelf material and edge treatment. Those layers can reduce the usable opening compared with the rough framed size or the nominal size printed on a product page.
That is why the measurement that matters to the person using the shower is the finished clear width, finished clear height and finished shelf depth.
If you are using a prefabricated system, compare its published dimensions and installation details with the finished tile assembly you plan to use. For example, Schluter currently offers several KERDI-BOARD-SN niche sizes and specifies that the niche be supported by framing and integrated into its waterproofing system according to the installation instructions. See the current Schluter KERDI-BOARD-SN product information.
Width: think in rows of products
Width determines whether bottles can sit side by side without becoming a puzzle. A single-person shower with a small product set may need only one compact row. A shared shower may work better with a wider shelf or a taller niche divided into tiers.
Before choosing width, arrange the bottles on a counter exactly as you want them to sit in the finished niche. Measure that row and add working clearance. This gives you a far more useful target than copying a generic “standard” width.
Height: include pump clearance and shelf thickness
Tall pump bottles are usually what make a niche feel too short. Measure from the shelf surface to the highest point of the pump, then allow enough room to operate or remove the bottle comfortably.
If the niche will have multiple shelves, plan each tier around a different product group rather than spacing every shelf evenly. One taller zone can hold shampoo and conditioner; a shorter zone can hold soap, razors or small jars. Uneven shelf spacing is often more useful than a perfectly symmetrical grid.
Depth: more is not always better
The finished depth should comfortably support the containers you use without making small items disappear behind one another. Very deep shelves can become harder to clean and may encourage two rows of products, which makes the rear row less accessible.
Wall construction limits what is possible. Plumbing, electrical components, insulation, structural framing and the chosen waterproofing system can all affect niche depth and placement. Do not assume the full depth of a wall cavity is available for storage.
Vertical vs. horizontal niches
| Orientation | Useful when | Main planning issue |
|---|---|---|
| Vertical niche | You want multiple shelf heights in a relatively narrow wall zone | Plan each tier around actual products |
| Horizontal niche | You want a long shared ledge or strong visual line | May require more deliberate framing and waterproofing design |
| Compact square niche | The product set is small or the wall has limited clear space | Confirm tall bottles and hand clearance |
| Two separate niches | Two users need distinct storage zones | More openings mean more layout and waterproofing details |
A vertical niche often works neatly with common framing layouts, but it is not automatically the correct choice for every wall. A wide horizontal opening can affect framing and should be planned with the wall construction rather than cut through structural members casually.
Choose the wall before choosing the niche
The ideal visual location may not be the ideal construction location. Before finalizing the niche, identify:
- wall framing and any required blocking;
- water supply lines, valves and drains;
- electrical wiring or controls;
- whether the wall is interior or exterior;
- insulation and air/vapor-control layers;
- the shower waterproofing system;
- door, glass-panel and fixture clearances.
An exterior wall deserves particular caution because recessing storage can conflict with insulation and thermal-control requirements. If a niche cannot be created without compromising the wall assembly, a surface-mounted shelf or another wall may be the better answer.
Keep the waterproofing system continuous
A shower niche is part of the wet-area enclosure. Its corners, seams, shelf transitions and perimeter have to integrate with the waterproofing system used on the surrounding shower wall.
Do not mix generic “two coats,” homemade sealants or internet waterproofing recipes with a proprietary shower system. Follow the instructions for the exact membrane, board, prefab niche or finished niche being installed. Schluter, for example, specifies how its niche connects to adjacent KERDI or KERDI-BOARD assemblies rather than treating the recess as an isolated box.
If the niche requires structural alteration or you are unsure how it ties into the wet-area system, use an experienced tile or shower professional.
Plan drainage at shelves and the niche base
Horizontal surfaces in the wet area should not be designed to hold standing water. The exact slope, materials and detailing should follow the chosen shower system and tile-installation requirements. Avoid inventing a universal pitch independently of the system being used.
Also consider the shelf material. Tile, solid-surface inserts, stone and compatible glass shelves differ in thickness, edge treatment, cleaning needs and how much clear height they consume.
Place the niche for the people who actually use it
There is no single ideal niche height for every household. A comfortable placement depends on user height, whether someone bathes seated, whether children use the shower, fixture locations and the height of any tub deck.
Mock the opening up with painter’s tape before framing. Stand or sit where the user will actually be and reach for imaginary bottles. This simple test is more useful than treating a generic 48-inch number as a rule.
Where accessibility is a primary requirement, plan the shower as a complete accessible system—controls, grab bars, seating, clearances and storage together—rather than choosing niche height in isolation.
Coordinate the niche with the tile layout
Once the practical dimensions are settled, compare the opening with the tile module. A niche can either:
- blend into the wall with matching tile and restrained edges;
- align with major grout lines where practical;
- use a contrasting back tile as an accent;
- use a metal profile, stone return or mitered tile edge for the perimeter.
Do not sacrifice usable storage or waterproofing just to force every grout line into mathematical alignment. The better priority order is: wall suitability → waterproofing → finished dimensions → reach → tile composition.
A practical sizing workflow
- Gather the products that will live in the shower.
- Measure the tallest, widest and deepest containers.
- Arrange them by user or product type.
- Decide whether one shelf or multiple tiers are more useful.
- Set target finished clear dimensions with hand clearance.
- Check framing, plumbing, wiring, insulation and glass/door conflicts.
- Select a compatible niche/waterproofing approach.
- Account for tile, shelf and edge thickness.
- Mock the location up at full size before construction.
- Only then coordinate the opening with the tile layout.
What size should you choose for full-size bottles?
Choose the smallest finished niche that comfortably holds your real product set with room to operate pumps and remove bottles. If you use several tall bottles, a vertical niche with one generous tall tier and one or more shorter tiers is often more efficient than one short, wide shelf.
The goal is not to hit a “standard” dimension. It is to create storage that fits the household, works with the wall assembly and remains part of a properly waterproofed shower.
For the design side of the decision, continue with our shower niche ideas guide. For the wider bathroom cluster, see tiny bathroom spa ideas, bathroom tile planning, and vanity mirror sizing.