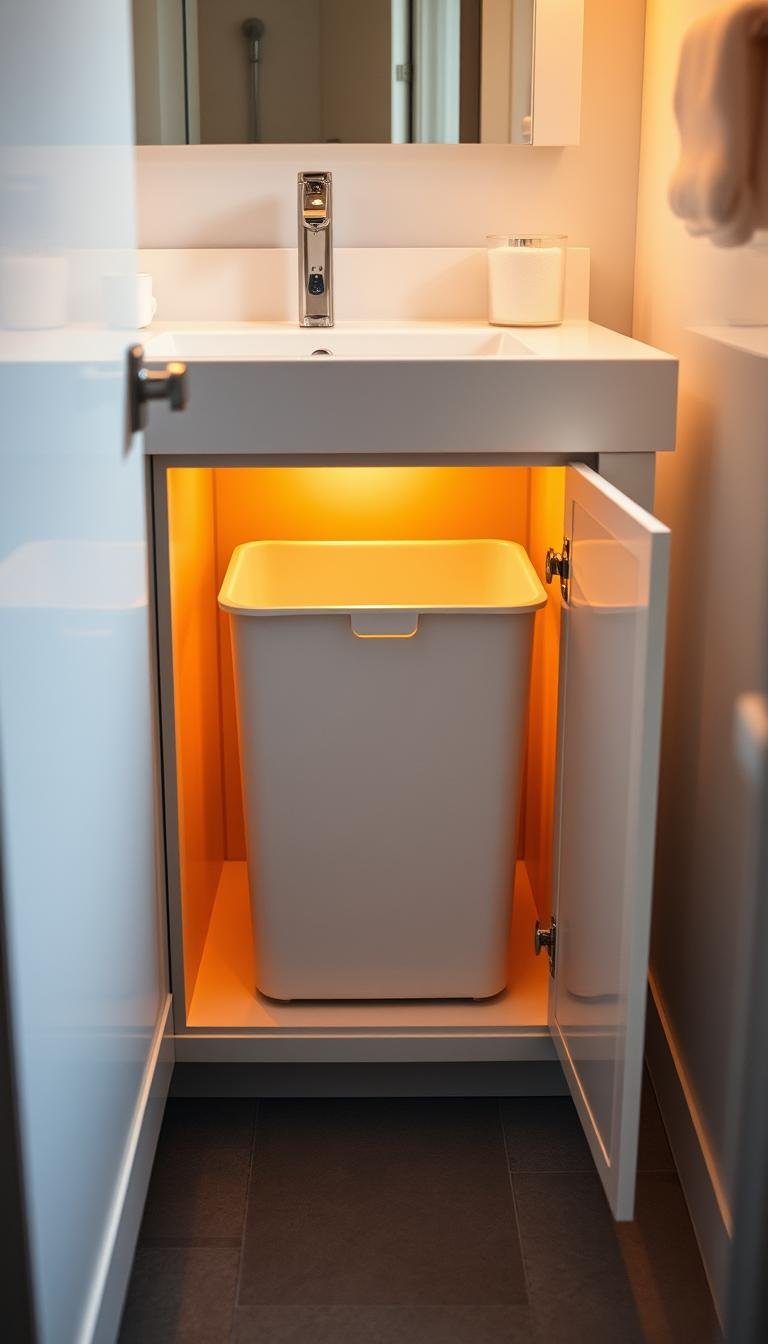
How can I add a hidden hamper inside a bathroom vanity?
I used a pull-out drawer setup to hide laundry in plain sight. It looks like any other drawer but holds a removable liner and lets air move to cut moisture. This kept the counter clear and the room tidy.
Planning mattered most: I measured cabinet depth, chose slide hardware, and sized the liner for about 30–50 liters per person. That capacity fit my routine and stayed compact.
I tested two ways to build this: retrofit an existing cabinet or include the system during a remodel. Both routes worked, but the retrofit saved time while the remodel gave cleaner integration.
Ventilation followed CDC-style guidance to reduce humidity and mold risk. Small vents or gaps at the base, plus breathable liners, kept the contents fresh without fuss.
Key Takeaways
- Pull-out drawers hide laundry while keeping the vanity functional.
- Choose removable, breathable liners and plan for airflow to reduce moisture.
- 30–50 liter capacity suits one person and fits most compact cabinets.
- Retrofit or remodel are both valid; pick based on time and finish goals.
- Make the front seamless so storage blends with your vanity’s look.
Why I love hidden bathroom hampers for small-space storage
A pull-out drawer made laundry disappear from sight and instantly calmed my small room. It looked like any other drawer until I needed it. The front stayed seamless and the counter space returned to daily use.

Practical details mattered: the system uses removable liners for quick sorting and breathing fabric to cut odors. Planned ventilation and the right capacity kept the unit useful every day.
- I stopped losing counter space to a freestanding basket.
- The built-in bin tucks into wasted depth and keeps the floor clear.
- Removable liners let me sort darks and whites at the source without cluttering the home.
- Matching fronts and hardware preserve visual continuity and polished design.
Function stays simple: the drawer glides out at waist height, so handling dirty laundry is quick. Closing the panel keeps the room tidy and makes cleaning faster. For a small space, the upgrade felt upscale and sensible.
Plan your hidden hamper design
Before cutting or buying parts, I measured cabinet depth and mapped plumbing to find usable space. That step saved time and kept me from blocking traps or supply lines.

Choosing location and style matters: I picked spots that cleared plumbing and left enough slide length for full extension. I tested back clearance so bin handles wouldn’t snag on pipes.
- Layout options: pull-out drawer with removable liners, a tilt-out face, or a dual-purpose drawer. I usually favor pull-out for smoother access and bigger capacity.
- Airflow: plan perforated panels, small spacer gaps, or a rear vent path to reduce odors and moisture per CDC-style ventilation guidance.
- Capacity: size the bin at about 30–50 liters for one user so it fits and resists overfilling.
- Materials: choose breathable fabric liners and finishes that handle bathroom humidity; plan for sorting (whites vs darks) if needed.
Final check: ensure the drawer vanity face aligns with adjacent fronts so the storage reads as part of the room, not an afterthought.
How can I add a hidden hamper inside a bathroom vanity?
My project split into retrofit work for current cabinets and a full remodel that planned the laundry module up front. Below is a quick overview of both paths, then my checklist for install day.

Retrofit vs. remodel — quick overview
Retrofit: measure the cabinet depth, pick full-extension slides, and mount a drawer frame that holds a lined bin or removable bags. This way saves time and costs less than building out.
Full remodel: design the vanity with an integrated module or dual-purpose drawer from the start. This solution gives cleaner design integration and tailored ventilation.
My install-day checklist
- Confirm cabinet measurements and side clearances so liners lift out without snagging.
- Mark slide positions, predrill, and attach full-extension slides rated for the expected load.
- Set the drawer box, fasten the front, and test movement under load.
- Verify ventilation: spacer gaps, perforated panels, or a rear vent path per CDC-style guidance.
- Organize items—liners, hooks, and odor sachets—so setup takes minimal time.
- Dry-run the laundry flow: remove a liner, walk to the washer, and reseat the bag.
- Final safety check: secure the cabinet to studs and confirm slides work smoothly.
| Path | Main steps | Time & finish |
|---|---|---|
| Retrofit | Measure cabinet, install slides, add lined bin | Low time, modest finish |
| Remodel | Design module, build integrated drawer, add vents | More time, seamless finish |
| Shared tasks | Check side clearance, test liners, secure to wall | Short adjustments after install |
Pull-out hamper drawer: my go-to solution
For everyday use I settled on a pull-out drawer that blends with surrounding fronts while hiding laundry until wash day. It behaves like any other cabinet drawer but holds a lined bin that slides out for quick transfers.

Slides, clearances, and depth you’ll actually need
I pick full-extension, soft-close slides rated for the load. That prevents sag and keeps motion smooth when towels or heavier clothes fill the bin.
I confirm depth so the unit clears plumbing at the back and avoids hardware interference at the side. I also reinforce the bottom to stop flex under weight.
Removable liners for easy sorting and washing
Removable canvas or fabric liners make sorting simple. I use twin bags so darks and lights leave the cabinet ready for the wash.
Ring anchors or a small lip stop liners from slipping when I toss in dirty laundry.
Ventilation tricks: perforated panels and spacer gaps
Ventilation matters. I add discrete perforations or toe-kick spacer gaps to encourage airflow and cut stale odors.
Finally, I test open-and-close under load and add felt pads at contact points to stop squeaks and protect finishes.
Dual-purpose vanity drawer that doubles as a hamper
My aim was a single front that reads like any other drawer while hiding sorting bags behind it. The goal: blend storage into the vanity so the room feels tidy and cohesive.

Making the front look like the rest
I build the face to match neighboring fronts so the unit reads as standard millwork. Matching pulls and finishes keep the visual rhythm across the vanity.
Small details matter: align gaps, hide seam lines, and use the same paint or stain to preserve the look.
Folding space when the drawer is open
The drawer doubles as a temporary folding surface when fully extended. I keep the top edge clear so small items rest easily on the slide-out lip.
Inside, a collapsible frame or soft liner holds laundry and pulls out for washing. I sized the interior height to stop snagging and to let bags remove quickly.
“A unified front with breathable liners and full-extension slides gave me the best mix of form and function.”
- I use twin bags for quick sorting while preserving a single, seamless front.
- Airflow paths and washable components reduce moisture in the small room.
- Hardware matches existing pulls and slides to full extension for easy reach.
| Approach | Key benefit | When to choose |
|---|---|---|
| Premade module | Fast install, tested components | Retrofit or quick upgrade |
| DIY liner + frame | Custom fit, lower cost | Limited budget, minor remodels |
| Built-in during remodel | Seamless integration, tailored ventilation | Full remodel for best finish |
DIY liner ideas: canvas bags, Velcro, and washable inserts
I chose drop-cloth canvas and French seams so the bag survives weekly washing without fray. This made a durable, breathable fabric liner that fits the drawer footprint and pulls out cleanly for laundry day.

Sewing a sturdy canvas liner with French seams
I cut prewashed canvas to size and sew French seams: first wrong sides together, then right sides together. This hides raw edges and strengthens seams for repeated cycles.
Orient the seams toward the rear and split bulk at corners so the machine runs smoothly and the liner lies flat at the bottom.
Velcro placement to secure and remove the bag fast
Use hook-and-loop strips to lock the rim to the cabinet side. Stick the hook side on the cabinet and the soft loop on the fabric so removal is quick and snag-free.
Avoid sewing through adhesive-backed tape; if the loop loosens with time, replace it with sew-on tape at stress points.
Choosing breathable, quick-dry fabrics that resist mildew
Pick canvas, coated liners, or performance textiles that dry fast and breathe. I dedicate one bag for whites and another for colors so sorting happens while I toss items in.
Reinforce handles and prefit the liner in the bathroom before final stitching so the rim sits under the drawer rim and lifting out takes minimal time. This simple solution kept clothes fresh and made laundry less of a chore.
Smart alternatives when space is extra tight
Tight quarters pushed me to carve out shallow storage and rethink where laundry lived. Small, vertical fixes kept the room open while giving clear sorting options.

Recessed niches, stacks, and hanging pockets let me store items without losing circulation or sightlines. Each solution fits a different place in the home and preserves the overall design.
- Built-in wall niche: I carved a shallow niche to hold labeled removable bins for colors, whites, and delicates. I left handle clearance so each bin slides out without scraping trim.
- Stackable column: A slim stack of hampers behind a sliding door saves floor space. I anchored tall stacks with a discreet bracket so they stay steady when full.
- Over-the-door pockets: Hanging sorting pockets on the back of the door worked when drilling was off limits. I chose quick-dry fabrics and emptied them often to cut trapped moisture.
Quick tip: I always mock up clearances before committing so the sliding door and each basket remove easily. These small steps made the solutions feel intentional, not temporary.
For more compact options, see small-space laundry ideas.
Materials and finish choices that survive bathroom humidity
Durability under humidity guided every finish and liner pick. I chose materials that resist warping and clean up with little fuss.

Bamboo, treated wood, and sealed surfaces
Bamboo or treated hardwoods held up best in my tests. I sealed every face, edge, and cutout so the cabinet would not soak up moisture.
Avoid raw particleboard inside the unit. It wicks water and degrades fast in a steamy bathroom.
Plastic tubs and coated liners for easy cleaning
I use plastic tubs or coated fabric liners where spills or lint collect. They wipe clean fast and replace easily when worn.
Breathable fabric plus planned ventilation kept laundry fresher between wash cycles and lowers mold risk, following basic moisture-control guidance.
| Material | Benefit | When to use |
|---|---|---|
| Bamboo/treated wood | Stable, low warp | Built-in units with visible faces |
| Plastic tub | Easy wipe-down | High-lint laundry loads |
| Coated fabric liner | Washable, water-resistant | Removable liners for sorting |
| Rust-resistant hardware | Long life in humidity | Anywhere slides or pulls are used |
- I matched finishes to my home while prioritizing durability.
- I kept the design simple so replacement of parts or liners is quick.
- I used a light interior color to spot items and dust easily.
Cost, time, and tools: what I budget for a hidden hamper
I kept the parts list simple: full-extension slides, a basic drawer box, and a canvas liner covered most needs without high cost.

When a pull-out costs less than a freestanding basket: I priced slides and a DIY box and found the total often undercut a stylish basket, especially when the basket would need replacement later.
- I budget time for careful measuring, slide install, and a test fit so nothing binds under load.
- During a remodel, converting one drawer bay into this laundry unit sometimes cut slide costs versus several small drawers.
- High-quality premade double-hamper cabinets can top $300, so DIY liners are a budget way to save.
Tools I used: drill/driver, square, level, clamps, measuring tape, and a countersink bit. I kept extra screws and bumpers as contingency.
Small extras matter: a spare liner, odor-control sachets or charcoal filters, and a day staged so the bathroom stayed usable. In the end, the built-in added practical storage and small resale value to my home without eating floor space.
| Line item | Typical cost | Notes |
|---|---|---|
| Full-extension slides | $25–$60 | Rated for load; soft-close optional |
| Drawer box + hardware | $20–$80 | DIY or premade kits |
| Canvas liner + extras | $10–$40 | Low-cost, washable |
Common mistakes I learned to avoid
A few simple mistakes made the build harder than it needed to be, so I wrote down what to avoid. These fixes saved time and kept the final design working for years.

Under-ventilating and trapped moisture
Ventilation matters. I learned that a sealed cabinet will trap humidity and cause mildew. I now add perforations or small toe-kick gaps and follow CDC-style guidance to boost airflow.
Bin handle clearance and slide strength
Measure the rim and handles before fitting the liner. If the bag snags on the drawer or side, removing clothes becomes a chore.
I choose slides rated for the expected load and test them fully loaded. This prevents racking and early wear.
Overfilling beyond realistic capacity
Keeping the hamper capacity near 30–50 liters per person kept me emptying regularly. Oversizing just led to spilled loads and stressed hardware.
- I avoid tight side tolerances that pinch fabric and snag liners.
- I check the back for plumbing that could puncture a bag during travel.
- I reinforce stress points where clothes tug so seams don’t fail mid-week.
- Simple interiors make lint cleanup fast and keep the space fresher.
- Ultimately, frequent emptying plus steady ventilation is the best way to control odors.
Conclusion
A simple pull-out drawer transformed my sink area into tidy storage in this small bathroom and kept counter space clear. It hides the weekly hamper and makes laundry chores less visible, while preserving the look of the vanity and the flow of the room.
Thoughtful design matters: size the bin near 30–50 liters, plan airflow and choose humidity-ready materials like bamboo or treated wood with coated liners. This practical solution suits retrofit work or a full remodel and fits whatever place works best in your home.
Test the drawer under load, check clearances, and start with a simple liner swap. The payoff is real: less clutter, more usable counter, and a bathroom that feels bigger and smarter every day.