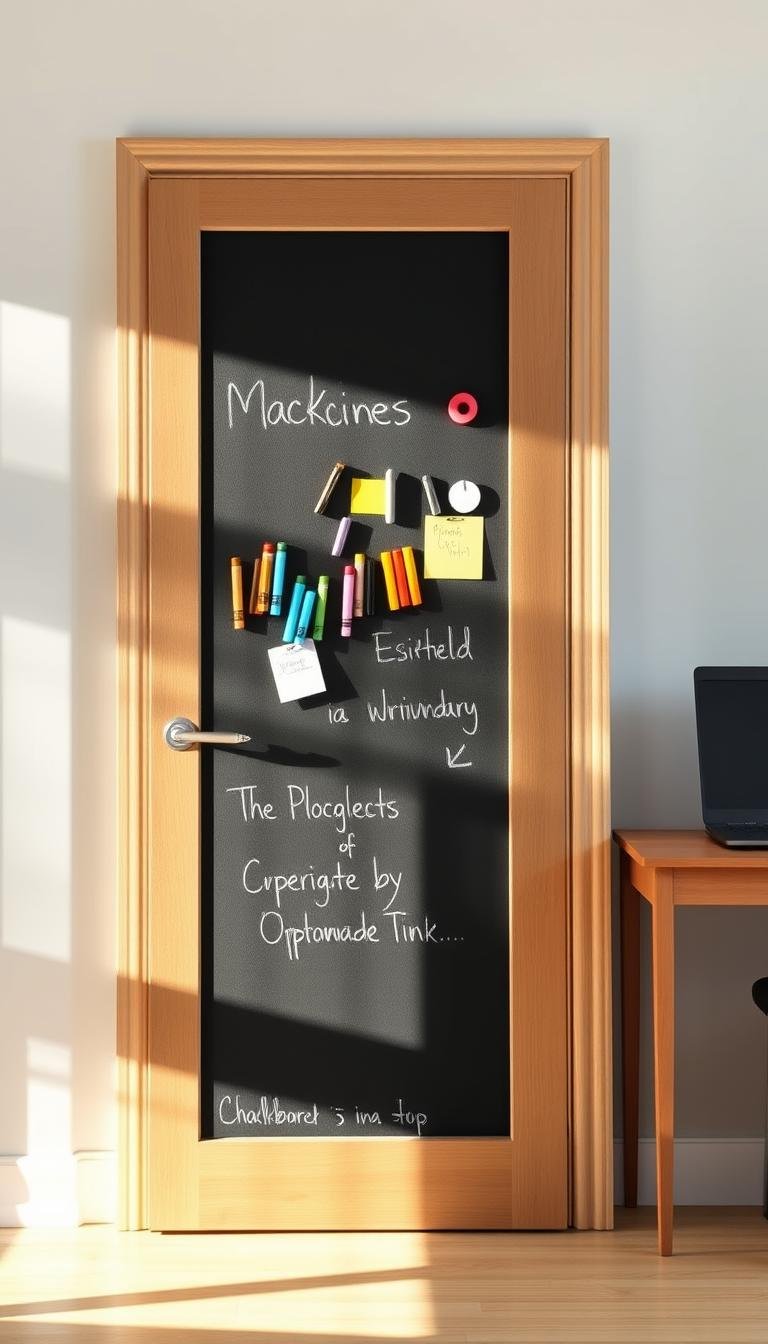
How can I turn a hollow-core door into a chalkboard command center?
I decided to remake an ordinary closet panel into something useful and stylish for my kitchen. The plan used three simple approaches: paint the center with a custom chalkboard mix, skin the panel with luan for a smooth face, or build a framed inset field with trim. Each path is budget-friendly and fast.
I describe the paint recipe I used (1 cup flat latex + 2 tbsp dry unsanded grout) and rolled on three coats for a durable finish. I also added 1.5-inch decorative trim to hide a slightly unlevel hang and inset the field to clear the knob.
Seasoning the surface with chalk rubs and wiping makes erasing easy and gives that true schoolboard patina. For magnetic use, I mention applying magnetic primer under the surface so I can stick notes and letters.
If you want step‑by‑step photos and materials, see my full guide at how to make a chalkboard door.
Key Takeaways
- Three routes: paint directly, skin with luan, or build a framed inset for a polished look.
- Use a simple chalkboard mix or store paint and roll in multiple light coats for smooth coverage.
- Trim hides flaws, levels appearance, and gives a custom finish.
- Season the board for easy erasing and authentic chalk texture.
- Add magnetic primer and small buckets to hold chalk and notes for full function.
Plan the project: my approach, materials, and where this chalkboard door will live
I mapped out three clear paths—fast paint, luan skin, or framed inset—and checked what each would need. Choosing the route helped me set realistic time and material expectations for this room area.

Choose your path
- Direct paint: fastest option for a usable surface with minimal prep.
- Luan skin: gives a flat writing face on four-panel doors; notch for the knob and deadbolt, glue with construction adhesive, then tack with brad nails.
- Framed inset: cut a field three inches in from the outer edge so the chalk zone clears hardware; use 1.5-inch decorative trim to hide any slight misalignment.
Materials, tools, and measurements
I used chalkboard paint over magnetic primer when I wanted magnets. Key items: primer, chalkboard paint, 1.5-inch trim, construction adhesive, brad nails, foam roller, sandable wood filler, and Gorilla Wood Glue for any repair work.
Measure for knob clearance and overall size before cutting. If the lower half of a reclaimed door needs rebuilding, I fit a block, glue and clamp it, then nail and fill for a solid finish.
Step-by-step: turning a hollow-core door into a durable chalkboard surface
To begin, I repaired the damaged lower half with a snug wood block glued using Gorilla Wood Glue, clamped, and pinned with nails. I added a thin plywood patch at the strike plate before topping with wood filler so the repair had solid backing.
Next, I removed hardware, filled hinge mortises and the knob bore with wood filler, and sanded smooth. These quick fixes keep the finished surface from flexing and make painting easier.

Make the face flat
On panel doors I cut luan to size, notched half-moons for the knob and deadbolt, spread construction adhesive, and brad-nailed the sheet to create a dead-flat writing face.
Prime the field
I rolled magnetic primer only in the chalkboard zone so magnets stick. It adds slight texture, which is fine under the top finish.
Paint in light coats
I used a foam roller and worked from top to bottom, applying three to four light coats of chalkboard paint. Between coats I slipped the roller into a plastic bag to keep it usable without washing.
Trim and finish
Once cured, I framed the field with slim trim and wrapped the edges with 1.5-inch decorative trim to hide any uneven hang. I ran painter’s caulk along seams, primed the entire door, and finished in semi-gloss trim paint for durability.
“A few careful repairs and steady coats make a practical, long-lasting chalkboard that wipes clean and holds magnets.”
- Remove hardware and patch cavities first.
- Rebuild bottom if cut away, then sand smooth.
- Apply primer in the field, then roll light coats of paint.
Make it a true command center: layout, seasoning the board, and weekly routines
Turn the finished door into a daily hub by zoning the field, adding nearby storage, and picking a simple Sunday refresh habit. I set the top third for the family calendar, the middle for daily to‑dos and meals, and the bottom for kids’ notes or art.

Season the surface for easy erasing
I season the fresh surface by rubbing the side of a chalk stick across the whole area, then wiping it back. This lightens the look slightly and gives that authentic, erasable finish from day one.
Add organizers that hang nearby
I hung small oval metal buckets beside the field to hold chalk, magnets, and a microfiber cloth. A slim homework pocket keeps folders and the planner tidy in one small room‑friendly spot.
Style and sizing choices
For color, I mixed flat latex with dry unsanded grout to make custom paint that matches the adjacent kitchen or hall. I glazed the painted trim with a smoked, dry‑brushed finish for character. Right‑size the field so it fits your wall and your family’s needs.
- Weekly routine: Sunday update, mid‑week wipe, weekend shopping refresh.
- Quick clean kit: damp cloth for deep wipes and dry microfiber for daily erases.
Conclusion
Finishing the project meant layering light coats, framing the field with trim, and sealing seams for a clean, usable surface.
My finished chalkboard door used magnetic primer under the chalkboard paint, three light coats on the field, and careful caulking where trim met the door. I primed and finished the surrounding door and trim in semi‑gloss for durability and a crisp look.
Seasoning the surface with chalk made erasing simple and gave that true schoolboard feel. Small buckets and a homework basket keep the area tidy in the kitchen or any busy room.
Repairing the bottom or doing deeper patching is straightforward. Wipe the board weekly, spot‑clean trim fingerprints, and enjoy a practical, polished hub that fits real life.