How can I turn a thrift-store dresser into a colorful kids’ changing table?
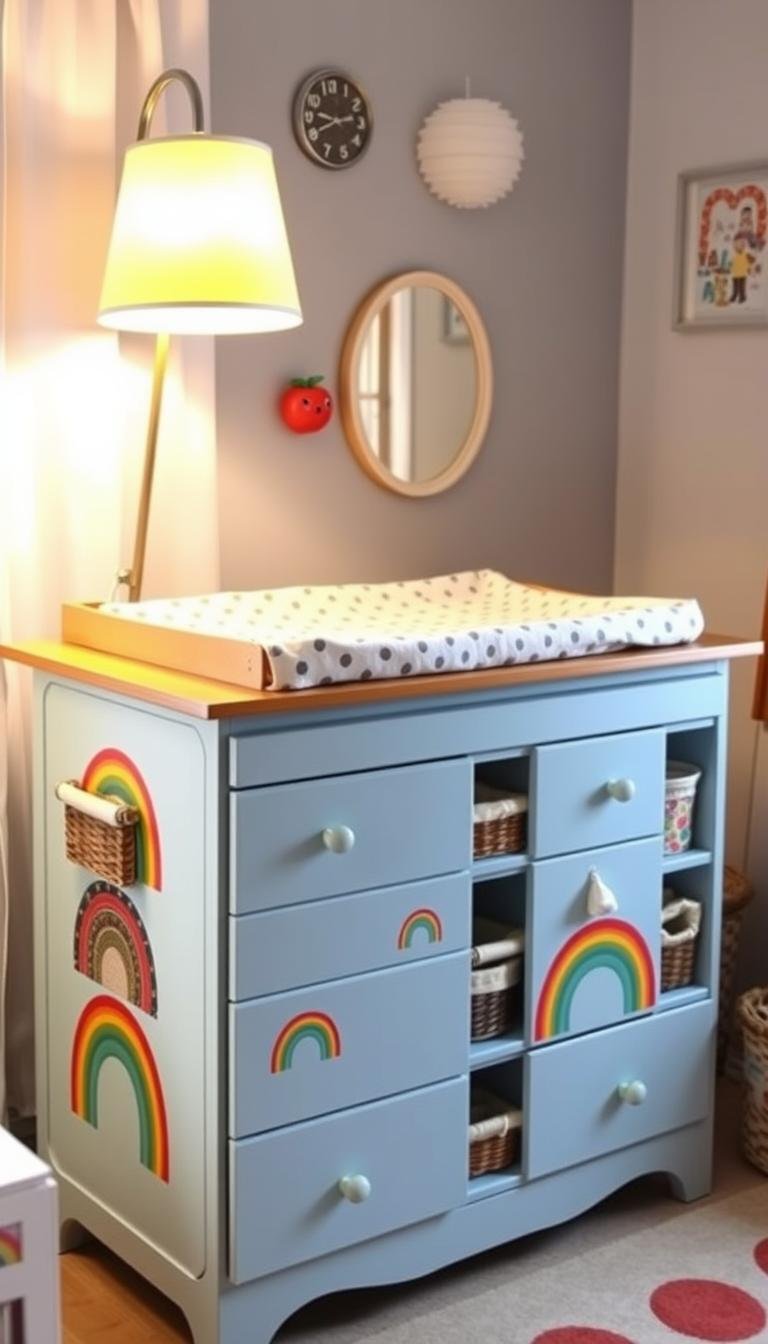
I found a solid-wood Craigslist dresser and made it the heart of my nursery for under $50. I cleaned the surface with TSP, primed with Zinsser Cover Stain, and rolled two smooth coats of Sherwin‑Williams Jaipur Pink. The original hardware got a fresh white spray finish, and the top fits a standard pad snugly.
On another piece I used a no-sand DIY chalk paint (4 tbsp plaster of paris + equal water, mixed into 1 cup paint) for instant coverage. I’ve also sanded, primed, painted, and applied two coats of poly with light 220-grit sanding between coats for lasting protection.
Safety and storage mattered. I removed a door for basket access, lined drawers with IKEA Scandinavian paper, and added a Diaper Genie Complete to keep odors low. These simple steps gave me a custom look without a huge cost, and they work for both bold and neutral color schemes.
Key Takeaways
- Choose solid wood for durability and a secure top for the baby pad.
- Two reliable finishes: TSP + Zinsser with foam roller, or DIY chalk paint with plaster of paris.
- Refresh hardware by spray paint or Rub ’n Buff for an elevated look.
- Prep, dry time, and secure the changing surface for safety.
- Small styling touches—drawer liners, baskets, lamp—make the station feel finished.
Plan the project: choose the right thrift dresser and map your nursery makeover
My plan began with clear goals and careful measuring. I set out to find a solid-wood dresser with a top wide enough for a standard pad and deep storage within arm’s reach for the baby.

What I look for: size, solid wood, storage, and room for a pad
Measure the top to leave a safe margin and check drawer travel and base stability. Avoid laminate — solid wood takes primer and paint better and lasts under daily use.
Where I found mine and why it worked
Patience paid off. I watched Craigslist and local Goodwill, popped into the store on weeknights, and set alerts for Facebook sale groups. Budgeting about $50 made decisions simple, and choosing a piece that fit in my van saved time and hassle.
| Source | Typical Price | Best for |
|---|---|---|
| Craigslist | $30–$100 | Solid wood finds, quicker pickup |
| Goodwill | $20–$60 | Frequent visits reward patience |
| Local thrift store | $25–$75 | Hidden gems; inspect for stability |
Tip: When a small cabinet door appears, remove it and add baskets to create an open diaper zone. Map the nursery layout first so the changing station fits the room and workflow with ease.
Prep and paint: my step-by-step dresser-to-changing-table makeover
I prepped the piece by stripping hardware and giving the whole surface a TSP wash so primer would stick without sanding.
I removed all drawers and pulls, then mixed TSP powder into a spray bottle and degreased every face. This step made primer adhesion effortless and reduced the need to sand.

Clean and prime without sanding
I rolled Zinsser Cover Stain with a foam roller in steady passes. It took two coats of primer to block old finishes and create a smooth base.
Between coats I let the piece dry fully to avoid streaks and sticking when the drawers went back in.
Color that pops
I used Sherwin‑Williams Jaipur Pink for one finish and, on another project, paired Behr Flannel Grey with Salty Dog. I applied two thin coats of paint and waited for full drying time between each coat for even coverage.
No-sand alternative
When I wanted a faster route, I mixed DIY chalk paint: 4 tbsp plaster of paris + equal water, whisked smooth, then stirred into 1 cup of paint. One to two coats delivered great coverage without sanding. For full instructions, see my DIY chalk paint guide.
Hardware refresh, safety, and sweet details
I spray-painted pulls white on the pink unit and used Rub ’n Buff Silver Leaf on another for an aged look. For durability I sometimes add two coats of polyurethane, lightly sanding with 220-grit between coats (not after the final coat).
| Step | Why it matters | Tip |
|---|---|---|
| Remove drawers & hardware | Prevents drips and gives full access | Label drawers so reassembly is easy |
| TSP wash | Degreases and improves adhesion | Use spray bottle for even coverage |
| Primer + two paint coats | Blocks old finish; ensures even color | Use foam roller for smooth surface |
| Optional DIY chalk paint | Skip sanding; quick coverage | Mix plaster first to avoid lumps |
| Hardware + drawer liners | Finishes look and function of furniture | Line drawers with IKEA Scandinavian paper |
Safety note: Avoid laminate tops; secure the changing pad to the top and let every coat fully cure before reusing. These steps help the finished piece serve your nursery with style and strength.
How can I turn a thrift-store dresser into a colorful kids’ changing table? My complete workflow
Before I picked up the dresser, I staged supplies so nothing wasted time. I put TSP cleaner, Zinsser Cover Stain primer, foam rollers, edging brushes, and my chosen paint—usually Sherwin‑Williams Jaipur Pink or a neutral like Flannel Grey—within reach.

Tools and supplies I actually used
- TSP cleaner, rags, and masking tape
- Zinsser Cover Stain primer and foam rollers
- Sherwin‑Williams paint or DIY chalk paint (4 tbsp plaster of paris + equal water into 1 cup paint)
- 220-grit sandpaper, polyurethane, spray paint, Rub ’n Buff
- Baskets from Hobby Lobby, a secured changing pad, and a Playtex Diaper Genie Complete
From pickup to finish
I hauled the solid-wood dresser in my van, removed drawers and hardware, and wiped every surface with TSP. Two smooth primer coats went on with a foam roller, then two thin color coats, keeping strokes consistent.
If I wanted faster coverage I used the DIY chalk mix. For durability I added two light coats of poly, sanding with 220-grit between coats and letting each cure fully.
Setting up the changing station
I lined drawers, removed one door to add open baskets, and arranged diapers, wipes, and creams left-to-right for an efficient flow. The Diaper Genie sat next to the table to control odor and simplify swaps.
Result: A sturdy piece of furniture that works for baby care and fits the nursery without costing a lot of time or money.
Conclusion
After the last coat cured, the dresser became the room’s reliable centerpiece for diaper duty and storage. I used TSP, Zinsser Cover Stain, and two thin paint coats in Jaipur Pink and Flannel Grey, refreshed hardware with spray paint or Rub ’n Buff, and finished with light poly when needed.
This kept the piece sturdy and low-maintenance, and small choices—removing a door for baskets, lining drawers, and securing the pad—made daily care simpler. A Playtex Diaper Genie Complete nearby helped control odors and speed swaps.
Result: A budget-friendly changing table built from a solid-wood dresser that supports baby care now and remains useful long after each changing is done.