How do I stop my mattress from sliding on a platform bed frame?
Few things disrupt a good night’s sleep more than a mattress that won’t stay in place. Waking up constantly to readjust your sleeping surface is beyond frustrating. I’ve been there, and it truly affects your rest and comfort.
This common issue has several simple solutions. First, we need to understand why it happens. Common causes include the mattress age, incorrect sizing, or lack of proper friction. Some bed frames simply lack the necessary support.
This guide will walk you through identifying your specific problem. We’ll explore everything from quick DIY fixes to more permanent options. You’ll find reliable advice to finally achieve stable, comfortable sleep.
Key Takeaways
- A sliding mattress significantly disrupts sleep quality and causes physical discomfort.
- Common causes include mattress age, size mismatch, and lack of friction or support.
- Simple solutions range from rubber pads and Velcro strips to proper cleaning techniques.
- Assessing your specific mattress and frame situation is crucial for the right fix.
- Expert insights and product testing ensure you get effective, reliable advice.
- Multiple options exist, allowing you to choose based on your unique needs.
- Permanent installations or DIY hacks can provide a long-term solution.
Why My Mattress Won’t Stay Put on My Platform Bed
Waking up to find your sleeping surface has migrated across the room is more than annoying. It’s a physics problem with multiple factors working against you. Understanding these forces helps you find the right solution.
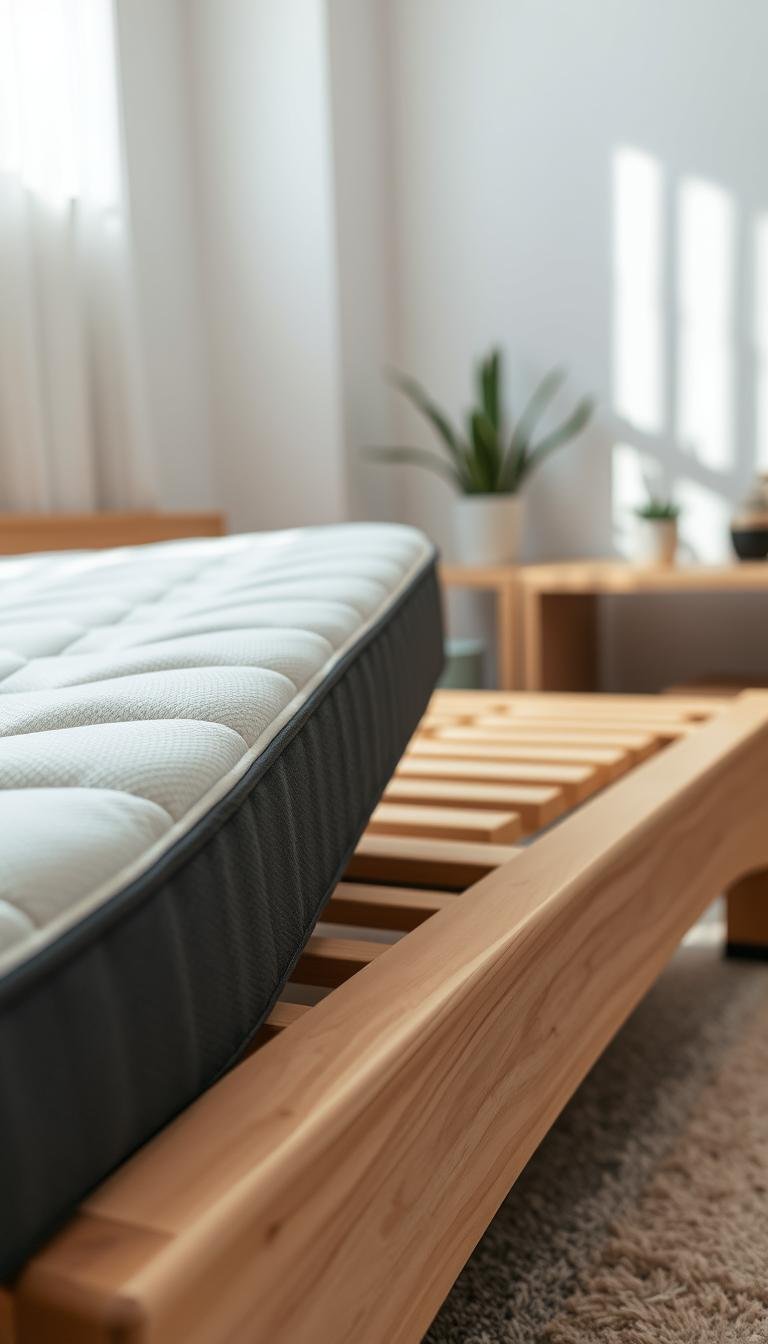
The main issue comes down to simple physics. Modern mattresses feature smooth bottom fabrics. These glide easily across equally smooth platform beds. The combination creates minimal friction between surfaces.

Your own body movement plays a huge role. Most people change positions 20-40 times each night. These small shifts gradually push the sleeping surface out of place. Over time, this creates significant displacement.
Design choices also contribute to the problem. Many modern bed frames prioritize sleek aesthetics over functionality. They often lack physical retention features like side rails. This allows too much freedom of movement.
Environmental factors can worsen the situation. Sloped floors create natural inclines. This gives gravity an advantage in moving your sleeping surface. Even slight angles become noticeable over time.
Different mattress types behave differently. Memory foam and latex have unique sliding tendencies. Their material properties affect how they interact with the frame surface.
Improper sizing creates another challenge. Too much space around the edges allows for movement. Even a small gap can become a sliding zone during the night.
As mattresses age, they develop additional challenges. Body oils and sweat gradually build up on the bottom surface. This reduces natural grip and makes sliding more likely.
These factors combine to create what sleep experts call the “perfect slide storm.” Multiple issues work together to disrupt your comfort and rest.
| Factor | Effect on Mattress Stability | Common Solutions |
|---|---|---|
| Smooth Surfaces | Reduces friction between mattress and frame | Rubber pads, non-slip mats |
| Sleep Movement | Gradual displacement from position changes | Retainer bars, Velcro strips |
| Design Choices | Lack of built-in retention features | Added rails, gap fillers |
| Mattress Type | Different materials have varying slide tendencies | Type-specific solutions |
| Size Mismatch | Excess space allows for movement | Mattress extenders, proper sizing |
Recognizing these factors helps you address the root cause. The right approach depends on your specific situation. Fortunately, multiple effective solutions exist for every scenario.
Common Reasons Your Mattress Slides Around
Identifying the root causes of mattress movement helps you find the right fix. Several factors work together to create this frustrating issue.

Mattress Age and Material Buildup
Over time, our bodies leave invisible marks on sleeping surfaces. Natural oils and sweat gradually accumulate on the bottom fabric.
This buildup creates a slick surface that reduces natural grip. After seven years, this accumulation often becomes significant.
Many sleep experts consider this timeframe a threshold for replacement. Older mattresses simply lose their ability to stay put.
Incorrect Mattress Size for Your Frame
Proper sizing is crucial for stability. A mattress that’s too small leaves dangerous gaps around the edges.
These spaces become movement zones during the night. Even a slight size mismatch can cause significant sliding over time.
Surprisingly, oversized mattresses create similar problems. They can curl at the edges and lose contact with the frame.
Lack of Proper Friction Between Surfaces
Different mattress materials behave uniquely on platform beds. Memory foam and latex have naturally smooth bottom surfaces.
These materials offer less traction than traditional innerspring options. Two-sided designs with soft layers on both sides are particularly slippery.
Dust accumulation adds another slick layer between surfaces. This environmental factor further reduces essential friction.
Missing Side Rails on Platform Frames
Many modern platform beds prioritize sleek aesthetics over function. They often eliminate side rails for a cleaner look.
This design choice comes with a functional cost. Without physical barriers, mattresses can roam freely during sleep.
Uneven frames or widely spaced slats compound the problem. They create unstable support that encourages movement.
These factors often combine to create persistent sliding issues. Recognizing your specific situation helps you choose the most effective solution.
Assessing My Current Mattress and Frame Situation
Finding the right solution begins with understanding your specific setup. A thorough assessment helps identify what’s causing the movement between your sleeping surface and foundation.
Start by measuring the gap between your mattress and frame edges. Use a tape measure to check all four sides. Even small gaps can create significant sliding space during the night.
Listen carefully while moving on your bed. Creaking sounds often indicate support issues within the frame structure. These noises suggest underlying problems beyond surface friction.

Examine your mattress bottom for visible wear patterns. Look for oil buildup or discoloration that reduces natural grip. Older mattresses often develop slick surfaces that compromise stability.
Check your platform bed frame for smooth or worn areas. Run your hand across the surface to feel for potential slip points. Dust accumulation between surfaces also reduces essential friction.
Test the actual friction between your mattress and frame. Lift one corner and place it back down. Notice how easily it slides into position or resists movement.
Consider environmental factors like floor slope. Place a level on your bed frame to check for inclines. Even slight angles can gradually shift your sleeping setup over time.
Evaluate whether your mattress type contributes to the problem. Memory foam and latex have different sliding tendencies than traditional innerspring options. Each material interacts uniquely with platform surfaces.
Create a simple checklist to document your findings:
- Gap measurements around all four sides
- Audible creaking or support issues
- Visible wear or buildup on mattress bottom
- Frame surface condition and dust accumulation
- Friction test results
- Floor level measurements
- Mattress type characteristics
This assessment helps prioritize which issues to address first. You might discover that multiple factors contribute to your sliding problem. The right fix depends on your specific situation.
Remember that proper diagnosis saves time and effort. You’ll avoid applying solutions that don’t match your actual needs. A careful evaluation ensures you choose the most effective approach for your sleep setup.
Using Rubber Pads and Grippers to Stop Sliding
Rubber pads offer a simple yet powerful way to maintain mattress stability. These versatile tools create essential friction between your sleeping surface and foundation. They’re among the most effective solutions for preventing unwanted movement.
Originally designed for rug stabilization, these pads work equally well for bed applications. Their grippy material provides excellent traction on various surfaces. You’ll find them available in multiple sizes and thickness options.

These affordable helpers create a secure connection between surfaces. The rubber composition ensures consistent performance over time. Many users report immediate improvement in their sleep experience.
Selecting the Right Rubber Pad Size and Type
Choosing appropriate pads depends on your specific setup. Measure your mattress dimensions before purchasing any products. Consider both length and width when determining needed coverage.
Standard sizes range from small corner pieces to full-length strips. Heavier mattresses typically require thicker, more durable options. Lighter models might work well with thinner, more flexible materials.
Different rubber textures offer varying grip levels. Some feature raised patterns for enhanced friction. Others use smooth surfaces with high-tack formulations.
Consider these popular options available on the market:
- Basic rubber shelf liners – economical and easily customizable
- Specialized mattress grippers – designed specifically for bed applications
- Interlocking puzzle mats – provide complete surface coverage
- Adhesive-backed pads – offer semi-permanent installation
Quality variations exist between different manufacturers. Read customer reviews to identify reliable brands. Look for products with consistent positive feedback about durability.
Proper Placement for Maximum Effectiveness
Correct installation ensures optimal performance from your pads. Always position the grippy side against the bed frame surface. This creates maximum adhesion with the foundation.
Corner placement often provides the best results for preventing movement. The mattress weight naturally concentrates at these points. Four corner pads usually suffice for most standard sizes.
Larger mattresses might benefit from additional center support. Consider adding strips along the longer sides for extra security. The goal is creating even pressure distribution.
Follow this placement guide based on mattress dimensions:
| Mattress Size | Recommended Pad Quantity | Optimal Placement Points | Estimated Cost Range |
|---|---|---|---|
| Twin | 4 pads | All four corners | $15-$25 |
| Full | 6 pads | Corners plus midpoints on long sides | $20-$30 |
| Queen | 6-8 pads | Corners with additional center support | $25-$40 |
| King | 8-10 pads | Strategic points along all sides | $35-$50 |
| California King | 8-10 pads | Emphasis on longer side security | $40-$60 |
Regular maintenance keeps your pads performing effectively. Clean them monthly with mild soap and water. Avoid harsh chemicals that might degrade the rubber material.
Inspect pads periodically for wear or reduced grip. Replacement typically becomes necessary after 12-18 months of use. Proper care can extend this timeframe significantly.
For more detailed information about mattress stabilization techniques, visit our comprehensive FAQ section. You’ll find additional insights about various prevention methods.
Rubber solutions work best for moderate sliding issues. They might not suffice for severely sloped floors or extremely heavy mattresses. Consider combining methods for challenging situations.
These affordable tools provide excellent value for money. Most households can implement this solution for under fifty dollars. The investment pays off through improved sleep quality and comfort.
Installing Non-Slip Mattress Pads for Stability
Discovering the perfect balance between security and comfort transforms your sleep experience. Non-slip pads create a reliable foundation that prevents unwanted shifting. These specialized accessories offer multiple advantages beyond simple stabilization.
Unlike basic rubber mats, these products are designed specifically for sleeping surfaces. They come in standard dimensions that match common mattress sizes. This ensures complete coverage and maximum effectiveness.

Benefits Beyond Just Preventing Movement
Quality pads provide additional cushioning that enhances surface comfort. They add a protective layer that extends your mattress lifespan. This dual functionality makes them an excellent investment.
These products reduce wear caused by constant movement against the frame. They absorb minor impacts and distribute weight evenly. Your sleeping surface maintains its original support characteristics longer.
Many users report improved temperature regulation with certain pad materials. Some fabrics wick moisture away from the body. This creates a cooler sleeping environment during warm nights.
Choosing Quality Non-Slip Pads
Selecting the right product requires attention to material composition and thickness. Look for pads with reinforced edges and secure fastening systems. These features prevent bunching and maintain consistent coverage.
Consider these popular material options:
- Bamboo-derived fabrics – naturally breathable and moisture-wicking
- Quilted cotton blends – provide extra cushioning and comfort
- Hypoallergenic synthetics – ideal for allergy sufferers
- Waterproof membranes – protect against spills and accidents
Proper installation ensures optimal performance. Always follow manufacturer instructions for placement and securing. Most designs feature elastic corners that grip the mattress securely.
Regular maintenance involves gentle washing according to care labels. Avoid harsh detergents that might reduce the non-slip properties. Proper care extends the product’s effectiveness significantly.
These pads work particularly well on platform beds with smooth surfaces. They create essential friction without compromising comfort. The thin profile ensures you won’t notice any height difference.
For extreme sliding situations, combine pads with other stabilization methods. This layered approach addresses multiple factors simultaneously. You’ll achieve complete peace of mind regarding mattress security.
Investing in quality non-slip protection pays dividends through better rest. You’ll wake up feeling more refreshed and energized. The mattress remains perfectly positioned throughout the night.
How do I stop my mattress from sliding on a platform bed frame with Velcro Solutions
Sometimes the simplest solutions work best for keeping things exactly where they belong. Velcro strips offer a brilliant approach to mattress stabilization that many people overlook. This method creates a reliable connection between your sleeping surface and foundation.
These clever fasteners work particularly well on platform beds without side rails. The hook-and-loop design provides just enough resistance to prevent unwanted shifting. You’ll enjoy peaceful nights without constant adjustments.

Applying Velcro Strips Correctly
Proper installation ensures maximum effectiveness. Start by cleaning both surfaces thoroughly with rubbing alcohol. This removes dust and oils that could interfere with adhesion.
Measure and cut strips to match your mattress width at both ends. Position them about six inches from each corner for optimal hold. The hook side typically attaches to the bed frame while the loop side connects to the mattress bottom.
Press firmly for thirty seconds after placement to activate the adhesive. Allow twenty-four hours for full bonding before regular use. This curing period ensures long-lasting performance.
Consider these popular Velcro types for different needs:
- Standard strength – ideal for lighter mattresses
- Heavy-duty options – better for king sizes or memory foam
- Water-resistant varieties – perfect for humid climates
- Extra-wide strips – provide additional surface contact
Long-Term Maintenance of Velcro Fasteners
Regular care extends the life of your Velcro solution. Gently brush hooks monthly to remove dust and fibers. Avoid pulling strips apart forcefully as this weakens the adhesive bond.
Inspect connections every six months for signs of wear. Reduced grip strength indicates replacement time. Most quality strips last two to three years with proper maintenance.
Removal requires careful technique to avoid damage. Use a hairdryer to warm the adhesive before peeling. Residual glue comes off with rubbing alcohol and gentle scraping.
| Velcro Type | Ideal Mattress Weight | Estimated Lifespan | Cost per Foot |
|---|---|---|---|
| Standard Adhesive | Up to 60 lbs | 2 years | $1.50-$2.00 |
| Heavy Duty | 60-100 lbs | 3 years | $2.50-$3.50 |
| Industrial Strength | 100+ lbs | 4 years | $4.00-$5.00 |
| Waterproof | All weights | 2.5 years | $3.00-$4.00 |
Compared to carpet tape, Velcro offers easier adjustment and removal. While both provide strong adhesion, Velcro allows for occasional repositioning. This flexibility makes it superior for most sleeping setups.
Quality products are available at hardware stores and online retailers. Look for brands with strong customer reviews about durability. The investment typically ranges between $15-$30 for complete coverage.
This approach works wonders for maintaining proper mattress placement. You’ll wake up feeling rested without fighting a shifting sleep surface. The security lasts through countless nights of peaceful rest.
Keeping Surfaces Clean for Better Grip
Maintaining clean contact points between your sleeping setup and foundation makes a huge difference in stability. Those seemingly harmless dust bunnies create a slick layer that reduces essential friction. Regular cleaning prevents this buildup and keeps everything securely in place.

Dust and debris accumulation creates surprisingly slippery surfaces. This thin layer acts like tiny ball bearings between your mattress and frame. Over time, it significantly reduces the natural grip needed for stability.
Body oils and sweat gradually transfer to the bottom surface through normal use. These natural secretions create a slick coating that promotes unwanted movement. After several years, this buildup becomes noticeable and affects performance.
Regular Vacuuming Techniques
Proper vacuuming removes the invisible enemies of mattress stability. Use your home vacuum’s upholstery tool attachment for best results. This specialized tool reaches into fabric surfaces without causing damage.
Start by lifting your mattress carefully to access the bottom surface. Work methodically across the entire area using slow, overlapping passes. Pay special attention to corners and edges where debris collects.
Move to your bed frame next using the appropriate attachment. Wood frames require a soft brush tool to prevent scratching. Metal frames can handle more aggressive cleaning attachments.
Follow this cleaning sequence for optimal results:
- Remove all bedding and lift the mattress
- Vacuum the mattress bottom with upholstery tool
- Clean the frame surface with appropriate attachment
- Address hard-to-reach areas with crevice tool
- Replace mattress and make final inspection
Addressing Dust and Debris Build-up
Monthly cleaning maintains optimal friction between surfaces. This frequency prevents significant accumulation that affects grip. Homes with pets or allergies might require bi-weekly attention.
Natural cleaning solutions work well for most mattress materials. A mixture of white vinegar and water effectively cuts through oil buildup. Always test cleaning solutions on inconspicuous areas first.
Proper drying prevents moisture-related issues that could damage materials. Allow surfaces to air dry completely before reassembling your sleep setup. This prevents mold growth and maintains material integrity.
Regular cleaning extends the life of both your mattress and frame. It prevents abrasive particles from wearing down surfaces over time. You’ll enjoy better comfort and support through proper maintenance.
Create a simple maintenance schedule to keep surfaces clean and grippy:
| Task | Frequency | Tools Needed | Time Required |
|---|---|---|---|
| Surface vacuuming | Monthly | Upholstery attachment | 15 minutes |
| Deep cleaning | Quarterly | Natural cleaners | 30 minutes |
| Full inspection | Bi-annually | Flashlight, level | 20 minutes |
Accessing hard-to-reach areas requires creativity and the right tools. Use extendable dusters for tight spaces between mattress and frame. A handheld vacuum works well for quick touch-ups between deep cleans.
This simple maintenance routine solves many sliding issues before they begin. Clean surfaces provide the natural friction needed to keep your sleep surface stable. You’ll wake up feeling more rested without nighttime adjustments.
Adding Rails or Retainer Bars to My Platform Bed
Physical barriers provide the ultimate security for keeping your sleep surface exactly where it belongs. These structural solutions create permanent boundaries that prevent any unwanted shifting. I’ve found they work exceptionally well for heavier mattresses or more active sleepers.

Rail systems create visible boundaries that stop movement completely. Unlike friction-based methods, they provide positive retention that doesn’t rely on surface grip. This approach works regardless of mattress material or frame surface smoothness.
Choosing Between Adjustable and Fixed Rails
Adjustable systems offer flexibility for changing needs or multiple bed configurations. These typically feature telescoping designs that accommodate various widths. Many include quick-release mechanisms for easy removal during sheet changes.
Fixed rails provide maximum stability through permanent installation. They often feature stronger materials and more secure mounting options. This type works best for permanent bedroom setups where adjustability isn’t needed.
Consider these factors when selecting your system:
- Bed frame material and construction compatibility
- Mattress weight and thickness requirements
- Frequency of moving or reconfiguring your sleep setup
- Aesthetic preferences and visibility concerns
- Installation complexity and tool requirements
DIY Installation Tips
Custom rail projects let you match existing bedroom decor perfectly. Woodworking enthusiasts can create beautiful matching rails from leftover materials. Metal fabricators might prefer steel or aluminum options for industrial looks.
Proper measurement ensures perfect fit and function. Always measure the interior dimensions of your frame at multiple points. Account for any irregularities in construction that might affect rail placement.
Follow this installation sequence for best results:
- Clean all contact surfaces thoroughly
- Mark precise placement points with painter’s tape
- Pre-drill holes to prevent material splitting
- Use appropriate fasteners for your frame material
- Test stability before final tightening
Retainer bars offer specialized solutions for larger sleeping surfaces. These U-shaped designs provide three-sided protection against movement. They’re particularly effective for California king sizes or split mattress arrangements.
Cost comparisons show significant savings with DIY approaches. Pre-made systems range from $50-$150 depending on materials and features. Custom solutions typically cost $20-$60 in materials plus your time investment.
Regular maintenance involves checking fastener tightness every six months. Look for any signs of wear or stress at connection points. Simple adjustments keep your system functioning perfectly for years.
These barrier methods work best when other solutions prove insufficient. They provide peace of mind that your sleeping surface stays perfectly positioned. You’ll enjoy uninterrupted rest without constant repositioning worries.
Using Mattress Extenders and Gap Fillers
Size discrepancies between sleeping surfaces and foundations create unique challenges that demand smart solutions. That empty space around your mattress isn’t just annoying – it’s the main reason things keep shifting out of place during the night. I’ve found that addressing this gap issue directly provides some of the most effective stabilization results.

These clever tools work by creating a physical barrier that eliminates movement space. They bridge the distance between your mattress edge and frame side. This simple approach stops the sliding problem at its source.
When to Consider Size Adjustments
Gap fillers become necessary when you notice consistent movement toward one side. If your sleeping surface shifts more than two inches nightly, size mismatch is likely the culprit. This issue commonly appears after mattress replacement or frame upgrades.
Measure your gap carefully before choosing any solution. Use a tape measure to check all four sides separately. Note that gaps often vary around the bed – one side might have more space than others.
Consider these scenarios where extenders provide the perfect solution:
- When your mattress is slightly smaller than standard dimensions
- After switching from a box spring to platform frame setup
- When using older mattresses that have shrunk over time
- With custom-sized frames that don’t match standard mattress measurements
Proper measurement ensures you choose the right solution. Even half-inch differences matter when selecting gap fillers. Take multiple measurements at different points along each side.
Temporary vs Permanent Size Solutions
Temporary options work well for rental situations or short-term needs. These include foam pool noodles, rolled towels, or inexpensive foam strips. They provide immediate relief while you decide on permanent solutions.
Permanent extenders offer better durability and aesthetics. These typically feature custom-fit designs that match your bed frame material. Many include finishing options that blend seamlessly with your existing setup.
Consider this comparison when choosing between temporary and permanent solutions:
| Solution Type | Estimated Cost | Installation Time | Expected Lifespan |
|---|---|---|---|
| Temporary Fillers | $5-$20 | 5 minutes | 3-6 months |
| Commercial Extenders | $30-$80 | 15-30 minutes | 5+ years |
| Custom Solutions | $50-$150 | 1-2 hours | 10+ years |
DIY approaches using common materials offer excellent intermediate options. High-density foam strips provide reliable performance at reasonable cost. Upholstered wood extenders create beautiful custom solutions.
For quick temporary fixes, try these household items:
- Pool noodles split lengthwise
- Rolled blankets or towels
- Pipe insulation foam
- Old pillow stuffing in fabric sleeves
Permanent installations require more careful planning but deliver better results. Measure twice before cutting any materials. Allow for slight compression when sizing foam elements.
Combining gap fillers with other stabilization methods creates unbeatable security. Use non-slip pads on top of the frame surface. Add Velcro strips between the mattress and extenders for extra hold.
Proper sizing dramatically improves sleep comfort by eliminating movement anxiety. You’ll rest easier knowing your sleeping surface stays perfectly positioned. The investment pays off through better rest and reduced frustration.
Sometimes gap fillers can’t solve extreme size mismatches. If your mattress is more than three inches smaller than the frame, replacement might be necessary. Consider both cost and long-term comfort when making this decision.
These solutions work with all mattress types and frame materials. The approach remains consistent whether dealing with memory foam or innerspring designs. The key is creating that snug fit that prevents any movement.
Remember that aesthetics matter too. Well-executed gap solutions should be virtually invisible under sheets. Take time to choose colors and materials that complement your bedroom decor.
Ensuring Proper Mattress and Frame Sizing
Getting the right fit between your sleeping surface and foundation makes all the difference. I’ve learned that perfect sizing eliminates most sliding problems before they start. This approach addresses the root cause rather than just treating symptoms.

Measuring for Ideal Fit
Accurate measurements form the foundation of proper sizing. Start by measuring your sleeping surface length and width. Use a metal tape measure for precision, checking both top and bottom dimensions.
Next, measure the interior dimensions of your bed frame. Note any variations between head, foot, and sides. Even half-inch differences can affect stability over time.
Consider these measurement techniques for different setups:
- For platform beds: measure between inner edges of side rails
- For slatted frames: measure between outer slat edges
- For storage beds: account for any protruding mechanisms
- For adjustable bases: measure at both flat and elevated positions
The ideal fit allows about one finger’s width around all sides. This slight gap prevents binding while minimizing movement space. Too much room invites sliding during the night.
Test your measurements by gently pushing the mattress toward each side. Notice how much movement occurs before contacting the frame. Minimal movement indicates good sizing.
When to Consider Replacement Options
Sometimes sizing issues indicate replacement time rather than adjustment needs. The seven-year rule serves as a useful guideline for many sleep surfaces. After this period, materials often break down and affect performance.
Look for these signs that replacement might be necessary:
- Visible sagging exceeding 1.5 inches
- Persistent odors that resist cleaning
- Increased allergy symptoms during sleep
- Noticeable decrease in comfort and support
Evaluate both your mattress and frame when considering replacements. An older foundation might not provide adequate support for new sleeping surfaces. Matching the age and quality of both components ensures optimal performance.
Consider this cost-benefit analysis when deciding between repair and replacement:
| Solution Type | Average Cost | Expected Lifespan | Sleep Quality Impact |
|---|---|---|---|
| Stabilization Accessories | $20-$100 | 1-3 years | Moderate improvement |
| Mattress Replacement | $500-$1500 | 7-10 years | Significant improvement |
| Frame Replacement | $300-$1200 | 10-15 years | Moderate improvement |
| Complete Set Replacement | $800-$2500 | 7-10 years | Maximum improvement |
Newer mattress materials affect sizing requirements differently. Memory foam and latex tend to have firmer edges than traditional innerspring designs. This changes how they interact with various frame types.
When shopping for replacements, always test fit in the store if possible. Bring your exact measurements and compare them to potential purchases. Many retailers offer trial periods to ensure proper fit at home.
Proper sizing impacts more than just stability. It affects overall sleep quality, support, and comfort. The right fit ensures even weight distribution and prevents pressure points.
Remember that investment in proper sizing pays dividends through better rest. You’ll wake up feeling more refreshed and energized. The peace of mind knowing everything stays in place is priceless.
Conclusion
A secure sleeping surface transforms your rest and well-being. Unstable beds disrupt sleep patterns and affect daily energy. Proper stabilization brings back comfort and peace of mind.
Solutions range from simple rubber pads to custom rail systems. Each method addresses specific causes like size gaps or low friction. Choose based on your bed type and personal needs.
Combining approaches often delivers the best results. Regular maintenance keeps everything functioning perfectly. Your investment in stability pays off through better sleep quality.
Never underestimate the value of a firmly placed sleeping surface. It supports health, safety, and overall bedroom comfort. Sweet dreams begin with a mattress that stays right where it belongs.