How can I add a Murphy bed to a 10×10 guest room?
I want my compact 10×10 space to pull double duty as a comfortable sleep area and a practical home office. I start by measuring door swings, windows, outlets, and clear floor so the fold-down mechanism works without obstacles.
Careful planning makes this project feel simple. I weigh vertical versus horizontal orientation, decide between a DIY kit, freestanding unit, or custom built-in, and pick hardware rated for safety and smooth lift action.
Smart choices—a 6–8 inch mattress, integrated storage, task lighting, and USB outlets—keep the room tidy and guest-ready. I plan cable management and a modest timeline so the build fits my budget and skill level.
Key Takeaways
- Measure thoroughly before choosing orientation or unit type.
- Pick quality lifting hardware and locks for long-term safety.
- Use a thinner mattress (6–8 in) to ensure proper closure.
- Integrate storage, lighting, and outlets for dual use as an office.
- Choose DIY kit, freestanding, or custom build based on budget and space.
What I want from a 10×10 guest room with a Murphy bed
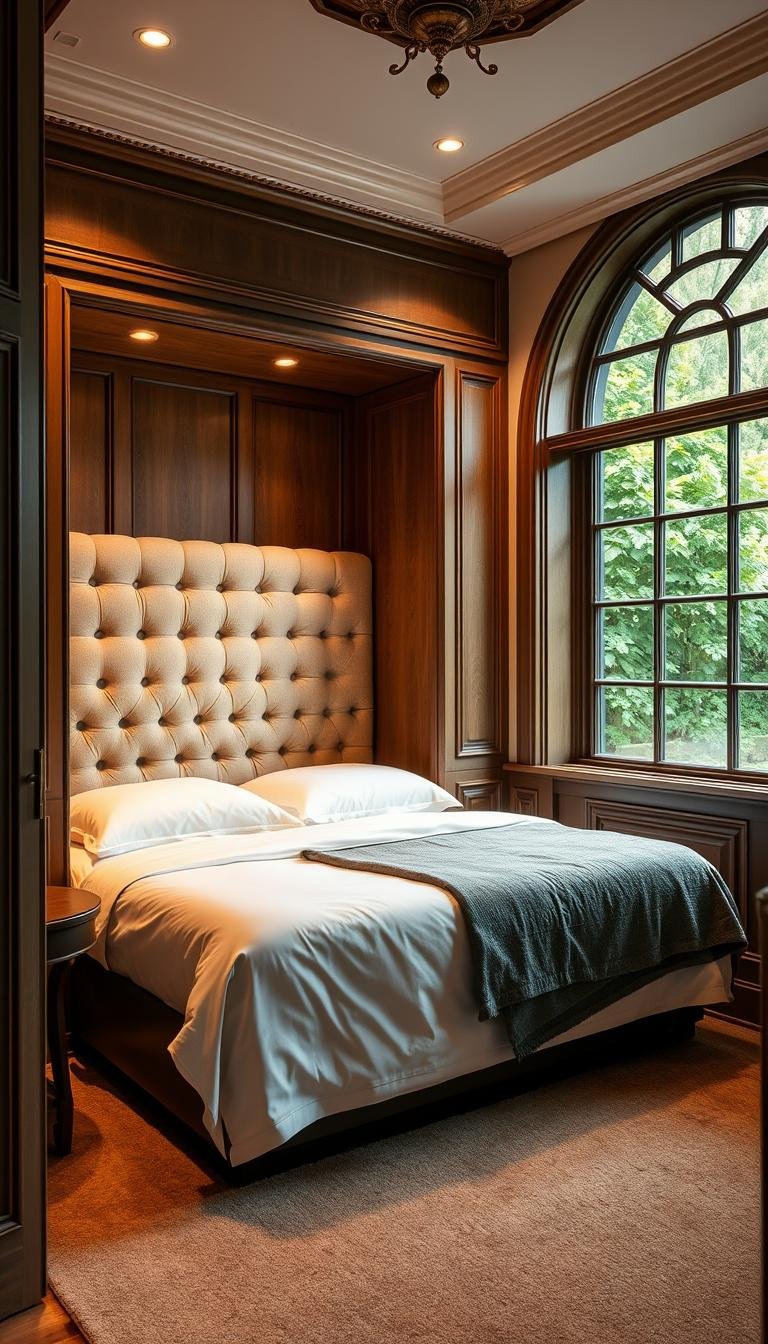
My aim is a small guest area that functions as a calm bedroom at night and a usable workspace by day. I want guests to feel welcomed by soft linens and a supportive mattress.
Clutter-free living matters most. I plan minimal, movable furniture so the fold path stays open. Neutral cabinetry and subtle accents will blend the unit into the home and keep the design calm.
Practical touches make stays easier. I’ll add USB outlets near the bed and storage that hides extra bedding and towels. That keeps surfaces clear and speeds turnarounds when family visits.

- Welcoming yet functional at night and day
- Comfortable sleep setup with quality linens
- Hidden storage to keep the space open
| Priority | Feature | Benefit |
|---|---|---|
| Sleep comfort | 6–8″ supportive mattress | Good rest without bulk |
| Storage | Built-in cabinets & drawers | Fresh bedding within reach |
| Function | Minimal movable furniture | Clear fold-down pathway |
Measure twice: mapping doors, windows, and floor space
My starting point is a precise sketch of the space so the fold-down unit won’t hit obstacles. I measure wall to wall and note windows, radiators, closets, outlets, and baseboard projections before I order anything.

Clearances for fold-down and foot traffic
I mark the footprint the bed needs when open and document floor space depth from the wall to where the foot of the beds will land. Include rug thickness so the unit sits level.
I make sure there is at least 30–36 inches of clear pathway for safe foot traffic. Mirrors help increase perceived depth if the room feels tight.
Door swings, closets, and outlets I need to keep accessible
I check doors and closet swings so they never collide with the bed cabinet during fold-down. I locate studs where the cabinet will anchor and avoid switches or panels.
- I note outlet and USB positions so they stay reachable when the unit is open and closed.
- I sketch two or three layouts to test traffic flow and note vents, returns, or heaters that might conflict.
- Decide if small furniture needs casters so it moves quickly on cleaning day.
Choosing vertical vs. horizontal orientation for my room
Choosing the right orientation makes the most of my tight layout and avoids awkward clearances. I weigh ceiling height, window placement, and how the unit will open into the rest of the space.

Ceiling height and window placement considerations
Vertical units suit rooms with 8-foot-plus ceilings and long, uninterrupted wall height. They feel built-in and use vertical space efficiently.
Horizontal options work when windows, soffits, or low ceilings interrupt the wall. A horizontal layout keeps the mattress low and avoids hiding trim.
“Careful measurement prevents a cramped feel and helps the unit read like furniture instead of an afterthought.”
- I check head position relative to windows to avoid drafts and early light.
- I map the bed swing so it won’t block doors, vents, or thermostats.
- I plan sconces and switches for reachability in either orientation.
- I choose the design that best balances proportions with cabinetry and shelves.
| Factor | Vertical | Horizontal |
|---|---|---|
| Ceiling height | Best for 8′ + ceilings | Good for lower ceilings |
| Window conflicts | Needs uninterrupted wall | Handles windows or soffits well |
| Floor space when open | Deeper foot area | Wider footprint, less depth |
| TV viewing in office mode | May require side mount | Often better sightlines |
My final pick depends on the cleanest path and fewest compromises. I test layouts on paper, then measure again before ordering hardware or committing to a design.
DIY kit, freestanding cabinet, or custom built-in—what fits my home and budget
Choosing between a ready kit, a renter-friendly cabinet, or a custom built-in shapes cost, timeline, and the final room design. I compare durability, installation skills required, and whether the piece should stay with the house or move with me.

When a kit makes sense
DIY kits save money and include cut lists plus step-by-step instructions. I pick a kit when I want clear guidance and I’m comfortable with tools and measuring.
Why freestanding cabinets work for renters
Freestanding units need minimal wall attachment and protect painted walls in a rental. They give real fold-down beds functionality with fewer permanent changes to the house.
Custom built-ins for maximum function
Commissioned cabinetry lets me add shelves, nightstands, or a sofa front for a tailored look. Custom work suits those who want built-in storage, integrated lighting, and a seamless furniture feel.
- I weigh whether my office workflow needs a fold-down desk or hidden file storage in the same footprint.
- I compare shipping, lead times, finish options, return policies, and warranty terms before ordering.
- I plan electrical early for sconces and USB and confirm codes or HOA rules for anchoring and cabinet depth.
- Resale matters: quality built-ins often add appraisal value when done to code.
| Option | Best if you | Cost | Installation |
|---|---|---|---|
| DIY kit | Want savings and follow instructions | Low–Medium | Moderate (tools & time) |
| Freestanding cabinet | Renting or avoiding wall damage | Medium | Easy (minimal anchoring) |
| Custom built-in | Want perfect fit and extra storage | High | Pro install required |
Hardware and lifting mechanisms I can trust
Reliable lifting parts are the backbone of any wall-mounted sleep solution. High-quality hardware ensures smooth motion and long life. I focus on parts that protect guests and everyday use.

Gas springs and quality hinges for smooth, safe operation
Gas springs paired with solid hinges make opening easy and closing controlled. I pick springs rated for my mattress weight and bed frame so the lift stays balanced.
I check hinge material and mounting plates to avoid racking or binding over time. A positive-lock device prevents accidental opening and protects people and pets.
- I buy hardware from reputable suppliers; the mechanism bears the load every time.
- I follow torque and fastener specs to avoid stressing the frame.
- I test-cycle the unit dozens of times during install to confirm smooth travel.
- I keep an Allen key, spare screws, and silicone spray for quick tune-ups.
| Component | What I look for | Why it matters |
|---|---|---|
| Gas springs | Rated capacity, corrosion-resistant | Balanced lift and long life |
| Hinges & plates | Thick steel, precision mounting | Prevents binding and frame stress |
| Locking system | Positive-lock with manual release | Safety for people and pets |
| Serviceability | Replacement parts & warranty | Avoids downtime and costly swaps |
Pro tip: I register the warranty, note serial numbers, and save the manual for future troubleshooting.
Mattress fit and comfort in a wall bed
A properly chosen mattress makes the fold-down solution feel like a real bed, not a compromise. I focus on thickness, weight, and sleep comfort so the unit stores cleanly and guests rest well.

Why 6–8 inches is the sweet spot
Most systems accept 6–8 inch mattresses because that thickness closes without bulging and keeps the cabinet flush. I confirm maximum mattress thickness and weight with the manufacturer before buying.
- I pick a medium-firm mattress for balanced support across sleeping positions.
- I add breathable covers and a hypoallergenic pad to keep the surface fresh between stays.
- I use a strap kit so bedding won’t shift when the panel closes.
- I avoid pillow-top models that make the panel sit proud and stress hinges.
- I test the lift with the final mattress installed to verify the mechanism balances correctly.
- I store spare linens nearby, rotate the mattress periodically, and log the exact model for future replacement.
Planning the cabinet and frame: materials, bracing, and anchors
A rigid, well-planned cabinet gives the installation long-term stability and safer daily use. I use straight, dry lumber and quality joinery so the unit behaves like built-in furniture.

Solid frame bracing with dimensional lumber
Start with a stout skeleton. Build bases from 2x4s, add cross bracing, and lock joints with glue plus screws. Use pine 1x2s for mattress support, predrill and countersink 2″ screws to prevent splitting.
Securing the bed cabinet to studs for safety
Make cabinet sides from 3/4″ pine and join with pocket holes where unseen. Set unit on a level base, shim as needed, then confirm stud locations.
- Use structural screws rated for shear into the wall studs.
- Add blocking behind drywall when stud spacing is off.
- Recess 10″ shelves above and trim with 1x2s; faux door panels from 1x3s finish the look.
- Leave service access to gas spring mounts and bed frame hardware for future tuning.
How I’ll handle installation in a 10×10
My install approach focuses on positioning the cabinet precisely before any fasteners go in. I bring the assembled components into the room and set the unit where it will live. I check level on the floor and sight the wall so the face reads true.

Removing baseboards so the cabinet sits flush
I remove baseboards along the wall where the unit meets the studs so the cabinet sits tight and square. After final fitting, I scribe and reattach the baseboard to the cabinet face for a seamless built-in look.
Positioning, leveling, and anchoring the unit
I anchor into studs with structural screws and confirm bite and torque on each fastener. I install gas springs inside the cabinet per the manufacturer instructions and attach them to the bed frame while still empty.
Testing fold-down operation before finishing
I test the arc without the mattress first and cycle the bed open and closed repeatedly. I make sure the panel clears doors, trim, and flooring transitions through the entire motion.
- I adjust hinges and hardware until gaps are even and latches engage every time.
- I only proceed to paint and trim after the mechanism proves reliable; a paint sprayer gives a smooth finish on large cabinetry.
- I keep tools and spare fasteners nearby for fine-tuning during the first week of use.
Integrating storage without crowding the guest room
Smart storage keeps the small space feeling open while holding essentials within easy reach. I design built-in units that hug the wall so the footprint stays clear and the area reads like furniture, not clutter.

Built-in side cabinets and floating shelves
Shallow side cabinetry is my go-to for linens and a welcome basket. I size cabinets narrow so they store items without sticking into traffic paths.
Floating shelves keep the visual weight light. I mix closed cabinet doors with one or two open shelves for display and quick access.
Under-bed drawers and a slim headboard shelf
When the mechanism allows, I add under-bed drawers for off-season bedding. Drawers must not block the fold or stress hardware.
A slim headboard shelf holds a phone, a lamp, or water. I include cable pass-throughs so chargers stay tidy and out of sight.
- I plan adjustable shelving for baskets and books.
- Soft-close hardware makes opening quiet for overnight guests.
- I pick furniture with small footprints and casters for flexible layouts.
- I leave one empty shelf for visitors, and I add subtle LED strips to warm the space at night.
Designing a home office by day, guest bedroom by night
A slim work zone that stows neatly keeps the room ready for visitors without fuss. My layout pairs a folding work surface with tidy wiring so the small space functions well all day.

Fold-down desk options and cable management
Pick a desk that clears the bed when it opens so items stay put. I choose models with shallow depth and a strong hinge so the worktop folds flat against the cabinet.
Cable channels and grommets route power and data out of sight. A mounted monitor arm swings clear when guests arrive, and a slim charging station lives on the side cabinet.
“A quick conversion feels effortless when furniture and cords are planned together.”
- Compact chair and rolling file pedestal tuck away under the desk.
- Programmed lighting scenes shift from active office to relaxed pre-sleep mode.
- Labeled bins keep guest linens and essentials ready for fast conversion.
| Feature | Benefit | Best for |
|---|---|---|
| Wall-mounted fold-down desk | Clears floor when closed | Small office / shared space |
| Shelf-top slide desk | Minimal hardware, easy install | Renters and quick setups |
| Integrated flip-top desk | Built-in cable channels and outlets | Permanent multiuse space |
Lighting, power, and comfort upgrades
Good lighting and thoughtful outlets make the small space feel intentional and guest-ready.

Dimmable sconces and USB outlets near the head
I add dimmable sconces at the head so my guests can read without harsh overheads. Warm color temperature bulbs create a cozy evening vibe and reduce glare.
Combo outlets with USB make charging effortless. I run wiring through the cabinet cavity so the wall stays clean and cables are out of sight.
Sound control with rugs and curtains
Layered rugs and lined curtains help reduce noise transfer and soften the room. Acoustic panels work well if thin walls carry sound.
I consider a ceiling fan with a quiet motor for airflow. I also install tamper-resistant outlets if kids may visit and keep a small tray for glasses and a carafe within reach.
| Upgrade | Benefit | Best use |
|---|---|---|
| Dimmable sconces | Targeted light for reading | Bed head area |
| USB combo outlets | Easy charging, fewer cords | Side cabinet or nightstand |
| Rugs & lined curtains | Sound damping and warmth | Floor and window zones |
Pro tip: Program smart dimmers to a bedtime scene and keep a spare blanket at the foot for cool nights.
Finishes and color choices that make the room feel bigger
Subtle color decisions and reflective surfaces give a tiny room surprising depth. I aim for light, neutral finishes so the cabinet blends with the wall and the space reads larger at a glance.
Neutral cabinetry that blends with the wall
I paint the cabinet to match the wall so the panel visually recedes when closed. I test two or three color samples in both day and night light before I commit.

Accent backs and mirrored fronts for depth
A subtle accent on the back panel adds depth without shrinking the room. Mirrored fronts bounce light and double as a dressing mirror, making the guest room feel taller and wider.
“A unified finish across millwork and walls helps the whole space read as one calm plane.”
- I align trim profiles with existing base and crown for a seamless transition.
- I choose understated pulls that won’t snag bedding or clothing.
- I spray one-coat cabinet enamel for coverage, then add a second coat for durability and scuff resistance.
| Finish move | Benefit | When to use |
|---|---|---|
| Match cabinet to wall | Visual recession of unit | Small rooms |
| Mirrored facade | Added light and perceived depth | Rooms with limited windows |
| Accent back panel | Controlled depth without contrast | When a subtle design touch is wanted |
| Spray enamel | Smooth, durable finish | Cabinet surfaces and trim |
Pro tip: For complete guidance on cabinet styling and construction, see the murphy bed cabinet resource I used for finish ideas and trim layouts.
My step-by-step plan to build or assemble the bed cabinet
I start my build by laying out every cut and labeling each part before the saw ever runs. This keeps the job efficient and reduces mistakes.

Follow the kit’s cut list. Batch-cut boards, mark each piece, and group matching pieces so assembly moves fast. Dry-fit the frame and cabinet boxes made from 3/4″ pine with pocket holes. Confirm the unit is square before glue and screws.
Trim and panel details for a built-in look
Remove the baseboard where the unit sits so the cabinet fits flush. Reattach the baseboard to the front after final fitting for a seamless edge. Create faux doors from 1x3s and trim so reveals are even and consistent.
Finishing: sanding, priming, and spraying
Sand faces and edges through three grits for a smooth surface. Pre‑drill and countersink every 2″ screw to avoid splits. Install pine 1x2s for mattress bracing and fit gas springs per instructions.
- Label parts and dry-fit before final assembly.
- Assemble boxes with pocket screws and keep edges flush.
- Prime and spray with Behr Cabinet, Door & Trim Enamel Satin; one coat may cover, two coats improve durability.
- Install doors last and adjust hinges so gaps are perfect.
- Keep a time log to track how long each step takes for the next project.
| Step | Material | Key action |
|---|---|---|
| Cut & label | wood pieces | Batch cut, mark every piece |
| Dry-fit | frame & cabinet | Square check before glue |
| Trim & doors | 1x3s, baseboard | Fit faux doors, reattach baseboard |
| Finish | primer & enamel | Sand three grits, spray two light coats |
Safety checks and ongoing maintenance
Routine inspections save time and avoid inconvenient failures during a stay. I run a short checklist every few months so the system stays safe and reliable for guests.

- I verify the locking system engages fully when the panel is closed and when it’s stored.
- I confirm the cabinet is anchored securely to the wall and recheck fasteners after the first month.
- I attach anti-tip brackets to adjacent storage so nothing shifts when the bed opens.
Periodic hardware checks
Simple maintenance keeps everything moving smoothly. I set a calendar reminder to tighten hardware and lubricate moving points twice a year. That saves time and prevents wear.
- I show guests how to operate the unit safely and to keep fingers clear of hinges.
- I keep doors latched and cords stowed so nothing snags during operation.
- I inspect for racking or rubbing that signals a level or hinge adjustment is needed.
- I replace worn gas springs with the same rate to preserve balance.
- I clean the tracks and hinge lines to keep debris from binding.
- I maintain a clear floor area so there’s no trip hazard at night.
Pro tip: A brief demo the first time someone uses the bed helps protect people and extends the life of the mechanism.
Cost, timeline, and tools I’ll need
A clear plan for tools, timeline, and contingencies prevents last‑minute surprises on install day. I set a simple budget and a realistic weekend schedule before ordering parts or hiring labor.

Budget ranges: kit vs. freestanding vs. custom
DIY kits usually cost the least because they include cut lists and step‑by‑step instructions. I price a kit with necessary wood and hardware against a freestanding unit and a custom millwork bid.
Freestanding units sit in the middle price-wise and save on install time. Custom built‑ins and architect solutions sit at the top of the range but give a perfect fit and color match.
Essential tools for a smooth install
- I plan my tool list: table saw or track saw, circular saw, brad nailer, drill/driver, level, stud finder, and a paint sprayer for a top finish.
- Consumables: glue, screws, pocket‑hole fasteners, primer, and enamel (one coat may cover; one more improves durability).
- I include delivery charges, lead times for mechanisms, and a contingency line for wall or floor leveling.
- Block out one weekend for rough build and another for finishing and install, and arrange help on lift days to move large panels safely in my house.
When time is short I compare totals against ready options and consult a trusted DIY wall bed guide to confirm supply lists and realistic costs for murphy beds in my home.
How can I add a Murphy bed to a 10×10 guest room? My room-by-room layout ideas
Smart zoning keeps the small space feeling open and ready for either work or sleep. Below are three layout ideas that make a tight footprint versatile without compromising comfort.

Corner desk + vertical unit along the longest wall
Place a corner desk opposite a vertical unit on the longest wall to preserve a wide aisle. Float a rug in front of the panel so the open bed lands on a soft surface and the visual flow stays calm.
Horizontal unit under a window with recessed shelves
Tuck the horizontal setup beneath the window and add recessed shelves about 10″ deep on either side for balanced storage. Low-profile side storage works best where door swings are tight and keeps circulation clear.
Sofa-front wall system for a hybrid lounge/office
Choose a sofa-front system when daytime seating matters. Use a rolling desk that nests by the closet, angle a chair toward the window for a reading nook, and place lighting so switches serve both desk and bed.
- Center artwork so the panel feels framed, not busy.
- Test layouts with painter’s tape before anchoring anything.
Conclusion
A well-built wall unit transforms a modest area into a comfortable place for family stays and work sessions.
With accurate measuring, quality hardware, and thoughtful storage, the fold-down solution gives real comfort without crowding the space.
I follow a clear plan: pick the right orientation and mechanism, confirm mattress fit, and add lighting and outlets so the room feels inviting and useful.
The payoff is daily flexibility for my home and reliable comfort for visiting family. I keep a simple maintenance checklist so the unit stays safe and smooth for years.