What’s the ideal depth for a window seat that doubles as storage?
I tested several builds in my home and settled on measurements that actually feel right in daily use. I often aim for about 19 inches in seat height and roughly 21 inches of sitting surface for general comfort. That hits a sweet spot for upright seating and casual lounging.
If I wanted a deeper nap spot, I moved toward 24–30 inches like a daybed. Many modern guides sit between 18 and 22 inches for casual seats, so I use those ranges to match how we live in a room.
Adding storage changed my cut list. Hinges, lid clearances, and cushion foam eat into usable space, so I plan them up front. I also watch lid overhang so I don’t lose precious cubby room.
My rule: pick depth to match use—upright reading, lounging, or both—and add cushion thickness to final measurements so the finished bench feels right.
Key Takeaways
- Target about 19 inches seat height and ~21 inches sitting surface for general comfort.
- Choose 18–22 inches for casual seating, 24–30 inches for daybed-style lounging.
- Plan for hinge and lid clearances when sizing storage below the seat.
- Factor cushion foam height and firmness; it shifts perceived depth by an inch or two.
- Decide use first—reading perch or lounging spot—then lock measurements to fit your room.
How I assess the room, window, and wall before choosing a seat size
I always start by walking the room and tracing the likely bench outline on the floor. That quick mock-up helps me see traffic flow and visualize how the new seat sits beside the windows and walls.

Measuring windows, corners, and bay angles for a snug fit
I measure the window opening and the wall returns first. Bay walls often sit around 135° but can vary, so I confirm each angle with an angle finder.
Small variances at the corners change how tight the frame fits. I note apron trim and stool projection so side panels do not pinch or float away from the windows.
Making space on the floor and wall: studs, vents, and baseboards
I map studs with a finder and mark centerlines. Studs are usually 16 inches on center, but I always verify before anchoring 2×4 cleats.
I remove baseboards in the bench footprint and check the floor for crowns with a long level. Any dips or high spots get shimmed in precise inches to keep the top level.
- I locate HVAC vents and outlets to avoid blocking airflow or access.
- I outline the proposed depth and width with painter’s tape to confirm walking clearance.
- I factor lid thickness, hinge clearances, and any desired overhang into final sizing.
| Check | Tool | Typical Value | Action |
|---|---|---|---|
| Bay angle | Angle finder | ~135° (varies) | Measure both sides, adjust side panels |
| Stud spacing | Stud finder | 16 in on center | Mark centerlines for cleats |
| Floor level | Long level | Variable | Shim where needed by inches |
| Vents/outlets | Tape measure | Room-specific | Plan cutouts or reroute grilles |
My final tip: make sure the tentative layout respects room flow and frame details before cutting lumber. That small step saves time and avoids rework.
What’s the ideal depth for a window seat that doubles as storage?
I test several depths on the floor with a scrap stack before cutting wood. That quick mock-up tells me whether the planned seat will feel chair-like or more like a daybed once cushions are added.

Comfort-first depths: 18–22 inches for casual seating
I set my baseline at 18–22 inches deep. This range lets most people sit upright with feet flat on the floor and backs supported by cushions against the windows.
Daybed lounging: when 24–30 inches makes sense
When I want true lounging or napping space, I increase depth to 24–30 inches. That turns the seat into a compact daybed while still leaving room for hidden storage under the top.
Cushions and overhangs that affect perceived depth
I factor cushion thickness—3–4 inch foam often reduces perceived depth by an inch or two. I also leave about 3/16 inch for piano hinge clearance so lids open cleanly.
- I keep a slight front overhang to avoid sharp frame edges at the thigh.
- In tight rooms or near a bay window, I lean toward 20–21 inches to preserve floor flow.
- I finalize depth only after testing with the actual cushion in place.
| Use | Typical Depth (inches) | Why |
|---|---|---|
| Casual seating | 18–22 | Supportive, chair-like feel; feet reach floor |
| Lounging / daybed | 24–30 | Space to stretch; nap or read comfortably |
| Hinge & cushion allowance | +3/16 hinge; +3–4 cushion | Clearance for lid, perceived depth shift |
Dialing in seat height, width, and inches that actually feel good
A finished top around 18–19 inches usually lets people sit and stand without strain. I use that as my baseline because it matches common chair heights and keeps knees comfortable during long reads or dinners.

Seat height targets
I aim for an 18–19 inch finished height when the bench will be regular seating. That height pairs well with dining and breakfast nooks and avoids knees scraping under the table.
I always measure from floor to underside of the stool so trim and adjacent cabinets line up. Adjust a half inch if your floor has a crown or wide baseboard.
Width and bay window spans
I stretch the top along a bay window or long wall when space allows. More linear inches give extra long seats and make room for extra seating without cluttering the area.
- I leave a few inches at each side for trim, curtains, and traffic paths.
- I match bench height to the table if this will be dining seating.
- I tape the footprint in the room and sit in the mock-up before locking in final size and storage plans.
| Measure | Typical | Why |
|---|---|---|
| Height | 18–19 inches | Ergonomic seating |
| Width | As room allows | More seats, balanced look |
| Side clearance | 2–3 inches | Trim and curtain stacks |
Smart storage solutions under the bench top
My go-to storage layouts start with deciding what will live under the lid. That helps me pick between a lift-up top, pull-out boxes, or sliding panels based on daily use.

Lift-up tops with piano hinges for hidden storage
Lift-up lids on 3/4-inch plywood tops work very well. I use continuous piano hinges and leave about 3/16-inch clearance so lids swing without scraping. I add centered supports under the top edge to stop flex and keep the lid solid over time.
Full-extension drawers vs. cabinets and sliding doors
Full-extension drawers are my pick when I need fast access to blankets and games. They make every inch visible and avoid lost items at the back.
Sliding doors work when items are used less often; they save forward clearance but force you to kneel and slide panels aside.
Handles, push-to-open hardware, and kid-friendly edges
I prefer low-profile pulls or inset finger grooves to avoid sharp catches on knees. Push-to-open is sleek, but on glossy finishes it shows fingerprints.
- I size drawer boxes to clear baseboards and allow soft-close slides.
- I plan storage by household needs: seasonal linens in a bay window bench, games in drawers, daily gear near main seats.
| Option | Best use | Notes |
|---|---|---|
| Lift-up lid | Large, unobstructed storage | 3/4″ top, 3/16″ gap, piano hinge |
| Full-extension drawers | Everyday access | Measure opening to 1/8″, soft-close slides |
| Sliding doors | Infrequent access | Good for deep cabinets, saves front clearance |
Designing and building the frame and top like a pro
I start the build by anchoring 2×4 cleats into the studs so the bench behaves like a short, steady wall. That gives me a solid back rail to register all other pieces and keeps the whole frame from racking over time.

2×4 cleats, short floating framing, and bracing
I anchor cleats into marked studs first, then assemble a stout front wall that stays dead parallel. If the floor crowns, I shim under the frame so the top lands level side to side.
I run cross-braces from the back cleat to the front frame to support lid seams and high-load edges where people sit. I predrill and use construction adhesive on all critical joints to prevent squeaks and loosening with time.
Why I use 3/4-inch plywood tops and edge reinforcement
I deck the top in 3/4-inch plywood because it resists flex under load. Then I glue and screw a solid wood edge strip to the leading edge so the front feels rock solid for years.
I dry-fit the top pieces and check alignment before fastening so hinge barrels and trim lines stay straight. I keep a tiny 1/16-inch gap between adjacent panels for seasonal movement while keeping the reveal neat.
Hinges, gaps, and alignment so lids open cleanly
For hinged lids I pilot screw piano hinges in straight runs, leaving about 3/16-inch clearance so the lid clears trim and stays put when open. I sand and ease the front edge slightly to make the seat comfortable at the thighs without changing overall inches.
- Anchor 2×4 cleats into studs first and shim as needed.
- Cross-brace between back cleat and front frame for lid support.
- Use 3/4″ top and reinforce the leading edge with solid wood.
- Dry-fit pieces, predrill, and glue joints to prevent future movement.
| Task | Why | Note |
|---|---|---|
| Cleat anchoring | Keeps frame rigid | Verify each stud under window |
| Top decking | Resists flex | 3/4-inch plywood minimum |
| Hinge gap | Prevents binding | ~3/16-inch clearance |
Materials, cushions, and finishes that stand up to sun and time
For sunlit spots I favor fabrics and foams built to last without losing comfort. I chose a simple kit of durable pieces so the bench feels like part of the home for years.

High-density cores and UV-safe fabrics
I use 10 cm (about 4-inch) high-density foam for reliable support. That cushion thickness resists sagging and keeps a generous sitting surface without crowding the planned inches of depth.
Performance or outdoor-rated textiles go on top. They resist UV and hold color near bright windows. I also Scotchgard or choose inherently stain-resistant cloth where kids and pets use the space.
Trim, fronts, and paint to blend with the room
I finish fronts with beadboard or smooth sheetrock panels and copy nearby casing lines. Durable, scrub-friendly paint on the face makes the bench easy to clean.
“A well-made cushion and smart fabric choice extend usable life more than any trim detail.”
- I add a small cushion crown for a tailored look and optional piping to match drapery.
- I flip cushions periodically to even out wear in sunny spots.
| Component | Why | Note |
|---|---|---|
| Foam | Support, longevity | 10 cm high-density |
| Fabric | UV and stain resistance | Outdoor/performance textiles |
| Front finish | Cohesive look | Beadboard or smooth panels, durable paint |
Room-by-room ideas: bay windows, kitchen nooks, dining rooms, and mudrooms
I map each room first, then pick a bench style that matches how people move through the space. That helps me choose depths, storage, and finishes that fit each area.

Curved and arched bays
Curved bays need custom-fit benches so cushions rest flat and the seating reads as one continuous run along panoramic glass. I cut the frame to the arc and make templates for cushion curves.
Kitchen and dining areas
I build benches at the table to add more seats without crowding. I fit full-extension drawers under the top for napkins and linens and align bench height with table height for comfort.
Mudrooms and high-traffic zones
Rugged finishes and closed cubbies keep shoes and bags out of sight. I pick wipe-clean cushions and discreet pulls so the bench stays tidy in daily use.
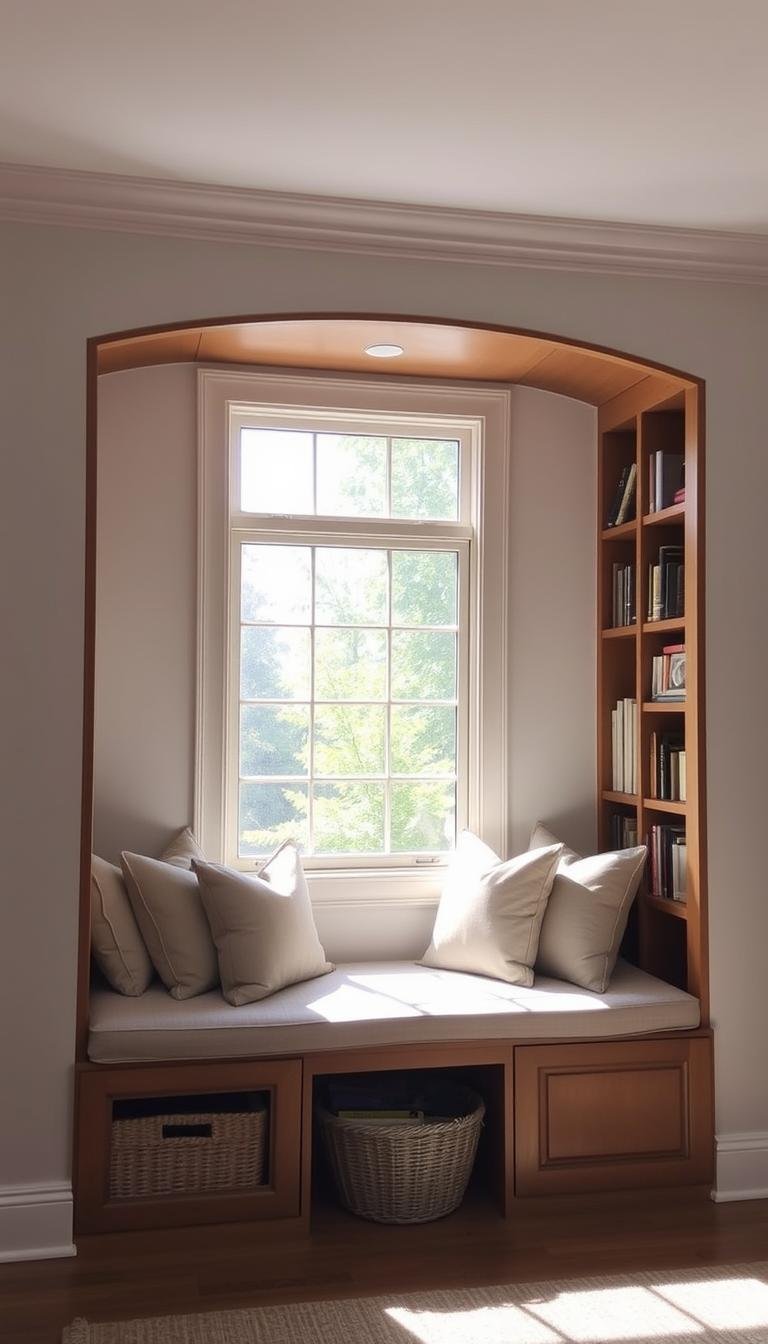
Library corners and landings
In tight corners I use slim benches to preserve circulation while creating a cozy nook. Shelves on either side frame windows and make the whole elevation feel intentional.
“Match depth to bay projection — deeper in large bays, shallower in compact ones.”
Conclusion
A quick floor mock-up helped me confirm final measurements and how people would use the bench.
I wrapped key targets into simple choices: finished height near 18–19 inches, casual seating around 18–22 inches, and 24–30 inches when lounging matters. I also kept hinge gaps at about 3/16 inch and left 1/16-inch panel spacing so lids move smoothly over time.
I summarized the build steps: layout, anchor a short wall into studs, level over the floor, then deck with 3/4-inch plywood and reinforce the front edge. Pick drawers or lift-up tops based on how often you reach items.
Measure twice, build smart, and match trim and paint so this addition reads like part of your home. For a quick how-to, see my favorite plan at DIY window bench plan.