What’s the easiest way to add a hidden jewelry drawer inside a dresser?
I struggled for years with my growing jewelry collection. Standard boxes just couldn’t handle my precious pieces. They created clutter on my dresser and made finding specific items frustrating.
My breakthrough came when I discovered a brilliant DIY approach. This method transformed my bedroom storage while keeping everything protected. The solution was surprisingly simple and budget-friendly.
I found that velvet-lined trays provide ideal protection for delicate items. The sliding mechanism makes every piece visible without digging. This system works for both fine jewelry and everyday wearable pieces.
The final result looks professional and keeps my dresser top clean. My morning routine became much smoother with everything organized. Dwelanor offers excellent DIY tutorials that helped me perfect this project.
Key Takeaways
- Traditional jewelry boxes often disappoint serious collectors
- Hidden storage solutions maximize space while maintaining cleanliness
- Velvet-lined trays provide superior protection for delicate pieces
- Sliding mechanisms ensure easy visibility and accessibility
- This DIY approach is budget-friendly compared to custom solutions
- The system works for both fine jewelry and everyday pieces
- Professional-looking results make morning routines more efficient
Why a Hidden Jewelry Drawer Is Your Best Storage Solution
My jewelry collection kept expanding over time. Standard storage options simply couldn’t keep up with my needs. I needed something that combined protection with smart organization.

The Problem With Traditional Jewelry Storage
Traditional jewelry boxes quickly become inadequate. They consume valuable dresser top space while offering limited capacity. My necklaces constantly tangled, and earrings frequently went missing.
The constant digging through jumbled items caused frustration. Delicate pieces suffered unnecessary damage from this daily struggle. I realized conventional storage wasn’t working for my growing collection.
Jewelry cabinets often feel awkward in room decor. They disrupt bedroom aesthetics while offering minimal protection. Dust accumulation became another persistent issue I faced.
Benefits of a Custom Hidden Drawer Organizer
Custom hidden drawers provide triple the storage capacity. They keep everything organized while maintaining clean surfaces. The sliding tray mechanism revolutionized how I access my pieces.
Velvet-lined compartments protect valuable items from scratches. Each piece has its designated spot, preventing tangles and damage. This system works beautifully for both everyday wear and special occasion jewelry.
The hidden nature maintains bedroom aesthetics perfectly. Unlike wall-mounted options, this solution protects from dust and sunlight. Everything stays organized while remaining easily accessible.
| Feature | Traditional Box | Hidden Drawer |
|---|---|---|
| Storage Capacity | Limited | Triple the space |
| Surface Space Used | Premium dresser top | Zero surface space |
| Protection Level | Basic | Superior velvet lining |
| Accessibility | Digging required | Sliding tray access |
| Aesthetic Impact | Cluttered look | Clean, hidden storage |
| Dust Protection | Minimal | Complete enclosure |
This organizer system changed how I manage my collection. Morning routines became smoother with everything in its place. The investment in proper storage paid off immediately.
My favorite aspect is how it protects sentimental pieces. Special items remain safe while still being accessible. The entire system maintains its elegance over time.
Planning Your Hidden Jewelry Drawer Project
My journey to organized bliss began with careful preparation. I discovered that proper planning makes the entire process smooth and successful. Taking these initial steps ensured my final result worked perfectly for my needs.

Sorting and Organizing Your Jewelry Collection First
I started by gathering every single piece I owned. The sorting process became an eye-opening experience. I found forgotten treasures and pieces needing repair.
Creating categories made the task manageable. I used five main groups: Fine Jewelry, Everyday Wear, Keepsakes, Bulky Costume, and Dress-up Costume. This system helped me decide what to keep and what to donate.
Further division by type proved essential for planning. Separate piles for rings, bangle bracelets, stretchy bracelets, stud earrings, and dangle earrings emerged. This approach helped me design compartment sizes that actually worked.
Taking Accurate Measurements of Your Dresser Drawer
Precise measurements became my most valuable step. I learned that drawer boxes are often shallower than the drawer face. This discovery prevented potential installation issues.
Using painter’s tape along the sides helped determine clearance. I measured between the drawer slides to ensure perfect fit. For my project, this measurement was 42 5/8 inches.
Combining different tray heights allowed for efficient space use. I planned for two sliding tiers plus the drawer base. Each tray extended just beyond halfway for optimal visibility.
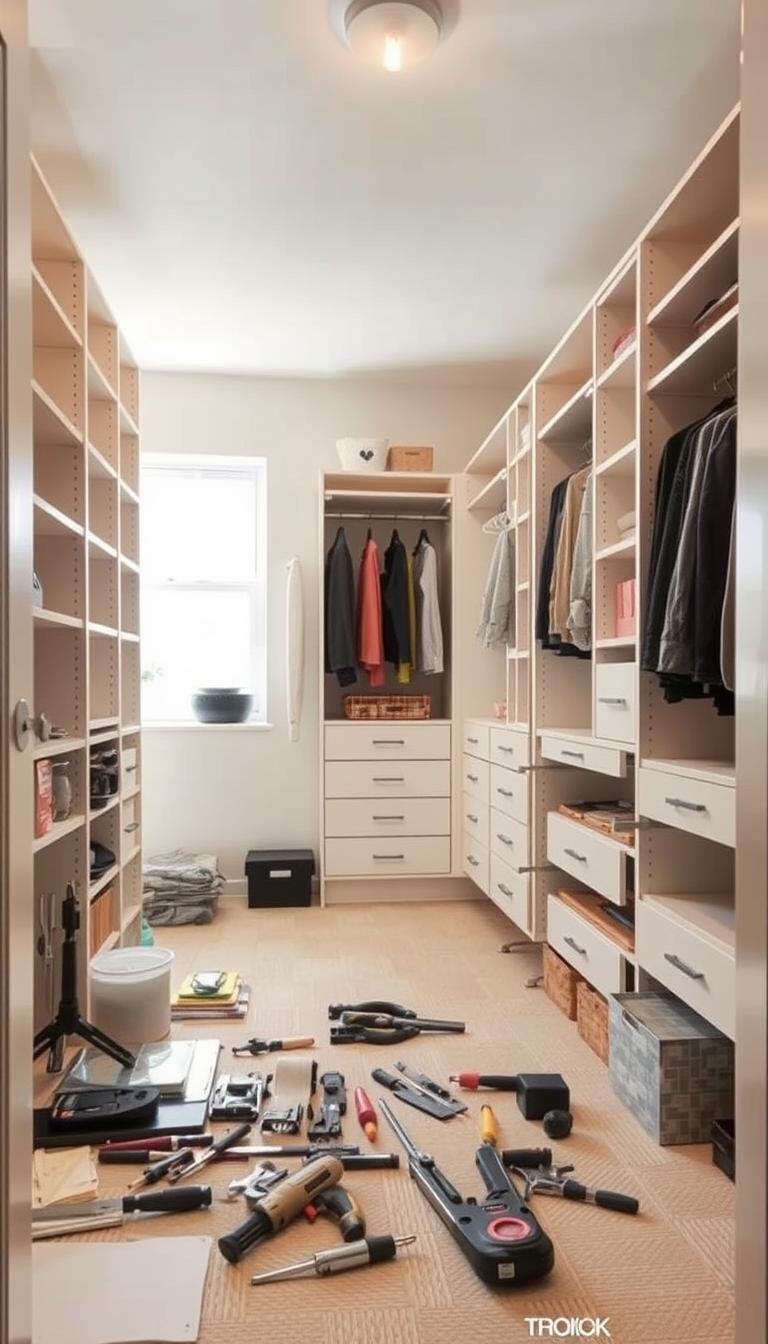
Gathering Materials and Tools You’ll Need
The materials list surprised me with its simplicity. Quality velvet jewelry trays formed the foundation of my organizer. Strong adhesive ensured everything stayed securely in place.
Basic wood trim and metal braces provided structural support. I chose screws for durability but brads work equally well. Optional paint or stain let me match my existing decor.
Essential tools included a yardstick, drill, and clamps. These items helped achieve professional-looking results. Dwelanor’s resource center provided additional guidance on material selection.
| Project Phase | Key Considerations | My Solutions |
|---|---|---|
| Sorting Process | Categorization system | 5 main groups with type subdivisions |
| Measurement Approach | Drawer depth accuracy | Painter’s tape clearance method |
| Tray Configuration | Space optimization | Two sliding tiers + base system |
| Material Selection | Durability vs aesthetics | Velvet trays with wood trim accents |
| Tool Requirements | Project complexity | Basic tools with professional results |
This planning phase transformed my approach to the project. Each decision contributed to the final success. The time invested upfront paid dividends throughout the installation process.
My collection finally had a home that matched its importance. The system accommodated both delicate pieces and costume jewelry. Everything found its perfect place in the new organizer.
What’s the Easiest Way to Add a Hidden Jewelry Drawer: Step-by-Step Instructions
My transformation from cluttered chaos to organized elegance happened through careful assembly. The process felt surprisingly manageable with proper preparation. Each step brought me closer to my dream storage solution.
Following these instructions created a system that works perfectly. The sliding trays make every piece accessible without digging. My entire collection now stays protected and beautifully organized.

Creating Custom Trays and Compartments
I began with velvet trays and strong E6000 adhesive. Safety first – I wore a respirator during glue application. The chemical fumes required proper ventilation.
Careful clamping ensured overnight bonding success. I placed weights evenly across the trays. This prevented warping and created seamless connections.
Next morning revealed perfectly joined compartments. I flipped the assembly and added metal mending plates. These braces provided crucial reinforcement for daily use.
Wider drawers needed multiple plates for support. I considered flannel covering for metal braces. This protected wood finishes during tray removal.
Building the Sliding Mechanism Rails
Choosing the right trim proved essential for functionality. Corner trim worked well but required adjustments. Middle tray access needed special consideration.
I discovered a brilliant solution using square dowel rods. These prevented top trays from slipping between rails. The simple addition ensured smooth operation.
Painting required clever techniques with push pin risers. Two light spray coats created the perfect finish. Gentle sanding between coats achieved silk-smooth surfaces.
Cutting trim pieces demanded precision with a hand saw. Each measurement ensured proper alignment later. The attention to detail paid off beautifully.
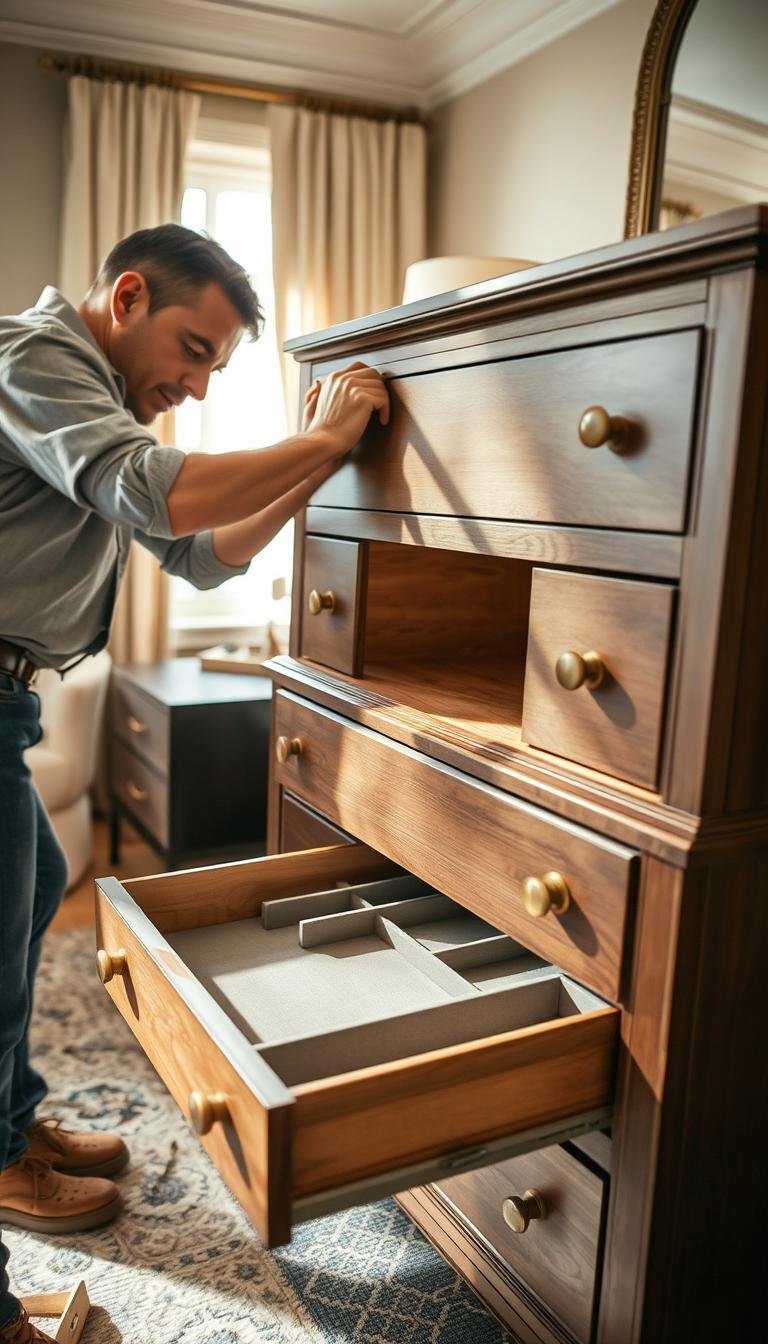
Installing and Securing Everything in Place
Using a loose tray as a alignment jig proved genius. This ensured perfectly straight rail placement. The system came together with professional precision.
Short wood screws secured lower rails securely. Particle board drawers required pilot holes first. This prevented splitting and ensured clean installation.
My nail gun made top rail installation quick and perfect. The jewelry tray served as an ideal spacer. Frequent sliding tests caught alignment issues early.
Final results exceeded my expectations completely. The system operates smoothly and quietly. South House Designs offers excellent guidance for similar projects.
| Assembly Phase | Key Technique | My Result |
|---|---|---|
| Tray Bonding | E6000 with clamping | Seamless velvet compartments |
| Reinforcement | Metal mending plates | Durable daily-use strength |
| Rail System | Square dowel addition | Slip-proof tray operation |
| Surface Finish | Dual spray coats | Silk-smooth sliding action |
| Installation | Tray jig alignment | Perfect rail positioning |
| Testing | Frequent sliding checks | Flawless final operation |
The completed organizer transformed my bedroom storage. Everything found its perfect place in the new system. Morning routines became effortless with visible, accessible organization.
My favorite rings and bracelets now shine in their designated spots. Necklaces hang tangle-free in separate compartments. The entire collection stays dust-free and protected.
This project proved that great storage solutions can be DIY. The results look professionally crafted yet cost a fraction. My jewelry finally has the home it deserves.
Alternative Hidden Jewelry Storage Ideas
Exploring different storage approaches opened my eyes to creative possibilities. While my drawer organizer worked perfectly, I discovered numerous alternative solutions. Each option offers unique benefits for various needs and spaces.

Some people prefer wall-mounted solutions that save floor space. Others enjoy repurposing everyday items into clever organizers. The right choice depends on your collection size and personal preferences.
Wall-Mounted Hidden Storage Options
Wall solutions maximize vertical space while keeping items accessible. I found that artwork with hidden compartments works beautifully. These pieces look like normal decor while concealing valuable items.
Mirror conversions provide both function and secret storage. Existing wall or standing mirrors can be modified with hidden compartments. This approach maintains full functionality while adding discreet space.
Clock jewelry boxes offer unexpected hiding spots. They appear as normal timepieces while safeguarding precious pieces. These blend seamlessly with room decor while providing protection.
Fake electrical outlet safes provide discreet storage for small items. I discovered these work best for rings and earrings. Proper placement is crucial – avoid areas near furniture where they might draw attention.
Open wall organizers feature hooks or chicken wire displays. These work well for frequent access to favorite pieces. However, they offer less protection from dust and damage.
Creative Repurposing of Everyday Items
Transforming ordinary objects into storage solutions sparked my creativity. Vintage boxes and containers can become unique organizers. This approach matches personal style while providing functional space.
Decorative plates or stands work wonderfully for costume jewelry. They keep pieces accessible yet organized in an attractive display. Showier items might find new homes through donations to local theaters.
Smaller collections benefit from hidden compartments in books. Decorative boxes on shelves also serve this purpose well. These solutions work particularly well in limited spaces.
I found that combining different methods creates comprehensive systems. Each alternative option has distinct advantages. Space constraints and personal preferences guide the best choices.
| Storage Type | Best For | Protection Level | Space Required |
|---|---|---|---|
| Wall Art Compartments | Small valuables | High security | Wall space |
| Mirror Conversions | Everyday pieces | Medium protection | Vertical area |
| Repurposed Containers | Costume jewelry | Basic coverage | Shelf or tabletop |
| Outlet Safes | Rings and earrings | Maximum security | Electrical space |
| Clock Boxes | Small collections | Good protection | Wall placement |
These alternative methods complement traditional storage approaches. Dwelanor’s mission includes exploring various organizational solutions. Their resources helped me understand different options.
Every home can benefit from customized storage systems. The right solution depends on individual needs and available space. Creative thinking transforms ordinary items into perfect organizers.
Conclusion: Enjoy Your New Organized Jewelry Space
This DIY jewelry organizer completely changed my daily routine. My morning now starts smoothly with everything in its proper place. No more frantic searching through tangled messes.
The hidden drawer keeps my dresser top clean and clutter-free. I love knowing my precious pieces stay protected from damage. The velvet-lined compartments prevent scratches perfectly.
Seeing my entire collection at once brings me joy. Rings, necklaces, and bracelets all have designated spots. This system works for both everyday wear and special occasion jewelry.
The project cost far less than custom solutions. It delivered professional results that look amazing. I feel proud every time I open my organized drawer.
Maintaining this system takes minimal effort. Quick tidying sessions keep everything perfect. This project inspired me to organize other areas of my home too.
I encourage everyone to try this rewarding project. Feel free to ask questions in the comments. Happy organizing!