How do I stop kitchen cabinet doors from banging at night?
I used to experience those startling cabinet door noises in the middle of the night. The sudden bang would jolt me awake, leaving me frustrated. This common household issue affects many homeowners.
Temperature changes and house settling often cause these sounds after dark. The door closes differently when everything cools down. Finding the right solution transformed my kitchen from noisy to peaceful.
Proper maintenance of your cabinets contributes to overall home comfort. Addressing this promptly can prevent more serious damage to the frame and hinge. With the right approach, anyone can solve this annoying problem.
Solving this improved my sleep quality and home environment dramatically. I’ll share my personal experience and effective methods that worked for me.
Key Takeaways
- Temperature changes at night affect how cabinet doors close
- House settling contributes to nighttime cabinet noises
- Proper maintenance prevents more serious cabinet damage
- Quick fixes can transform your kitchen environment
- Addressing this issue improves overall sleep quality
- Simple solutions exist for this common household problem
- Regular checks on hinges and frames prevent future issues
Understanding Why My Kitchen Cabinet Doors Bang at Night
Those unexpected nocturnal disturbances from my cabinets prompted me to investigate the root causes. The journey revealed fascinating scientific principles at work in every home.
The science behind those mysterious nighttime noises
Temperature changes significantly impact how wooden components behave. As temperatures drop at night, materials contract slightly. This subtle movement can alter the alignment of your storage units.
Humidity fluctuations also play a crucial role. Wood naturally absorbs and releases moisture from the air. This expansion and contraction cycle affects how each door fits within its frame.

I noticed the banging was worst during extreme weather changes. Cold, dry nights created the most dramatic effects. The physics behind this involves simple material science principles.
“Wood moves with seasonal changes – it’s a natural characteristic that requires understanding rather than fighting against.”
My research revealed that house settling over time contributes significantly to these noises. As structures age, they gradually shift and settle into their foundations.
Common household factors that contribute to door banging
HVAC system operation affects indoor environments more than people realize. Heating and cooling cycles create temperature variations throughout your living space. These changes make cabinet doors expand and contract differently.
Different design approaches react uniquely to environmental shifts. Overlay styles versus inset configurations each have distinct movement patterns. Understanding your specific cabinet type helps address the issue effectively.
The quiet of night amplifies sounds that daytime activity masks. What seems minor during daylight hours becomes pronounced in stillness. This contrast made me realize the problem existed all along.
| Factor | Effect on Doors | Time of Maximum Impact |
|---|---|---|
| Temperature Drop | Material contraction | 2-4 AM |
| Humidity Change | Wood expansion/contraction | Late evening |
| HVAC Cycling | Air pressure changes | Throughout night |
| House Settling | Structural shifts | Early morning |
Proper hinge maintenance emerged as a critical factor. Worn or loose hardware cannot properly secure the moving parts. This discovery helped me choose targeted solutions for my situation.
The way my home was constructed influenced the noise patterns. Older properties with wooden frames behave differently than modern builds. Each wall and connection point contributes to the overall acoustic environment.
This understanding transformed my approach to the problem. Instead of temporary fixes, I sought solutions addressing root causes. The right tip or adjustment made all the difference in achieving peaceful nights.
Checking and Adjusting My Cabinet Door Alignment
My investigation led me to discover that proper alignment was the foundation for solving my noise problem. Getting this right made all the difference in achieving peaceful operation.
How to identify misaligned cabinet doors
I learned to spot alignment issues by examining the gaps around each door. Uneven spacing between panels indicated adjustment was needed. This visual inspection became my first diagnostic step.
Determining the design style was crucial for proper correction. Overlay and inset configurations require different approaches. I checked each unit to understand its construction type.

Testing closure revealed hidden problems. When I closed each door completely, uneven contact points became obvious. This simple test showed me exactly where adjustments were needed.
Simple fixes using basic tools from my garage
My Phillips screwdriver became my best friend for this project. Tightening loose screws on the hinge plates often solved minor alignment issues. This quick fix addressed many of my problems.
I discovered that straightening crooked panels required minimal effort. Small adjustments to the hinge mechanism brought everything into proper position. The transformation was immediate and satisfying.
Proper alignment eliminated the banging completely in my space. The frame and components worked harmoniously once everything was properly positioned. This solution created the peaceful environment I wanted.
Addressing alignment first prevented more serious issues from developing. Regular maintenance now keeps my storage units functioning quietly. The right approach made all the difference.
Adjusting Hinge Settings for Quieter Operation
My journey toward peaceful nights led me to discover the magic of proper hinge adjustments. This revelation changed everything about how my storage units functioned after dark.
The right tension settings transformed noisy panels into silent performers. This adjustment process became my secret weapon against nocturnal disturbances.
Identifying different hinge types in my kitchen
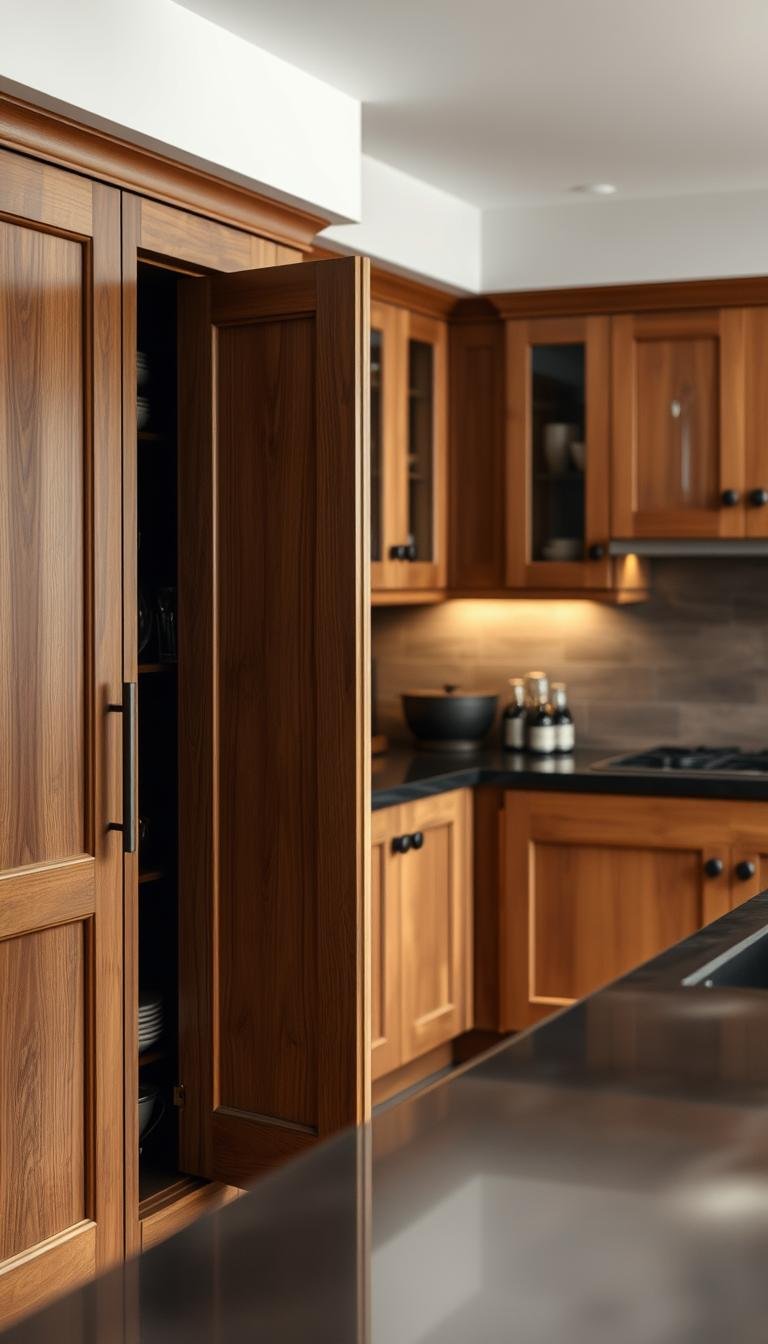
I found several hinge varieties throughout my cooking space. European-style cup hinges dominated most of my storage units. These feature a distinctive cup that mounts inside the door.
Some older units had surface-mounted butt hinges visible on the exterior. Each design requires different adjustment techniques. Recognizing these differences helped me approach each one correctly.
I learned to spot the adjustment mechanisms on each style. The European models typically have a small lever or screw for tension control. This knowledge made the adjustment process much simpler.

Step-by-step guide to adjusting tension settings
Locating the adjustment mechanism proved crucial for success. I looked for the gray or silver plunger in the hinge center. This small component controls the closing tension.
Setting the right tension depends on panel size and weight. Lighter settings work best for smaller units. Medium tension suits regular-sized panels perfectly.
Larger, heavier units require the strongest setting available. This prevents them from swinging too freely. The proper tension ensures smooth, controlled movement every time.
I used simple tools from my household toolkit. A Phillips screwdriver handled most adjustments. Some models required an Allen wrench for precise tuning.
Testing and fine-tuning the adjustments
Testing each adjustment immediately showed me the results. I opened and closed each panel multiple times. This revealed whether the tension felt right.
Fine-tuning became an iterative process of small changes. Minor adjustments often made significant differences. The perfect setting emerged through patient experimentation.
Proper tension prevents panels from slamming shut. They close smoothly and quietly instead. This transformation eliminated all those jarring nighttime sounds.
The right adjustment protects the frame and hardware from damage. It extends the life of your storage units dramatically. This simple maintenance step saves money and frustration.
“The difference between noise and silence often comes down to one-eighth of a turn on the adjustment screw.”
Some units required additional troubleshooting beyond basic adjustments. When simple tuning didn’t work, I investigated other potential issues. Worn hardware sometimes needed replacement instead of adjustment.
This process taught me the importance of regular maintenance. Now I check my hinge settings seasonally. Temperature changes affect tension requirements throughout the year.
The transformation in my home environment proved remarkable. Peaceful nights returned once I mastered these adjustments. My storage units now operate silently and smoothly.
Installing Hinge Restrictor Clips to Prevent Damage
My quest for quiet led me to discover an ingenious little device that completely transformed my storage solutions. These simple plastic clips offered protection I never knew my space needed.
What restrictor clips are and how they work
Hinge restrictor clips are small plastic accessories that limit opening angles. They prevent panels from swinging too far open. This control stops contact with nearby surfaces.
The mechanism is beautifully simple yet effective. Each clip attaches directly to the hinge assembly. It creates a physical stop at the desired opening point.

Most models limit movement to a 90-degree angle. This keeps everything safely away from walls and other obstacles. The protection extends to both the door and the surrounding area.
“These tiny clips solved two problems at once – they protected my walls while eliminating those jarring impact sounds.”
Sourcing affordable clips for European-style hinges
Finding the right components proved easier than I expected. Major manufacturers produce these accessories for their hinge systems. Compatibility depends on your specific hardware brand.
I discovered incredible value in bulk purchases. A couple dozen clips cost me less than five dollars online. Local hardware stores also carry them at reasonable prices.
Measuring my existing hardware ensured perfect compatibility. I noted the brand and model number before ordering. This tip saved me from purchasing incorrect items.
Proper installation technique for maximum effectiveness
Installation requires minimal tools and basic DIY skills. I used a simple screwdriver for the entire process. Safety glasses protected my eyes during the work.
The process involves attaching clips to the hinge mechanism. Each clip snaps or screws into place securely. Proper alignment ensures smooth operation without restrictions.
Testing the movement after installation confirmed success. Each panel now stops gracefully at the perfect point. The transformation eliminated all concerns about wall damage.
This solution proved incredibly cost-effective and permanent. My storage units now operate with controlled, quiet precision. The peace of mind was worth every penny spent.
Adding Soft-Close Mechanisms to Existing Cabinets
My search for a permanent solution led me to explore soft-close technology. This upgrade transformed my entire kitchen experience dramatically. The difference felt like moving from basic to luxury overnight.
Soft-close systems use hydraulic dampers built into the hinge mechanism. They engage during the final closing phase. This creates a smooth, silent motion every time.

When to consider upgrading to soft-close hinges
Upgrading makes sense when other adjustments provide temporary relief. Persistent noise indicates a need for more advanced solutions. The investment protects your cabinet doors and frames long-term.
Consider this upgrade if you have children or elderly family members. The safety benefits are significant. No more pinched fingers or sudden loud noises.
My decision came after realizing the cumulative cost of temporary fixes. Constant adjustments were consuming my time. The permanent solution actually saved money over years.
DIY installation versus professional help
DIY installation works well for standard European-style hinges. Most models feature adjustment tabs or levers for easy setup. You’ll find the mechanism by closing the door completely.
Basic tools handle most installations successfully. A screwdriver and measuring tape cover the essentials. Patience matters more than advanced skills.
Professional team assistance becomes valuable for complex situations. Heavy or oversized doors often need expert handling. Custom cabinets might require special ordering.
| Installation Type | Best For | Average Cost | Time Required |
|---|---|---|---|
| DIY | Standard cabinets | $50-100 | 2-4 hours |
| Professional | Custom cabinets | $200-400 | 1-2 hours |
| Hybrid Approach | Mixed cabinet types | $150-250 | 3-5 hours |
The cost-benefit analysis clearly favored upgrading. Soft-close mechanisms protect your investment beautifully. They extend the life of your storage units significantly.
My experience taught me that proper preparation ensures success. Measuring existing hardware prevents compatibility issues. Taking time to understand the system pays dividends.
This upgrade provided the permanent silence I desperately wanted. The gentle closing motion feels luxurious every time. My home finally achieved the peaceful atmosphere I deserved.
Alternative Solutions for Persistent Door Banging
Sometimes the simplest remedies provided the most effective results for those stubborn cabinet disturbances. When standard adjustments didn’t completely solve the problem, I discovered creative alternatives that made a significant difference.
These low-cost solutions often addressed the root cause more effectively than complex repairs. My experimentation revealed which approaches worked best in different situations around the house.
Using felt pads and other simple buffers
Felt pads became my go-to solution for many persistent noise issues. These inexpensive stickers provided just enough cushion to prevent hard contact between surfaces.
I tested various thicknesses and materials to find the perfect balance. Thicker pads worked better for heavier panels while thinner ones suited lighter doors.
Different buffer types served specific purposes throughout my home. Rubber bumpers offered more durability in high-traffic areas. Silicone dots provided excellent grip on smooth surfaces.

Strategic placement proved crucial for maximum effectiveness. I positioned buffers at the points where contact occurred most frequently. This simple tip eliminated the banging completely in several locations.
| Buffer Type | Best Applications | Cost Range | Effectiveness Rating |
|---|---|---|---|
| Felt Pads | Light to medium doors | $2-5 per pack | Excellent |
| Rubber Bumpers | Heavy doors, high use | $3-7 per pack | Outstanding |
| Silicone Dots | Smooth surfaces | $4-8 per pack | Very Good |
| Foam Strips | Large contact areas | $5-10 per roll | Good |
“The right buffer in the right place can solve problems that expensive repairs cannot fix.”
When cabinet door replacement might be necessary
Despite my best efforts with buffers and adjustments, some situations required more drastic measures. Severe warping or structural damage sometimes made replacement the only practical solution.
I learned to recognize when repairs reached their limit. Extensive water damage often compromised the integrity beyond repair. Major warping that affected multiple panels indicated replacement time.
Cost-effectiveness became an important consideration in my decision process. When repair costs approached replacement expenses, choosing new components made better financial sense.
Working with a design team helped me select matching replacements that maintained my kitchen’s aesthetic. Professional guidance ensured the new door would fit perfectly and function properly.
This approach finally brought a permanent end to the persistent noise issue. The investment in quality replacements provided lasting peace and quiet throughout my home.
Conclusion: Enjoying My Peaceful, Quiet Kitchen
My journey from noisy nights to peaceful mornings taught me valuable lessons about home maintenance. The transformation required understanding my cabinet design and addressing each issue systematically.
Simple solutions like hinge adjustments and felt pads made a huge difference. For more persistent problems, soft-close mechanisms provided the perfect end solution. Every home deserves this level of quiet comfort.
Regular maintenance keeps everything working smoothly. A quick check every couple months prevents most issues. This small investment of time protects your cabinet frames and hardware long-term.
The right approach depends on your specific situation. Some cases need professional team assistance while others are perfect DIY projects. Either way, peaceful nights are absolutely achievable.
Addressing this seemingly small issue dramatically improved my daily life. The quiet operation makes my entire home feel more serene. I finally enjoy the peaceful environment I always wanted.