What are the top reusable adhesive strips for heavy frames?
I test picture hanging gear so you can skip guesswork. I focus on weight ratings, surface fit, and true reusability. That gives you results you can trust when you hang valuable art or family photos.
I explain how brands guide weight limits: 3M’s Large pairs work up to 15 lb, Gorilla’s heavy duty mounting tape suggests about 2 inches per pound to 60 lb, and Scotch-Mount notes roughly 3 inches per pound up to 15 lb. I also cover temperature and surface rules so you know when a product will hold.
Expect clear advice on choosing between strips and tape, avoiding common failures, and prepping common walls like painted wood or metal. I’ll note when hardware beats adhesive and how to protect paper-backed frames or those with sawtooth hangers.
Key Takeaways
- I test weight, surface compatibility, and reuse to give practical picks.
- 3M, Gorilla, and Scotch offer different guidance—match product to weight.
- Temperature and surface texture affect hold; outdoor-rated items differ.
- Remove or adapt frame hardware for full contact and safe hanging.
- Use tape for very heavy loads or textured walls when strips won’t bond.
My goal with this product roundup and who it’s for
This product roundup focuses on damage-conscious hanging solutions that work in real homes and dorms. I built it for renters, homeowners, and students who want a tidy install without drilling or ruining paint.
I test each product by weight verification, surface fit, and ease of removal. That lens helps me compare options fairly and spot real-world limits before you buy.
I highlight when to choose reusable adhesive strips, mounting tape, or hooks based on frame size and back hardware. I also call out alternatives when a wall surface or heavy load makes adhesives a risky pick.
- Practical use cases: gallery walls, nurseries, hallways, and seasonal decor.
- Value, availability in U.S. stores, and clear instructions so you get the right product fast.
- Recommendations built to suit common interior wall finishes in apartments and houses.
My aim is simple: help you hang polished decor that stays put and comes down clean when you move or redecorate.

Quick picks: The best heavy-duty picture hanging strips right now
Here are my quick picks that balance strong hold with clean removal for everyday picture projects.
Best overall: Command Picture Hanging Strips (large) — reliable weight range up to 16 lbs per pair, clear instructions, and included prep wipes make wall-ready installs easy.
Value pick: Generic heavy duty hanging strips multi-pack — solid performance per dollar for gallery walls and photo groups. Good for multiple small frames.

Renter favorite: Command damage free hanging kit — removes cleanly when used as directed and is widely available in big-box stores.
Maximum-capacity option: Gorilla heavy duty mounting pairs — meant for large picture loads; scale up by adding extra pairs and place them at frame corners for best distribution.
Textured-wall alternative: Heavy duty mounting tape with high-tack adhesive works better on slightly textured surfaces where standard hanging strips struggle.
- Quick weights and pairs: noted on each product label — match your picture to the recommended pairs.
- Look for products that include alignment guides or easy-level features to re-level frames simply.
- Confirm your frame back is flat for full contact before buying.
How I choose adhesive strips for large picture hanging and heavy frames
I combine manufacturer specs with hands-on tests to find safe, predictable solutions. I start with published weight ratings and then verify them with calibrated weights. That confirms whether a label matches real use.
Weight and pairs matter. For example, 3M recommends four pairs of Large Picture Hanging Strips up to 15 lb, while Gorilla suggests about 2 inches of tape per pound up to 60 lb. Scotch-Mount lists roughly 3 inches per pound up to 15 lb. I use those rules to plan placement and scaling.

Damage-free vs permanent bond
I pick removable hanging strips for finished walls and stronger tapes for textured or high-load jobs. Removability wins when damage avoidance is key.
Removal and reusability
I test ease of removal step-by-step to see if a claim of reuse holds up. I watch for creep, heat sensitivity, and how forgiving the adhesive is during placement.
| Test Point | What I Check | Brand Example | Typical Guidance |
|---|---|---|---|
| Weight rating | Published vs real test | 3M / Gorilla / Scotch | 4 pairs = 15 lb; 2 in/lb to 60 lb; 3 in/lb to 15 lb |
| Placement | Pairs needed and distribution | Command style | Corner placement, add pairs for larger pieces |
| Removal | Damage risk and true reuse | Command | Follow prep and peel steps for clean removal |
What are the top reusable adhesive strips for heavy frames?
After hands-on trials, I picked products that hold big pictures without wrecking painted wallboard.
Best overall: Command Large Picture Hanging Strips. I like that 3M recommends four pairs for items up to 15 lb, and suggests placing strips at top corners and halfway down the frame. Follow prep steps and cure time for true damage-free hanging picture results.
Best value pick
The value option gives strong, consistent hold for gallery walls at home. Packs cover multiple pieces and make it easy to scale by adding extra pairs for larger items.
Best for renters
My renter choice removes cleanly from painted wallboard more often than others when instructions are followed. That minimizes patching or repainting after move-out.
- Start with four pairs for frames up to 15 lb; add two pairs per extra 5 lb as a safe rule.
- Use interlocking (hook-and-loop style) closures where available to help leveling on heavier pictures.
- Check frame backs—no protruding hardware—for a flush bond before application.

| Pick | Best Use | Pairs Guidance | Surface Notes |
|---|---|---|---|
| Command Large | Damage-free hanging picture | 4 pairs up to 15 lb; place top corners + mid | Painted wood, painted wallboard, metal |
| Value multi-pack | Multiple gallery pieces at home | 3–4 pairs per medium frame; buy extra pairs | Works on smooth, painted walls |
| Renter kit | Clean removal for leases | 4 pairs for small/medium; add for larger | Best on painted wallboard; avoid heavy texture |
Quick shopping list: grab Command or similar large packs, an extra 6–8 pairs for bigger frames, and alignment aids. Need more options? Check this picture hanging link on Amazon: picture hanging strips.
Top pick for maximum weight capacity and large frames
I pick solutions that increase contact area and spread load for the largest picture hanging jobs. For the safest adhesive-based hold, use multiple pairs and place them so the frame’s top edge resists peel.
Placement rule: use four pairs on items up to 15 lb, set at the top corners and halfway down the frame. That cut in peel force prevents the upper edge from lifting.

Recommended pairs per weight and when to switch methods
I follow a simple scale to plan installs: stay 20% under published limits for long-term reliability. If a frame gains weight from mats or glass, reweigh before final placement.
| Weight bracket | Pairs guidance | When to upgrade |
|---|---|---|
| Up to 10 lb | 3–4 pairs, corners + mid | OK with command style strips |
| 10–15 lb | 4–6 pairs, add along top rail | Consider extra pairs or mounting tape |
| 15–60 lb | Scale with added tape (2 in per lb) or use hardware | Switch to mounting tape or screws over 15 lb |
“Distribute load, increase contact, and always permit a safety margin,” is my practical rule for large picture hanging.
- For panoramic pieces, add pairs along the top rail to prevent bowing.
- Use inches-per-pound guidance: Gorilla suggests ~2 in/lb; Scotch lists ~3 in/lb for lighter mounts.
- Mark locations before exposing adhesive; heavy pieces forgive little misalignment.
Final note: framed glass adds weight. If glazing or backing raises the total, move to mounting tape or traditional hardware rather than overloading extra pairs.
Best alternative for textured surfaces: heavy duty mounting tape options
Textured walls, brick, or rough concrete often beat picture hanging strips. In those cases, I switch to heavy-duty mounting tape to get continuous contact and true hold.

When to choose mounting tape over strips:
- If texture is rougher than orange peel or the wall sheds dust, strips won’t seal; use mounting tape heavy enough to bridge gaps.
- Gorilla recommends about 2 inches of tape per pound up to 60 lb; Scotch-Mount suggests 3 inches per pound up to 15 lb.
How I test and apply tape length
I first run a small sample bead to check adhesion and removal risk. If it sticks clean and holds a light load, I expand to full runs.
| Brand | Inches per lb | Max guidance |
|---|---|---|
| Gorilla | 2 in / lb | Up to 60 lb |
| Scotch‑Mount | 3 in / lb | Up to 15 lb |
- Trade-off: tape is stronger but closer to permanent and can cause damage on drywall.
- Run parallel vertical strips or a perimeter frame to increase contact on uneven surfaces.
- Prep dusty masonry with a wire brush and wipe; avoid tape on irreplaceable finishes—use anchors instead.
Quick shopping checklist: look for tape heavy duty labeled for masonry or outdoor mounting, and consider double sided tape or sided tape heavy variants if weather is a factor.
Understanding weight and size limits before you buy
I break down rating labels so you can match a product to your frame with confidence. Read labels carefully: 3M lists four pairs of Large Picture Hanging Strips for items up to 15 lb. For posters, use four small poster strips — one in each corner.

Reading weight ratings correctly
Framed pieces concentrate load at hardware points. A printed rating for a flat poster won’t always apply to a framed picture that has glass or mats.
Using multiple pairs and distributing load
Use multiple pairs when weight climbs. Place pairs at top corners and halfway down the frame to share load and reduce peel.
Taller pieces can accept extra pairs along the top rail to stop tipping. Avoid mixing different strip sizes on one frame; uneven transfer causes failures.
| Item | Guidance | Why it matters |
|---|---|---|
| Poster (paper) | 4 poster strips, corners | Even hold, low weight |
| Framed picture | 4 pairs up to 15 lb; add pairs for more | Distributes shear and peel forces |
| Oversized piece | Multiple vertical pair columns | Resists torque and bowing |
“Leave a safety margin below published limits to account for humidity and long-term creep.”
Quick checklist: weigh your frame with glass and mat, use a level and painter’s tape guides, and keep alcohol wipes, a level, and a pencil among your tools for a clean install.
Surface and wall type: where hanging strips do and don’t work
Before you buy, I map common room walls to the best hanging choices so you don’t guess. Matching your surface to the right product prevents creaks, drops, and paint repairs later.
Approved surfaces I trust most often include painted wood, painted wallboard, metal, and painted cinder block. On these, command strips and similar wall hanging strips form good contact when the paint is cured and the area is clean.
Avoid these surfaces: highly textured walls (rougher than an orange peel), unpainted brick, bare concrete, and wallpaper. Wallpaper and fabric-backed walls can rip; I do not risk adhesive on delicate finishes.

Texture and porosity matter because they reduce real contact area. Even strong adhesive fails if it can’t touch enough surface.
- I test texture with a coin: if the edge rocks on peaks, it’s too rough for strips.
- For rough walls, use heavy-duty mounting tape or mechanical anchors instead of hanging strips.
- Clean surfaces with isopropyl alcohol to remove oils and dust before applying any product.
| Surface | Works? | Notes |
|---|---|---|
| Painted wallboard | Yes | Best when cured and clean |
| Painted cinder block | Yes (if painted & clean) | Common in dorms; ensure paint covers pores |
| Unpainted brick / concrete | No | Use anchors or masonry tape |
“If your wall texture is worse than an orange peel, switch to tape or anchors.”
Plan your layout around the best-performing wall areas. That simple step cuts risk of later damage and gives your picture the best chance to stay put.
Indoor vs. outdoor use and temperature performance
I test how temperature swings change long-term grip so you can avoid mid-season falls.
Indoor temperature ranges: Most indoor products perform best between 50°F and 100°F. Command indoor items list that range explicitly, and I stick to it when hanging a picture on a bedroom or living room wall. Large day-to-day swings reduce hold over months.
Outdoor-rated options for extreme climates
Outdoor-rated command options are built for -20°F to 125°F. Use these in garages or covered patios. When applying outdoors, ensure ambient temps are above 15°F so the adhesive can wet out and form a proper bond.
Why application temperature matters
Humidity and heat affect tack. High moisture can undermine some adhesives on fresh paint. In my tests, backed mounting tape keeps a steadier contact than hook-and-loop closures in damp or variable conditions.
- Acclimate strips and the frame to room temp before install.
- Time installs when temps will stay stable for 24 hours to let bonds cure.
- Leave a small safety margin under rated loads to handle seasonal shifts.

Frame backs, hardware, and achieving a flush, secure hold
I inspect the reverse of each picture to find solid, flat areas where the strip will make full contact with the wall.
If a hanger or wire sticks out, remove it so strips or double-sided tape can sit flush. When hardware can’t come off cleanly, I prefer a low-profile hook that accepts existing hardware rather than forcing adhesive over bumps.
Paper-backed frames pose a special risk. Thin paper can tear under load and transfer stress to the art and wall. My fix is simple: remove the paper liner or add a rigid backing board so the adhesive bonds to firm material.

Practical checks and quick wins
- Map flat zones on the back and place strips symmetrically to spread load.
- Use temporary spacers while pressing to ensure full contact as the adhesive sets.
- Avoid spanning hollow cavities without reinforcement—add a backing board first.
| Issue | Fix | Note |
|---|---|---|
| Protruding sawtooth | Remove or use low-profile hook | Prevents gap and peel |
| Paper backer | Replace with board | Stops tearing and preserves art |
| Hollow frame | Add stiffener | Distributes shear forces |
“A true flush contact beats brute force—match backing to the product and your wall will thank you.”
Quick checklist: confirm flat contact, remove loose hardware, reinforce paper backs, and pick a hook if hardware is integral. Follow these steps and your hanging picture job will stay secure.
Installation basics that actually prevent failures
I walk through practical steps that stop common hanging failures before they start. Follow these to cut risk and get a professional result with minimal fuss.
Placement matters: 3M recommends a strip at each top corner and one halfway down the frame to spread load. For tall pieces, add a vertical column of pairs along the top rail to resist tipping forward.
Prep the wall and frame contact points with isopropyl alcohol to remove dust and oils. Dry-fit using painter’s tape marks and a level so you only expose adhesive when alignment is perfect.
Apply firm, even pressure across each pad for the time the manufacturer specifies. Consistent pressure helps the adhesive wet out and bond across the full pad surface.
- Allow cure time before loading full weight; outdoors, apply above 15°F so the bond can set properly.
- Use a level and measuring tape as essential tools for accurate placement.
- Avoid touching adhesive with fingers, and don’t rush the cure — those mistakes cause most failures.
“Do a final safety tug test to confirm the interlock and bond before you walk away.”

Damage-free removal and tips for reuse
When it’s time to take down a frame, slow, steady technique saves your wall and your nerves. I focus on steps that protect painted drywall and avoid tears while keeping parts reusable when sensible.

Safe steps to protect paint and drywall
Start warm: bring the room to a moderate temp so paint stays flexible. Peel slowly along the wall surface—do not yank. If a tab is provided, use the stretch-release motion in a single, even pull.
When not to reuse and how to keep performance steady
Avoid reuse when a strip collected dust, oils, or lost shape. Never apply to wallpaper or delicate finishes; those surfaces may rip. Follow manufacturer instructions for clean removal to preserve finishes and the product warranty.
- Label frames with install date and pairs used so you know when to refresh.
- If a tab breaks, warm the area and work outward from a corner to ease the remaining adhesive.
- Store unopened packs sealed at room temperature to keep adhesive reliable.
“Take your time: careful removal prevents damage and makes smart reuse possible.”
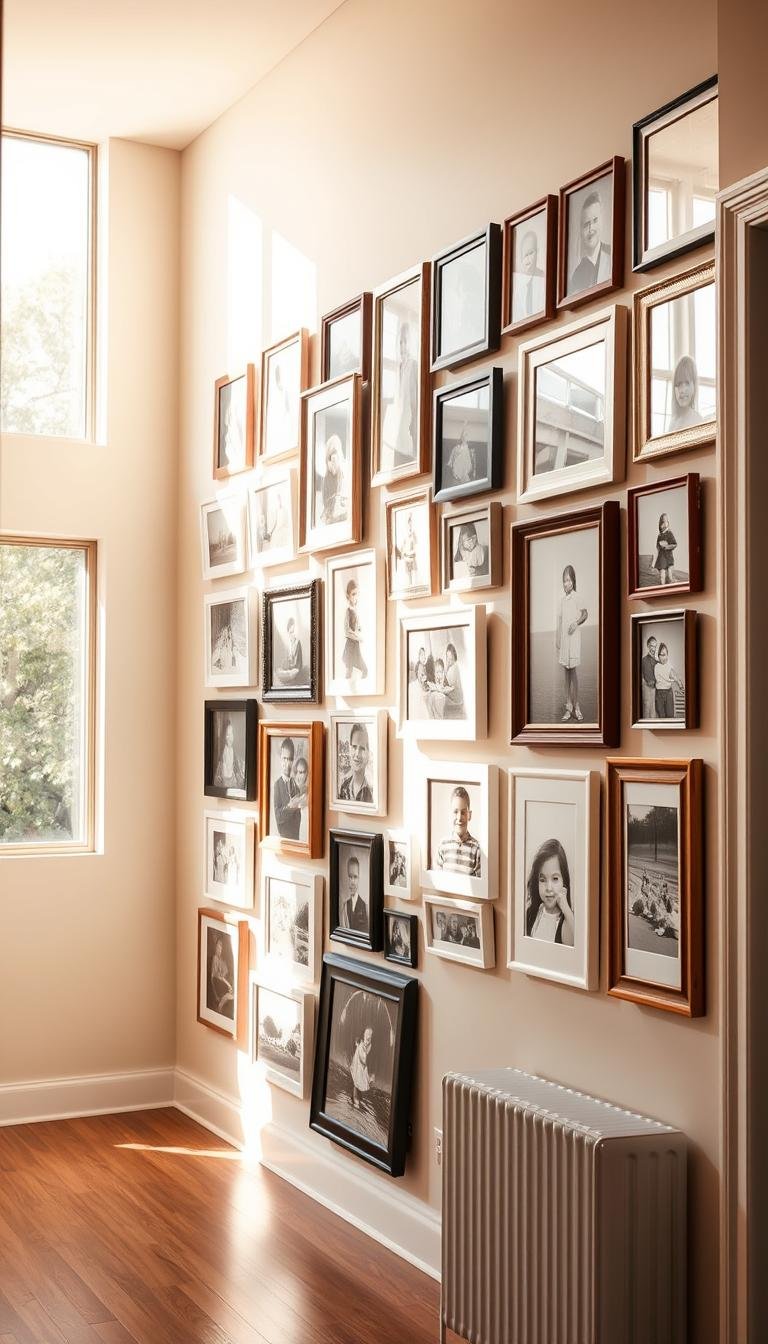
Large picture hanging vs. posters: choosing the right product type
I break down when a simple poster solution works and when a sturdier picture hanging approach is needed. Posters are light and forgiving, so four small poster strips—one in each corner—usually hold well and let you reposition prints without damage.
Framed art changes the rules. A glass front, matting, and a rigid back add weight and torque. For many framed pieces up to 15 lb, I use four pairs of Large Picture Hanging Strips placed at the top corners and midpoints to spread load and stop peel.

Surface prep matters for both types. Wipe contact areas with isopropyl alcohol, confirm flat backing, and avoid delicate paints or wallpaper that can lift. In rentals I balance clean removal with enough strength to protect the art.
- Mix gallery walls by using poster strips on paper prints and pairs on framed pieces to keep spacing even without odd gaps.
- Upgrade to stronger options when glazing or thick matting adds ounces—reweigh before final placement.
- Plan pack counts ahead: buy extra pairs so you can treat posters and frames in one project without running short.
“Match the load and backing to the right adhesive solution and your display will stay upright and damage-free.”
For a practical how-to and product notes, see how to use Command strips.
Command strips, hooks, and mounting tape: when each makes sense
I walk through when to pick a hidden strip, a small hook, or a full tape run so your picture stays put. My goal is simple: match the backing and wall to the right method and avoid surprises at install.
Low-profile hooks vs. strips for frames with hardware
If your frame has a sawtooth or wire, you can remove that hardware and use command strips for a flush fit. When removal isn’t possible, a low-profile hook lets you keep existing hangers and still get a neat look.
Quick rule: choose a hook when the back is obstructed, and strips when the back is flat and makes full contact.

- When command strips excel: smooth painted surfaces, renter-friendly installs, and invisible mounts.
- When a hook is smarter: wired frames, protruding hardware, or when you need easy leveling.
- When mounting tape wins: textured walls, masonry, or outdoor spots where hook-and-loop closures can’t seal.
- Tools to bring: alcohol wipes, a level, and measuring tape to prep and align every time.
| Method | Best on | Renters? |
|---|---|---|
| Command strips | Painted wallboard, metal | Yes — damage-free when used per directions |
| Low-profile hook | Frames with existing hangers | Yes — minimal wall impact |
| Mounting tape | Textured or masonry | No — can be more permanent |
Hybrid option: use a hook for the main vertical load and add a pair of small strips as anti-tip anchors. That combines convenience with extra security.
“Match your wall, backing, and weight — and bring the right tools so you leave with one correct product and no returns.”
Room-by-room ideas for home decor without nails
I map practical, room-specific hanging ideas that avoid holes and keep decor flexible. In the entryway I hang mirrors and framed art with damage-free pads so guests see a polished foyer and I skip a nail.
Living room: mix frame sizes and spacing for visual rhythm. Use lightweight picture pairs at staggered heights to build a gallery without extra hardware.
Kitchen & dining: choose small prints or plates on clean, painted surfaces. Moderate humidity means avoid prolonged adhesive contact near stoves unless ventilation is strong.
Nursery and kids’ rooms: I favor removable options so you can rearrange as tastes change. Keep heavy pieces off low walls and use extra anchors on high-traffic doors.
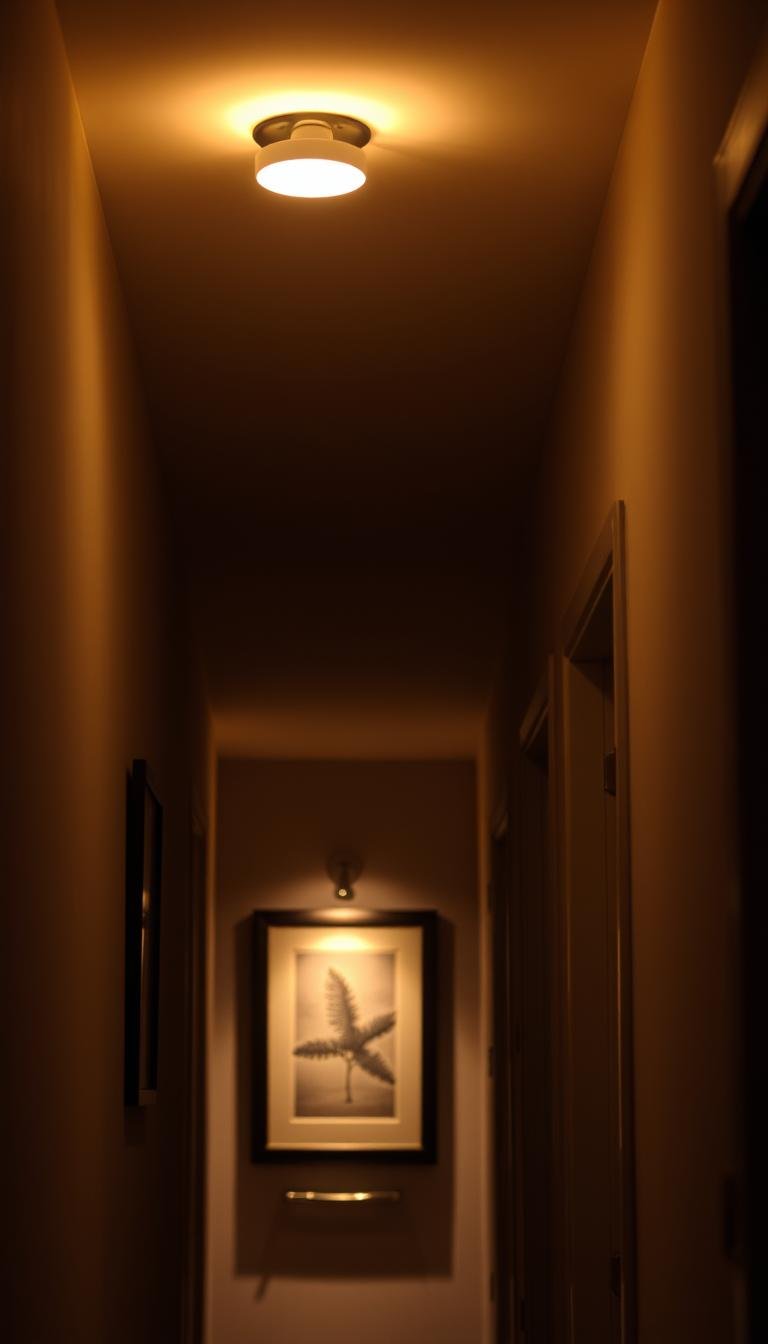
Hallways & home office: run photo strips in a row for seasonal swaps. In offices, rotate certificates and prints with easy-to-remove mounts so work walls evolve.
Bathroom tips: only hang art on well-vented, painted walls. Avoid strong adhesive on steamed surfaces to prevent failure.

- Plan by wall type, humidity, and weight.
- Use the right strips and keep spare products on hand.
- For doors and busy areas, add anti-tilt anchors to stop vibration loosening.
Buying guide: what to check on the label before checkout
Before checkout, I scan labels so you buy enough capacity and the right pack for your project. A few quick checks prevent returns and ruined walls.

Weight per pair, strip size, and pack count
I look for weight per pair and convert that into how many pairs I need. For example, four pairs of Large Picture Hanging Strips cover up to 15 lb, and four small Poster Strips work in each corner for light prints.
Tip: buy an extra pack so you can test placement and finish a gallery without running out.
Indoor/outdoor rating and compatible surfaces
Check indoor vs. outdoor ratings and the listed compatible surfaces. Indoor command products list 50°F–100°F; outdoor options span −20°F to 125°F but must be applied above 15°F.
Avoid highly textured walls, unpainted brick, concrete, and wallpaper. Best surfaces include painted wood, painted cinder block, metal, and painted wallboard.
Temperature range and removal instructions
Note the temperature window and look for clear removal steps or stretch-release tabs if damage-free results matter. Scan labels for included tools like prep wipes or templates that speed a clean install.
| Metric | Where to find it | Example | Why it matters |
|---|---|---|---|
| Weight per pair | Back label / specs | 4 pairs = 15 lb (Large) | Decides how many pairs you need |
| Surface compatibility | Front or rear panel | Painted wallboard, metal, painted wood | Tells if product will bond cleanly |
| Tape math | Instructions / tech sheet | Gorilla: ~2 in/lb; Scotch: ~3 in/lb | Use for double sided tape or full tape runs |
“Read labels first: weight, surface, and removal instructions are the three details that save time and walls.”
Conclusion
I close by stressing that matching weight, wall type, and product choice prevents messy falls and patch jobs.
Use enough pairs and place them where they counter peel. Respect cure times and room temperature so bonds set right. Those steps cut most failures before they start.
Pick command when you want damage-free results on painted surfaces. Choose a low-profile hook if hardware won’t come off. Switch to heavy duty tape when walls are textured or masonry.
Keep reuse in mind: replace worn pads, avoid dirty contact areas, and store extras at room temperature. A small kit of strips and tape saves time when you redecorate.
A little prep goes a long way. Wipe with alcohol, mark locations, and test before final press. If you follow these rules, your picture hanging will look great and stay secure without nails or stress.