How do I choose a shower niche size that fits full-size bottles?
Getting your shower niche dimensions right makes a huge difference in daily use. Nothing’s more frustrating than trying to squeeze large shampoo and conditioner containers into a space that’s too small. The right measurements ensure everything stays organized and accessible.
Based on my experience and industry data from sources like Schluter Kerdi, the most popular prefab niche measures 12″ wide by 20″ high with a 3.5″ depth. This accommodates most family-sized products comfortably.
Standard options typically range from compact 12×12 units to more spacious 16×20 designs. Understanding your specific storage requirements is the essential first step toward a functional and beautiful shower area.
This guide will walk you through everything from measuring your wall space to installation considerations. I’ll share practical insights on what truly works for keeping all your essentials within easy reach.
Key Takeaways
- The most popular prefab shower niche size is 12×20 inches with 3.5-inch depth
- Standard niche sizes range from 12×12 to 16×20 inches
- Proper sizing ensures comfortable storage for shampoo and conditioner bottles
- Niche depth is typically limited by standard wall stud spacing
- Understanding your storage needs is the first step in selection
- This guide covers measurements, installation, and practical considerations
Why Getting Your Shower Niche Size Right Matters
Properly sizing your shower recess transforms it from mere storage to a functional design element. This decision impacts your daily routine and the overall aesthetic of your space. Getting it wrong can lead to frustration that lasts for years.

More Than Just Storage: Form and Function
A well-proportioned shower cavity serves dual purposes beautifully. It keeps your essentials organized while enhancing your bathroom’s visual appeal. This combination of practicality and style creates a truly upgraded experience.
Unlike bulky racks or corner shelves, these built-in solutions eliminate visual clutter. They provide a clean, integrated look that complements your tile work. The right proportions ensure everything feels accessible, not cramped.
I’ve found that investing time in proper planning pays off tremendously. Your daily routine becomes smoother when products fit perfectly. The space serves both practical and visual needs seamlessly.
Avoiding Regrets After Your Remodel
Poor sizing decisions can lead to lasting disappointment after renovation. Imagine finishing your dream bathroom only to find your favorite products don’t fit. This common mistake creates daily frustration and wasted space.
Getting the measurements correct saves money and prevents future headaches. It’s much easier to plan properly than to fix issues later. Thoughtful planning ensures your investment brings satisfaction for years to come.
The right approach prevents products from feeling inaccessible or cramped. It transforms your shower area into an organized, beautiful space. This attention to detail makes all the difference in your daily experience.
Understanding the Basic Constraints: Stud Bays and Depth
Your shower’s wall structure determines what’s possible for built-in storage. I always start by examining the framework behind the tiles. This approach prevents surprises during installation and ensures lasting results.

The Standard Stud Bay and Its Limitations
Most residential walls feature studs spaced 14.5 inches apart. This measurement creates the natural cavity where your storage recess will live. Standard prefabricated units are designed to fit perfectly within this space.
Older homes typically maintain this consistent spacing throughout. Newer construction might show variations in different areas. Always verify your actual measurements before making any purchases.
How Wall Stud Depth Dictates Niche Depth
The depth of your wall studs directly controls how deep your storage space can be. Traditional 2×4 studs provide about 3.5 inches of usable depth. This measurement works perfectly for most bathroom products.
Some modern homes use deeper 2×6 studs on exterior walls. These offer approximately 5.5 inches of potential depth. However, I never recommend using this extra space without proper planning.
| Wall Type | Stud Depth | Available Depth | Common Use |
|---|---|---|---|
| Interior Walls | 3.5 inches | 3.5 inches | Most shower areas |
| Exterior Walls | 5.5 inches | 5.5 inches (with caution) | Limited applications |
| Custom Framing | Variable | Variable | Special designs |
A Crucial Warning on Exterior Walls and Insulation
Installing storage recesses on exterior walls requires special attention. The insulation behind these walls must remain completely intact. Compromising this barrier invites moisture problems and energy loss.
I’ve seen too many projects where proper insulation was sacrificed for extra depth. This mistake leads to condensation buildup and mold growth. Always prioritize your home’s protection over minimal storage gains.
Proper vapor barriers and sealing become absolutely critical here. Consult with a professional if you’re considering this location. Their expertise can prevent costly repairs down the road.
How do I choose a shower niche size that fits full-size bottles?
Smart planning starts with understanding exactly what you need to store. Many people underestimate their actual requirements until it’s too late. Taking time to assess everything properly prevents disappointment later.

Taking Inventory of Your Shower Essentials
Gather every item currently in your bathing area. Include hair care containers, body washes, and specialty tools. Don’t forget less frequent items like exfoliators or special treatments.
Consider your household’s unique routines and preferences. Some families need space for multiple users’ favorite products. Others require accommodation for specific grooming implements.
Think about both daily essentials and occasional necessities. This comprehensive approach ensures your final design works for all situations. Nothing should feel cramped or inaccessible.
Measuring Your Largest Bottles and Products
Grab a tape measure and document your tallest containers first. Focus on family-sized shampoo and conditioner vessels. These typically determine the minimum height required.
Record width and depth measurements for bulkier items. Curved containers might need extra clearance. Allow breathing room between products for easy access.
Account for irregularly shaped accessories like loofahs or brushes. Their unique forms often demand creative spacing solutions. Proper planning prevents awkward fitting issues.
Remember that product packaging changes over time. Your favorite brands might alter their container dimensions. Building in slight extra capacity accommodates future variations.
Actual measurement beats assumptions every time. I’ve seen many projects fail from guessing standard proportions. Your specific items deserve custom consideration.
This thoughtful approach prevents underestimating your true storage requirements. Everything finds its place without compromise. Your daily routine flows smoothly with perfectly organized essentials.
Going Vertical: The Smart Choice for Maximum Storage
When planning your bathroom storage solution, orientation makes all the difference. Vertical placement offers remarkable advantages that horizontal options simply can’t match. This approach transforms how you utilize available wall space.

Why Vertical Niches Outperform Horizontal Ones
Tall, narrow configurations naturally align with standard wall framing. They slot perfectly between studs without requiring structural modifications. This seamless integration saves both time and money during installation.
Multiple shelves become possible within the same footprint. You gain organized compartments for different product categories. Everything stays visible and accessible without clutter.
Tall containers stand upright without tipping over. The vertical design accommodates their height efficiently. This prevents messy spills and wasted product.
Maximizing Space Without Major Structural Changes
Vertical units work with existing wall cavities rather than against them. No need to alter stud spacing or reinforce framework. The installation process becomes straightforward and cost-effective.
Customization options abound with this orientation. You can adjust shelf heights to match your specific needs. Different spacing accommodates various container sizes perfectly.
Expanding upward proves much simpler than widening horizontally. Additional height rarely conflicts with plumbing or electrical lines. This flexibility future-proofs your storage solution.
Vertical arrangements suit most bathroom layouts beautifully. They complement standard door openings and fixture placements. The result feels intentional rather than forced.
This smart approach delivers exceptional functionality. You get organized storage that enhances daily routines. The investment pays off every time you step into your shower.
Planning Your Shelf Layout and Spacing
Smart shelf organization transforms your shower niche from basic storage to personalized convenience. The right arrangement makes everything accessible while maintaining a clean, uncluttered look. Thoughtful planning here pays off every time you step into your bathing area.

Accommodating Tall Shampoo and Conditioner Bottles
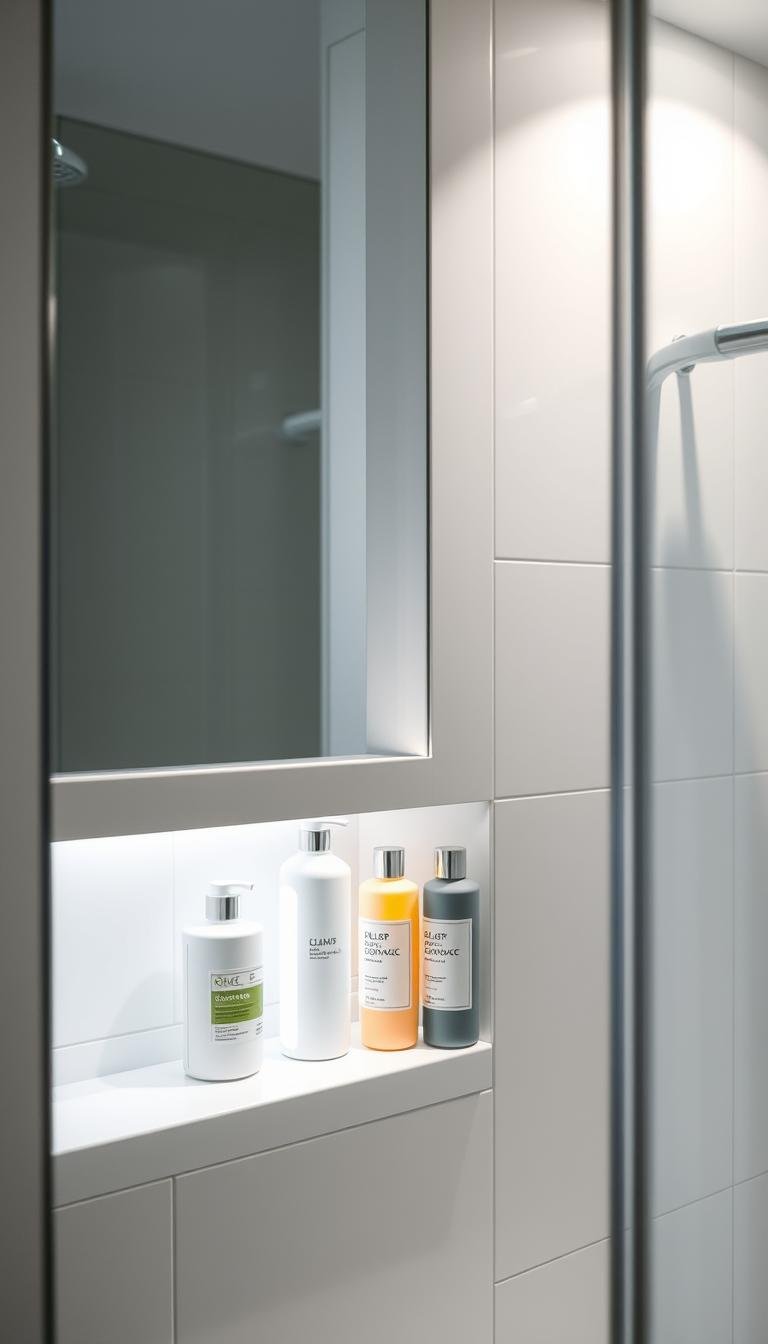
Tall containers demand generous vertical clearance. I always recommend allowing at least 12 inches of height for these essentials. This ensures even the largest family-sized bottles fit comfortably without tipping.
Consider the actual products you use daily. Measure your tallest shampoo and conditioner containers. Add an extra inch for easy removal and replacement.
This forward-thinking approach prevents frustration down the road. Your favorite products will always have a proper home. The space works with your routine rather than against it.
Creating Dedicated Spaces for Soaps and Razors
Smaller items deserve their own designated spots. A compact upper shelf works perfectly for razors, soaps, and other compact essentials. This separation keeps everything organized and accessible.
I’ve found that dedicated compartments prevent items from getting lost behind larger bottles. Each product category has its own home. This system makes morning routines smoother and more efficient.
Think about what you use most frequently. Place those items at the most convenient height. Less-used products can occupy harder-to-reach areas.
The Power of Uneven Shelf Spacing
Forget about perfectly even spacing between shelves. Custom heights work much better for real-world storage needs. This approach maximizes every inch of available space.
I typically create taller sections for bottles and shorter areas for smaller items. This varied arrangement accommodates different product sizes beautifully. Nothing feels cramped or wasted.
Consider your daily usage patterns. Frequently used products deserve prime positioning. Seasonal or occasional items can occupy less convenient spots.
This strategic planning prevents clutter before it starts. Everything has its place based on size and frequency of use. The result is a perfectly organized shower experience that feels tailored to your needs.
Choosing the Right Shelf Material to Save Space
The material you select for your shower niche shelves dramatically impacts both functionality and aesthetics. This decision determines how much usable storage you actually gain versus what gets lost to bulky supports. I’ve found that smart material choices can transform cramped areas into organized spaces.

The Problem with Standard Thick Foam Shelves
Standard foam shelves typically measure about 2 inches thick. This substantial thickness eats into valuable vertical storage capacity. You lose significant space that could otherwise hold additional products.
These bulky supports create visual heaviness in your design. They make the entire arrangement feel cramped and inefficient. I always recommend considering thinner alternatives for better space utilization.
The Sleek, Modern Appeal of Glass Shelves
Glass options offer a much slimmer profile at approximately 3/8 inch thick. This dramatic reduction in thickness maximizes vertical storage potential. You gain precious inches for taller containers or additional shelves.
The transparent quality creates an airy, open feel in your bathing area. However, smooth surfaces can become slippery when wet. This requires careful consideration for safety and practicality.
Maintenance involves regular cleaning to prevent water spots and soap residue. Despite this, the elegant look makes glass a popular choice for contemporary bathrooms.
Why Stainless Steel Shelves are a Top Performer
Stainless steel stands out with an incredibly slim 3/32 inch profile. This minimal thickness preserves maximum vertical capacity within your storage area. You can fit more products without compromising accessibility.
The material offers excellent durability against moisture and daily use. It resists corrosion and maintains its appearance over time. Cleaning requires simple wiping without special products.
I appreciate how stainless steel combines space efficiency with practical performance. It provides a modern, clean design that works beautifully in most bathroom styles. The material strikes a perfect balance between form and function.
Your final selection should balance space savings with practical considerations. Thin shelves maximize vertical capacity but must withstand daily use. The right choice enhances both storage efficiency and visual appeal.
Considering a Horizontal Niche: Pros and Cons
Horizontal configurations offer a different approach to bathroom storage that deserves careful evaluation. While vertical options work within standard stud spacing, these wide alternatives present unique opportunities and challenges. I always encourage homeowners to weigh both options before making final decisions.

The Aesthetic Appeal of a Long, Single Shelf
Horizontal niches create a striking visual statement with their elongated form. The continuous shelf offers a clean, minimalist look that complements modern bathroom aesthetics. This design approach feels intentional and custom-built.
Many tile patterns work beautifully with this orientation. Subway tiles and other rectangular formats align perfectly with the long shelf. The result creates a harmonious flow that enhances your overall style.
I’ve found these installations particularly effective in spacious showers. They provide ample surface area for multiple products without feeling crowded. Everything remains visible and accessible at a glance.
Understanding the Structural and Cost Implications
Horizontal installations require cutting through multiple wall studs. This structural modification demands careful engineering and reinforcement. The process becomes significantly more complex than standard vertical options.
Additional framing and support materials increase project expenses. Labor costs also rise due to the technical challenges involved. I always recommend budgeting 30-50% more for these custom installations.
Proper waterproofing becomes absolutely critical with wider openings. The larger surface area increases potential leak points. Extra membrane layers and sealing attention ensure long-term durability.
Tall bottles often present storage challenges in horizontal configurations. Their height may exceed the available vertical space. This limitation requires thoughtful product selection or alternative storage solutions.
Despite these considerations, horizontal niches work wonderfully for specific applications. They excel in showers where width exceeds height availability. The unique design can transform an ordinary shower into a stunning focal point.
I recommend these installations for homeowners prioritizing aesthetics over pure functionality. The dramatic visual impact justifies the additional investment for many people. Just ensure you work with experienced professionals who understand the structural requirements.
An Overview of Prefabricated Shower Niche Types
Understanding the different prefabricated shower niche categories helps you make the best choice for your bathroom project. These ready-made solutions come in various materials and finish options that suit different installation needs.

I always explain to homeowners that prefab units fall into two main categories. Tile-ready niches require your tile installer to complete the final surface. Finished niches come with their own surface treatment already applied.
Tile-Ready Niches: Foam Board and Plastic
Tile-ready niche options include foam board and plastic varieties. These units provide the basic structure for your tile installer to work with. The open framework allows for seamless integration with your wall treatment.
Foam board materials offer excellent waterproofing properties right out of the box. They’re lightweight and easy to cut for custom fits. Plastic versions provide durable bases that resist moisture damage.
Both options require professional tile installation to complete the look. This approach offers maximum design flexibility since you match your existing tile pattern. The final result appears completely custom-built to your space.
Finished Niches: Membrane Bonding and Overlap
Finished shower niches come with pre-applied surfaces that need no additional tile work. Membrane bonding types integrate directly with waterproofing systems. Overlap styles feature flanges that secure against your wall surface.
These types save time during installation since no tiling is required. They work beautifully when you want a contrasting material against your tile. Stainless steel and solid surface materials create striking visual statements.
I recommend finished units for projects needing quick completion times. Their pre-made nature ensures consistent quality and appearance. The design remains clean and professional-looking for years.
Waterproofing considerations differ between these categories. Tile-ready units integrate with your shower’s moisture barrier during installation. Finished niches often include built-in waterproofing features that simplify the process.
Choosing between these options depends on your project timeline and desired aesthetic. Tile-ready versions offer more customization possibilities. Finished units provide convenience and immediate usability after installation.
Understanding these differences helps you select the perfect solution for your bathroom renovation. Both categories deliver excellent results when properly installed. Your choice ultimately depends on your specific needs and preferences.
Exploring Popular Tile-Ready Foam Board Niches
Foam board niches have revolutionized bathroom storage solutions with their lightweight yet durable construction. These systems offer excellent waterproofing while remaining easy to cut and customize during installation. I always recommend them for homeowners seeking reliable performance with flexible design possibilities.

Leading manufacturers provide diverse options to suit various spatial requirements and aesthetic preferences. Each brand brings unique features that cater to different project needs. Understanding these differences helps you select the perfect match for your bathroom renovation.
Schluter Kerdi Niche Sizes and Options
Schluter Kerdi stands out in the market with their popular 12×20 inch model. This size accommodates most family-sized products comfortably. Their entire lineup maintains a consistent 3.5-inch depth that works perfectly with standard wall construction.
The brand offers four primary dimensions to choose from:
- 12×28 inches for maximum storage capacity
- 12×20 inches as the most popular choice
- 12×12 inches for compact spaces
- 12×6 inches for minimalistic installations
I appreciate how their integrated bonding flange simplifies waterproofing integration. The pre-formed corners ensure seamless moisture protection. This attention to detail makes installation straightforward for professionals.
Wedi Niche Sizes and Cementitious Coating
Wedi brings innovation with their cementitious coating that provides exceptional durability. Their 3-inch depth works well in various wall scenarios. The coating creates a perfect surface for tile adhesion without additional preparation.
Their size selection includes:
- 12×38 inches for expansive storage needs
- 12×19 inches for generous family use
- 12×13 inches for balanced functionality
- 12×9 inches for moderate requirements
- 12×5 inches for minimal footprint designs
The built-in waterproofing membrane eliminates extra steps during installation. I’ve found their systems particularly reliable in high-moisture environments. The integrated sealing properties provide peace of mind for years to come.
Noble and Laticrete Niche Offerings
Noble Company offers unique top profiles that add architectural interest to your shower design. Their selection includes square, peaked, and arched tops that create distinctive visual statements. These options work beautifully with various tile patterns and bathroom styles.
Laticrete Hydro Ban niches feature combo units that provide versatile storage solutions. Their standard sizes include 12×12 and 12×20 inch models plus compact 8×8 options. The integrated waterproofing system ensures complete moisture protection.
“The right foam board niche transforms ordinary storage into a seamless design element that enhances both function and aesthetics.”
| Brand | Popular Sizes | Depth | Special Features |
|---|---|---|---|
| Schluter Kerdi | 12×20, 12×28 | 3.5 inches | Integrated bonding flange |
| Wedi | 12×19, 12×38 | 3 inches | Cementitious coating |
| Noble | Various | 3.5 inches | Decorative top profiles |
| Laticrete | 12×12, 12×20 | 3.5 inches | Combo units available |
Each manufacturer brings distinct advantages to different project requirements. Schluter excels in user-friendly installation while Wedi offers superior surface durability. Noble provides architectural details and Laticrete delivers reliable system integration.
Having multiple quality options ensures you find the perfect solution for your specific needs. Consider your space constraints, design preferences, and installation requirements when selecting. The right choice will provide both practical storage and aesthetic enhancement for years.
Exploring Plastic and Finished Niches
Beyond foam board options, homeowners can explore innovative plastic and pre-finished solutions. These systems offer distinct advantages for different bathroom renovation scenarios. I always present these alternatives to clients seeking varied installation approaches.

Redi Niche and EZ-Niche Dimensions
Redi Niche provides versatile plastic options with integrated shelf systems. Their sizes range from compact 14×14 inches to spacious 42×16 configurations. This flexibility accommodates various storage requirements beautifully.
EZ-Niche offers another excellent plastic alternative. Their selection spans from 7×8 to 14×36 inch models. Both systems feature pre-formed shelves that simplify the installation process significantly.
I appreciate how these plastic materials resist moisture damage completely. They won’t warp or degrade in wet environments. The integrated shelf design eliminates additional construction steps.
The Durability of Stainless Steel Membrane Niches
Redblock stainless steel membrane niches deliver exceptional longevity. Their 10×14 and 10×28 inch models suit most shower applications perfectly. The stainless steel construction provides corrosion resistance that lasts decades.
These systems integrate seamlessly with waterproofing membranes. The result is a completely leak-proof installation. I’ve found they maintain their appearance with minimal maintenance requirements.
The sleek finish complements modern bathroom aesthetics wonderfully. It creates a contemporary look that many homeowners appreciate. The material feels substantial and high-quality upon installation.
Overlap Niches: Ceramic and Stainless Steel
Overlap niche systems feature flanges that secure against your wall surface. Stainless steel options include 12×12 and 24×12 inch models. Ceramic versions typically measure 11.75×11.75 inches for standard applications.
These pre-finished units save considerable time during renovation. Their installation requires no additional tile work or finishing. The result is immediate usability after placement.
I recommend overlap design for projects needing quick completion. They provide excellent value through reduced labor requirements. The systems work beautifully when you want contrasting materials against your tile.
Maintenance becomes remarkably simple with these finished surfaces. Most require only occasional wiping to maintain their appearance. This practical benefit appeals to busy households.
All these finished shower niche options offer reliable leak-proof performance. Their manufactured nature ensures consistent quality control. You gain peace of mind knowing the waterproofing is integrated from the start.
Waterproofing: The Non-Negotiable Step for Longevity
Creating a durable storage solution demands absolute attention to moisture protection. I consider this the most critical phase of any bathroom project. Skipping proper steps here guarantees future problems that compromise your entire space.

Integrating with a Waterproofing Membrane System
Your storage recess must become part of a complete moisture barrier system. I always recommend using either liquid-applied or sheet membranes for best results. These materials create a continuous shield against water intrusion.
Apply two to three coats of liquid membrane for optimal protection. Each layer needs adequate drying time between applications. Sheet membranes offer excellent consistency but require precise cutting and sealing.
The integration points demand special attention. Seal all edges and corners with manufacturer-approved tapes and sealants. This careful approach prevents weak spots where moisture could penetrate.
“Proper waterproofing isn’t just about preventing leaks—it’s about protecting your home’s structural integrity for decades.”
Why Proper Slope is Critical to Prevent Pooling
Water naturally seeks the lowest point in any space. Your storage area’s bottom must slope outward at least 1/8 inch. This subtle angle guides moisture back toward the drain efficiently.
I’ve seen many projects fail from neglecting this simple principle. Flat surfaces allow water to accumulate and stagnate. This standing moisture becomes a breeding ground for mold and mildew.
The slope should direct water away from wall intersections. This prevents moisture from seeping into vulnerable areas. Proper pitch ensures everything stays dry between uses.
Testing your slope before tiling confirms everything works correctly. Pour a small amount of water and observe its path. Make adjustments if needed before proceeding further.
Different waterproofing methods offer various advantages:
- Liquid membranes conform perfectly to irregular surfaces
- Sheet membranes provide consistent thickness throughout
- Combination systems offer redundancy for critical areas
- Pre-formed corners ensure perfect sealing at stress points
Poor moisture protection leads to serious consequences. Hidden leaks can damage wall structures over time. Mold growth creates health concerns and unpleasant odors.
Repairs become extremely costly once tiles are installed. The entire shower often requires complete demolition. Prevention through proper techniques saves money and stress.
Always test your waterproofing integrity before tiling. Flood the base and mark water levels on the walls. Check for any drops over several hours.
This verification step gives peace of mind about your work. It confirms your moisture barrier performs as intended. Your investment remains protected for years to come.
Remember that quality materials and careful installation work together. Don’t compromise on either aspect of the process. Your future self will thank you for the thorough approach.
Determining the Ideal Height for Your Niche
Finding the perfect vertical position for your storage space transforms daily convenience. The right elevation makes everything accessible without straining or bending. This decision impacts how comfortably you reach your essentials during each use.

Standard Placement for Easy Reach (48 Inches)
Industry standards suggest mounting the base approximately 48 inches above the floor. This measurement works well for most adults of average stature. It positions items comfortably at arm level during typical use.
This elevation allows natural access without excessive reaching or bending. Your products remain visible and within easy grasp. The placement feels intuitive and reduces movement strain.
I always verify this measurement against the user’s actual height. Personal adjustments might be necessary for optimal ergonomics. The goal is creating effortless access during your routine.
Adjusting for Tub/Shower Combos and Multi-User Homes
Bathtub combinations require different considerations than standalone units. The tub deck elevation changes the entire dynamic of placement. I typically recommend lowering the position to accommodate stepping in and out.
Households with multiple users present unique challenges. Different statures demand thoughtful compromise in positioning. Finding a middle ground ensures everyone can access essentials comfortably.
Families with children might benefit from slightly lower placement. This adjustment allows younger members to reach their own products safely. Everyone gains independence during their bathing routine.
| Installation Type | Recommended Height | Key Considerations |
|---|---|---|
| Standalone Shower | 48 inches from floor | Adult accessibility, visual placement |
| Tub/Shower Combo | 22-27 inches from tub deck | Step-in safety, lower reach range |
| Multi-User Home | 42-46 inches from floor | Compromise height, family accessibility |
| Accessibility Focus | 36-40 inches from floor | Universal design, limited mobility |
Staying Clear of the Showerhead’s Water Flow
Positioning away from direct water spray protects your products from constant moisture exposure. The wall opposite the showerhead typically offers the driest location. This placement minimizes water contact and reduces mess.
I always assess the showerhead’s spray pattern during planning. Understanding water flow direction helps identify optimal placement areas. This prevents products from getting constantly wet between uses.
According to guidance from industry experts, avoiding the “splash zone” significantly reduces moisture issues. Proper placement keeps items drier and more organized. This thoughtful approach enhances daily convenience.
Consider plumbing locations when selecting your spot. Valve walls often contain essential components that limit placement options. Identifying clear spaces ensures trouble-free installation.
Your final decision should balance practical needs with aesthetic considerations. The perfect position makes everything accessible while maintaining visual harmony. This combination creates truly functional storage that enhances your daily experience.
Aligning Your Niche with Your Tile Layout
Tile integration transforms your storage space from functional to fabulous. The visual harmony between your storage area and surrounding surfaces creates a polished, professional appearance. This attention to detail separates ordinary bathrooms from exceptional ones.

Why Perfect Grout Line Alignment is a Challenge
Achieving flawless grout line continuity presents significant obstacles. Tiny variations in mortar thickness can shift alignment during installation. Even professional tile setters face this persistent challenge regularly.
Tile spacing inconsistencies compound the problem further. Slight differences between batches create visible misalignments. These imperfections become glaringly obvious around your storage area.
Leveling systems help but cannot guarantee perfection. The cumulative effect of minor variations ruins seamless integration. I’ve learned that chasing absolute perfection often creates more frustration than satisfaction.
Achieving a Balanced Look and Avoiding “Sliver” Tiles
Centering your storage space on a full tile creates visual harmony. This approach prevents awkward narrow cuts along the edges. The result looks intentional and professionally executed.
Planning during the framing stage ensures optimal placement. Measure your tile size and pattern before installing the framework. This foresight prevents last-minute compromises in appearance.
Communicate clearly with your tile installer about your expectations. Discuss the layout before any mortar touches the wall. Their expertise helps navigate potential alignment issues effectively.
Avoiding skinny tile fragments maintains aesthetic integrity. These slivers look unfinished and compromise waterproofing integrity. Full tiles around the perimeter enhance both beauty and function.
Consider these practical strategies for success:
- Center the opening on a full tile whenever possible
- Use larger format tiles to minimize cutting requirements
- Plan the layout during early construction phases
- Accept minor variations as part of handmade charm
The right approach balances practicality with visual appeal. Your storage area should complement rather than compete with the overall design. Thoughtful planning prevents aesthetic disappointments that last for years.
Remember that professional-looking results come from smart preparation. Perfection matters less than overall harmony and functionality. Your finished space will feel cohesive and beautifully integrated.
Conclusion: Building Your Perfect Shower Storage
Creating your ideal bathroom storage solution combines practical function with beautiful design. I always emphasize measuring your largest products first. This ensures everything fits comfortably within your space.
Vertical configurations typically offer the most efficient use of available area. They maximize storage capacity while maintaining clean lines. Proper waterproofing remains absolutely essential for long-term durability.
Consider height placement carefully for effortless access. Balance your aesthetic preferences with practical storage needs. Thoughtful planning leads to results you’ll appreciate every day.
Take time to evaluate your specific requirements before starting. Good preparation ensures your finished project meets all expectations. You’ll enjoy organized, accessible storage for years to come.