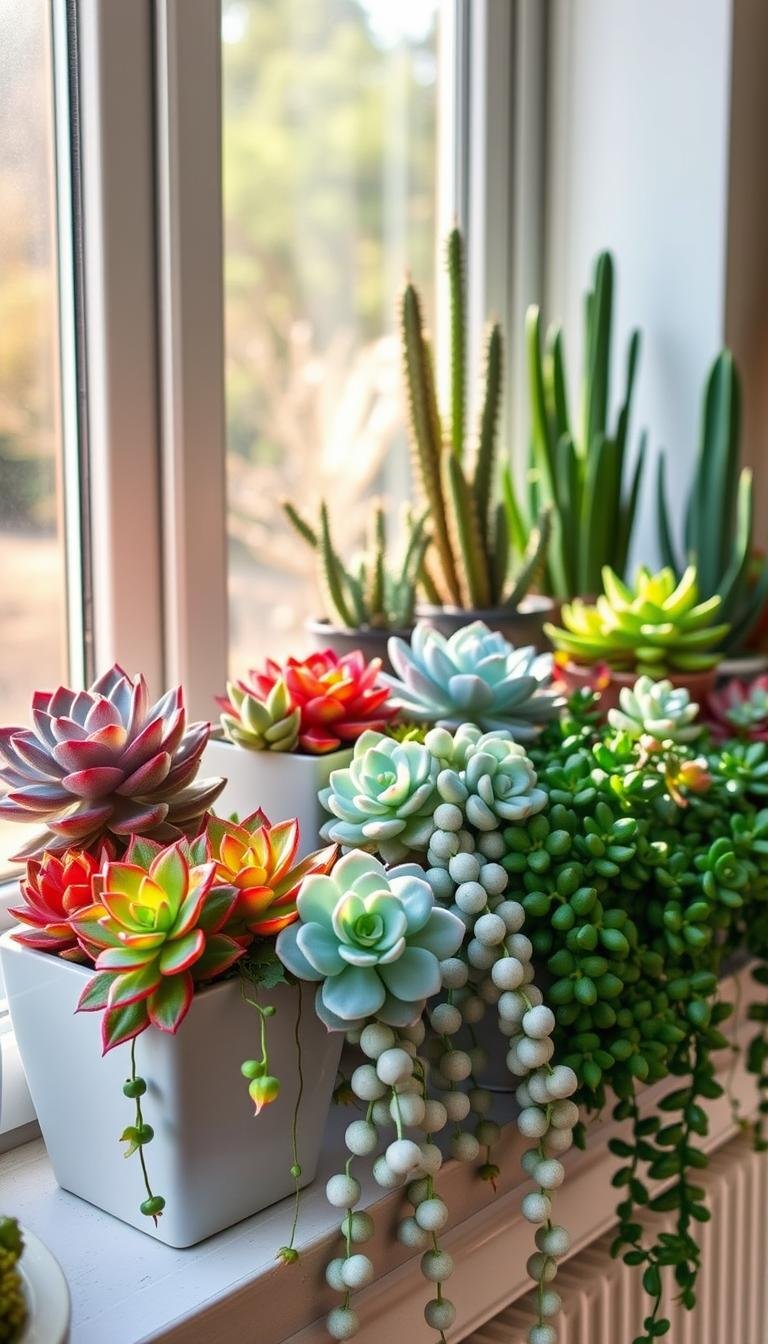
How can I add a hidden safe that looks like a regular wall vent?
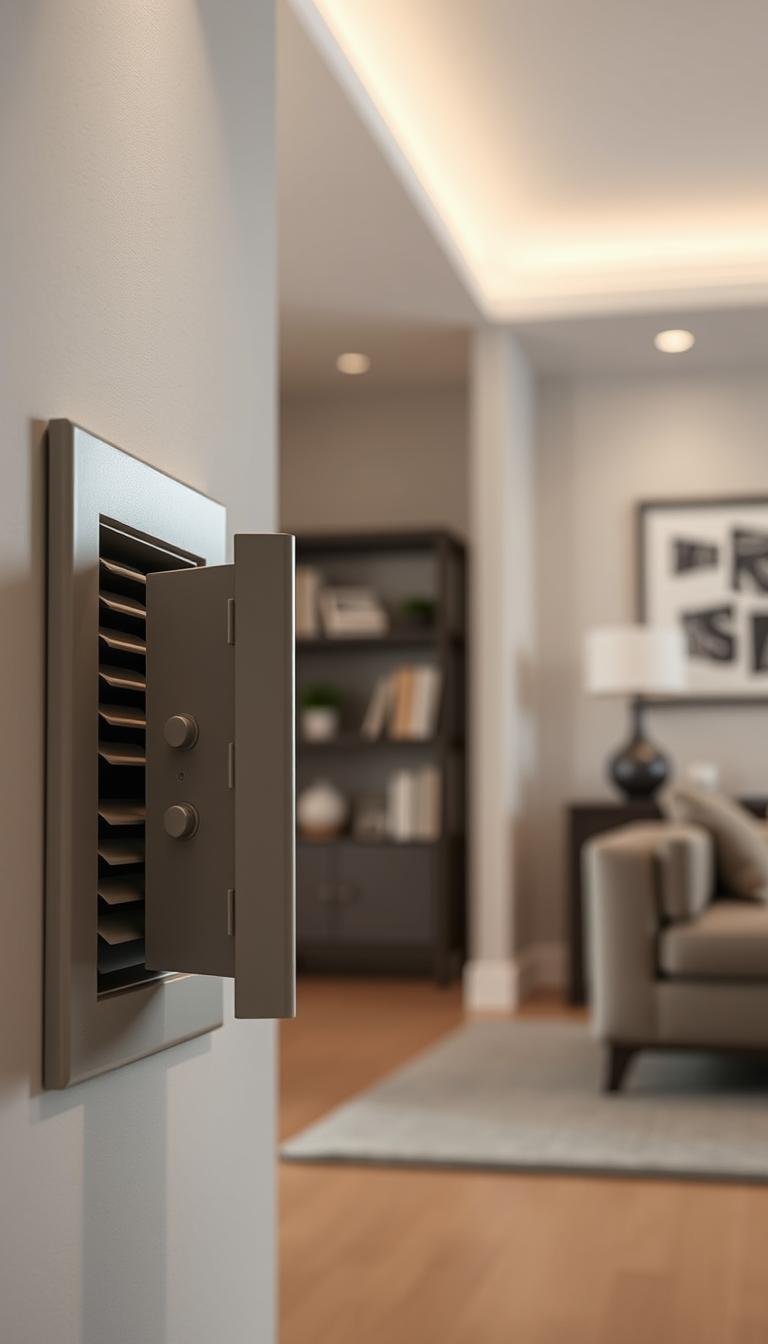
Ever wish you had a clever spot to keep your valuables out of sight? A wall vent safe offers a brilliant solution. It blends right into your home’s design, hiding your important items in plain sight.
Choosing the right location is key for this project. You need to find a good place between studs. Proper tools and a little time make the job smooth.
This DIY project boosts your home’s security. Burglars often overlook common household features. Your treasures stay secure behind what looks like a simple air vent.
Follow my guide to build your own hidden storage space. With basic tools and patience, you can create a secure spot for your belongings.
Key Takeaways
- A wall vent safe keeps valuables hidden while blending with your home’s design.
- Choosing the correct location between studs is crucial for installation.
- Basic tools and some patience make this project achievable for most homeowners.
- This discreet storage solution enhances home security by hiding items in plain sight.
- Proper planning ensures the safe is both functional and undetectable.
- Following step-by-step instructions makes the installation process straightforward.
- This DIY project adds both security and peace of mind to your living space.
Why I Love the Wall Vent Hidden Safe Concept
There’s something incredibly satisfying about creating security that doesn’t look like security. The wall vent concept taps into that perfect balance of accessibility and secrecy.

This approach transforms ordinary household features into extraordinary protection. It’s about working with your home’s existing design rather than against it.
The genius of hiding in plain sight
Burglars typically spend less than ten minutes inside a home. They target obvious spots like drawers, closets, and traditional safes. Common household features like vents become virtually invisible to them.
The psychology behind this is fascinating. Our brains are wired to overlook everyday objects. A vent register becomes part of the background – something we see but don’t really notice.
This creates the perfect concealment for your precious items. Your valuables remain protected precisely because they’re not obviously protected.
Why traditional safes sometimes attract unwanted attention
Traditional security boxes practically scream “valuables inside!” Their heavy, obvious design draws attention rather than deflecting it. Thieves know exactly what to look for and where to find them.
Studies show that burglars often target these conventional storage solutions first. The very thing meant to protect your items becomes a beacon for trouble.
Vent safes eliminate this problem entirely. They blend seamlessly into your living space while providing quick access when needed. The magnetic closure system ensures everything stays securely in place.
This concept opens up wonderful possibilities for creative hiding spots throughout your home. Once you understand the principle, you’ll start seeing potential concealment spaces everywhere.
- Blends with existing home features
- Avoids drawing burglars’ attention
- Provides quick access to stored items
- Encourages creative security thinking
Essential Tools and Materials You’ll Need
Gathering the right equipment makes this project smooth and successful. Quality materials ensure your hidden storage blends perfectly and functions reliably.
I recommend getting everything organized before starting. This preparation saves time and prevents mid-project trips to the hardware store.

Must-have tools for the project
Proper tools create clean cuts and precise installations. A drywall saw makes opening your wall cavity neat and controlled.
You’ll need a stud finder to locate framing members accurately. This step prevents damaging electrical wiring or plumbing behind your drywall.
Basic woodworking tools like a wood saw and carpenter’s square ensure straight cuts. Wire cutters handle any unexpected obstacles inside your wall space.
Don’t forget measuring tools! A level keeps everything perfectly horizontal. Tape measures guarantee your opening matches your vent grille dimensions exactly.
Choosing between fixed and adjustable vents
Vent selection affects both appearance and functionality. Fixed-size vents offer a clean, permanent look that matches existing home features.
Adjustable vents provide flexibility during installation. Their expanding design accommodates slight measurement variations in your wall opening.
Consider your home’s existing vent styles before choosing. Matching the finish and design maintains that crucial “invisible” appearance for your hidden storage space.
Selecting the right magnets and adhesives
Magnetic closure systems keep your valuables secure yet accessible. Strong 10mm x 5mm magnets provide reliable holding power without visible hardware.
Two-part epoxy putty creates permanent bonds between metals and surfaces. This adhesive withstands years of opening and closing without weakening.
Construction adhesive secures wood framing inside your wall cavity. Self-tapping screws offer additional reinforcement for heavy items stored within your hidden compartment.
Quality materials ensure your project lasts for years. They maintain that perfect balance between security and discreet appearance in your living space.
Finding the Perfect Location for Your Vent Safe
Strategic placement makes the difference between obvious storage and truly hidden security. The right spot keeps your belongings secure while maintaining complete invisibility.
I always recommend studying your home’s existing ventilation patterns first. This attention to detail ensures your new addition blends seamlessly with the architecture.

Matching existing vent placement patterns
Observe how air vents are positioned throughout your living space. Most homes follow consistent patterns that make sense for airflow and design.
Ceiling placements often work for central air systems. Wall-mounted units typically sit higher up, away from furniture obstructions.
Match the height and spacing of other vents in the room. This consistency prevents your installation from standing out to curious eyes.
Locations to absolutely avoid
Some spots instantly raise suspicion or create practical problems. Exterior walls often contain insulation that complicates installation.
Areas near existing ventilation create logical inconsistencies. Why would two vents be placed so close together?
Mid-wall placements between floor and ceiling often look unnatural. Burglars frequently check these obvious hiding spots during quick searches.
Always avoid spaces that couldn’t realistically contain ductwork. The illusion only works if the placement makes logical sense.
Considering floor-level placement options
Floor installations can work beautifully when done correctly. Wide vents mimic return air grilles found in many homes.
These placements often hide in plain sight near baseboards. People rarely examine floor-level features closely.
Ensure adequate clearance from carpets or flooring materials. The vent should open freely without obstruction.
This approach works particularly well in hallways or less-trafficked areas. The natural sight lines make these spots practically invisible.
The most effective hiding places are those nobody thinks to check twice.
Here are my top tips for assessing potential locations:
- Check for electrical wiring or plumbing behind chosen spots
- Verify adequate depth between studs for your storage needs
- Ensure the location allows comfortable access when needed
- Consider sight lines from room entrances and common areas
Take time to evaluate several options before committing. The perfect space combines convenience with complete concealment.
Your valuables deserve the best protection possible. Thoughtful placement ensures they remain secure yet accessible when needed most.
How to Properly Locate Wall Studs
Finding studs is the most important step in creating your hidden storage space. Proper placement ensures your installation stays secure and undetectable. This process requires patience but delivers excellent results.

Using stud finders effectively
Modern stud finders make this job much easier. I always start by calibrating the device on a clear section of drywall. Move it slowly across the surface until it indicates a stud edge.
Mark both edges of each stud you locate. This gives you the complete picture of your wall’s framing. Most studs measure 1.5 inches wide with consistent spacing between them.
Electronic models detect density changes behind your wall surface. They’re incredibly accurate when used correctly. Always double-check your findings before making any cuts.
Alternative methods for finding studs
Don’t worry if you don’t have a stud finder available. You can still locate framing members using simple techniques. Tapping the wall produces a hollow sound between studs and a solid sound over them.
Electrical outlets provide excellent reference points. They’re typically mounted directly to the side of a stud. Measure 16 inches from this point to find the next one.
Here’s a helpful table showing common stud spacing patterns:
| Construction Type | Typical Spacing | Notes |
|---|---|---|
| Modern Homes | 16 inches | Most common standard |
| Older Construction | 24 inches | Check local building codes |
| Commercial Buildings | 16 or 24 inches | Varies by structure |
Safety precautions when probing walls
Safety should always come first during this process. Avoid drilling or cutting near electrical outlets and switches. Wires often run vertically along stud sides.
If you need to make a test hole, choose a spot several inches above or below outlets. This simple precaution prevents damaging hidden wiring. It’s better to be safe than sorry.
Watch for plumbing lines in bathrooms and kitchens. These areas require extra caution. Take your time and proceed carefully.
Proper stud location ensures your hidden storage space remains secure. It also prevents damage to your home’s structure. The right approach makes everything work perfectly.
Testing Your Chosen Location
Taking a moment to verify your spot prevents costly mistakes down the road. This quick check ensures everything works perfectly before making your main opening.
I always treat this step as my final confirmation. It gives me confidence that my chosen space will actually work for storage.

The importance of a test hole
Drilling a small test hole lets you peek inside your wall cavity. This simple action reveals hidden obstacles before committing to the full opening.
I use a 1/4-inch drill bit for this inspection. It’s large enough to see through but small enough to patch easily if needed.
This precaution has saved me from cutting into plumbing lines twice. Those small repairs would have become major projects otherwise.
What to look for inside your wall
Shine a flashlight through your test hole to examine the space. You want to see clear, empty room between studs for your items.
Check for insulation batting or foam that might complicate installation. Look for electrical wires running vertically along the stud sides.
Ensure there’s enough depth for your storage needs. Standard walls offer about 3.5 inches of space between drywall surfaces.
According to guidance from hidden storage experts, you should verify no ductwork, pipes, or utilities occupy your chosen cavity.
Dealing with unexpected obstacles
Sometimes you’ll find surprises behind your drywall. Don’t panic – most issues have simple solutions.
Minor wiring can often be rerouted by an electrician. Small pipes might allow you to shift your opening slightly sideways.
If obstacles seem too complicated, choose another location. It’s better to move early than force a problematic installation.
Here’s a quick reference table for common wall discoveries:
| What You Find | Recommended Action | Risk Level |
|---|---|---|
| Insulation | Remove carefully or relocate | Low |
| Electrical Wiring | Consult electrician | High |
| Plumbing Pipes | Consider different spot | High |
| Clear Space | Proceed with confidence | None |
A moment of patience prevents a thousand regrets.
This verification step takes just minutes but protects your home and valuables. Your perfect hiding spot awaits behind that confirmed-clear wall space!
Creating the Perfect Opening
Precision cutting transforms your wall into a seamless hiding space. This step determines how authentic your final installation appears. Take your time here for professional results.

Measuring for different vent types
Accurate measurements create that perfect fit. Adjustable vents require inner edge measurements for width and height. Fixed types need slightly larger openings than their louvers.
I always create a cardboard template first. This prevents mistakes on your actual wall surface. Match your existing home vents for complete authenticity.
Ignore manufacturer instructions if they don’t match your specific needs. Your goal is blending with existing home features. Custom fitting ensures nobody suspects anything unusual.
Cutting techniques for clean edges
A sharp drywall saw makes clean, controlled cuts. Start with a small pilot hole in your marked area. Expand outward using smooth, steady motions.
Keep your blade perpendicular to the wall surface. This creates straight edges that support your vent grille properly. Remove cut pieces carefully to avoid damaging surrounding drywall.
Here’s my professional approach for flawless results:
- Score your outline lightly with a utility knife first
- Cut just inside your marked lines for adjustment room
- Support the drywall piece as you complete the final cut
- File any rough edges for perfect fitment
Ensuring proper level and alignment
A level guarantees horizontal perfection every time. Place it along your cutting lines before making any openings. This prevents crooked installations that scream “something’s hidden here!”
Use a carpenter’s square for perfect 90-degree corners. These tools ensure your vent sits flush against the wall surface. Proper alignment makes everything look factory-installed.
Test-fit your vent grille before finalizing the opening. Make minor adjustments if needed for that snug, professional fit. The right preparation now saves frustration later.
Your hidden storage space deserves this attention to detail. Perfect alignment maintains the illusion of ordinary household ventilation. Nobody will guess what’s really behind that vent grille!
Framing the Interior Structure
Building a solid frame transforms your opening into a functional storage space. This step creates the foundation for your concealed compartment. Proper framing ensures everything stays secure and looks professional.

I always use 1″x2″ wood strips for this part of the project. They fit perfectly between standard wall studs. The right materials make all the difference in creating durable hidden storage.
Cutting and positioning wood framing
Measure your opening carefully before cutting any wood pieces. I cut four pieces to form a simple box frame inside the wall cavity. The top and bottom pieces should match the opening’s width exactly.
The side pieces need to account for the top and bottom thickness. Butt joints work better than mitered corners for this application. They provide better surfaces for screw placement and stronger connections.
Test fit each piece before final installation. Everything should sit flush with the drywall surface. This creates a seamless transition between your frame and the existing wall.
Using construction adhesive effectively
Construction adhesive forms a permanent bond between wood and drywall. Apply a generous bead along each contacting surface. Press firmly to ensure good contact between materials.
I recommend using a high-quality adhesive specifically designed for wood-to-drywall applications. The bond strength matters for long-term durability. Allow the adhesive to dry overnight before proceeding.
This curing time ensures maximum holding power. Your frame will withstand years of use without loosening. Patience here pays off in security and reliability.
Adding optional hooks or shelves
Now is the perfect time to add organizational features inside your hidden space. Small hooks or miniature shelves keep your valuables organized. They prevent items from becoming jumbled together.
Pre-drill holes for any hooks you want to install. This prevents the wood from splitting during installation. Use small screws designed for delicate woodworking projects.
Consider what you’ll store when planning these additions. Jewelry might need different hanging solutions than documents or electronics. Customize the interior to match your specific storage needs.
Measure twice, cut once – but always test fit before final attachment.
Here are my top tips for successful framing:
- Use a level to ensure all pieces sit perfectly straight
- Wipe away excess adhesive immediately for cleaner appearance
- Add small braces at corners for extra reinforcement if needed
- Consider painting the interior white for better visibility
This framing process creates the perfect foundation for your hidden storage solution. The right approach makes everything feel solid and professional. Your valuable items deserve this level of care and attention.
Installing Magnet System for Secure Closure
The magnetic attachment system transforms your project from simple storage to professional-grade security. This crucial step ensures your hidden compartment remains both accessible and undetectable.

Positioning magnets for optimal hold
Proper magnet placement creates even holding power across the entire surface. I position four strong neodymium magnets at each corner of the vent grille.
This balanced approach prevents any single point from bearing too much weight. The magnets should sit flush with the metal surface for maximum contact.
Test different arrangements before final commitment. Sometimes shifting magnets slightly improves the overall magnetic connection.
Using epoxy putty for permanent attachment
Marine-grade epoxy putty creates bonds that withstand years of use. This two-part adhesive remains flexible yet incredibly strong.
Knead equal parts until the color becomes uniform. Press the mixture firmly around each magnet base. Ensure complete coverage for maximum holding power.
The epoxy should cure for at least 24 hours before testing. This patience ensures your magnets won’t loosen over time.
Testing magnet strength and alignment
Always verify your magnetic connection before proceeding further. Place the prepared grille against your steel mounting plate.
The connection should feel secure but not impossible to remove. You want smooth access without accidental detachment.
According to guidance from hidden storage experts, larger vents may require additional magnets for optimal security.
The difference between good and great lies in testing before finalizing.
Here’s my proven approach for perfect magnetic installation:
- Clean all surfaces with alcohol before epoxy application
- Use a level to ensure magnets sit perfectly parallel
- Test pull strength from various angles
- Adjust magnet height if needed for better contact
This meticulous attention ensures your hidden storage space functions flawlessly. The right magnetic system makes accessing your valuables both quick and secure.
Mounting Screws for Magnetic Attachment
Proper screw installation completes your magnetic attachment system with professional precision. This final step ensures your vent grille stays securely in place while maintaining that crucial invisible appearance.
The right approach makes everything snap together perfectly. Your hidden storage space deserves this attention to detail.

Precision placement techniques
Accurate marking guarantees perfect screw alignment every time. I use the magnet positions on the grille as my guide for placement.
Here’s my professional technique for flawless results. Place painter’s tape across the mounting area first.
Press your vent grille firmly against the tape. The magnets will leave slight impressions showing exactly where to place your screws.
This simple trick transfers markings with perfect accuracy. Your screws will align perfectly with the magnetic points.
Choosing the right screw types
Self-tapping countersink screws work best for this application. They create their own pilot holes in drywall without pre-drilling.
These special screws sit flush with the wall surface. This maintains optimal magnet strength for secure closure.
Never sink screws below the surface level. That extra depth reduces magnetic holding power significantly.
The right hardware makes installation smooth and reliable. Your security depends on these small but important details.
Testing the magnetic connection
Always verify your magnetic connection before considering the job complete. The vent should snap into place with satisfying authority.
Test from various angles to ensure even holding power. Gently pull from each corner to check for consistent resistance.
Your finished installation should look completely seamless. The grille must align perfectly with the wall surface.
Perfect alignment creates security that disappears into your home’s design.
Here’s my quick checklist for successful screw installation:
- Use painter’s tape for accurate magnet position transfer
- Select self-tapping countersink screws for easy installation
- Keep screws flush with the drywall surface
- Test magnetic connection from multiple angles
- Ensure the grille sits perfectly aligned with the wall
This attention to detail completes your professional-grade hidden storage solution. The right screws in the perfect places make all the difference.
Adding Realistic Finishing Touches
The final details transform your project from good to completely undetectable. These small elements create that perfect illusion of ordinary household ventilation.
I always save extra time for this crucial step. The right finishing work makes everything look professionally installed.

Creating fake screw heads
Real vents typically have visible screw heads holding them in place. Your hidden version needs the same authentic look.
I cut standard vent screws short using metal snips. Epoxy holds them firmly in their designated spots.
This creates the appearance of functional fasteners. Nobody will suspect they’re just decorative elements.
Painting the interior grille for authenticity
A flat black finish inside the grille works wonders for concealment. It prevents anyone from seeing your stored items.
I use matte spray paint for even coverage. Multiple light coats create that professional factory look.
This simple step enhances the disguise significantly. Your valuable things remain completely hidden from view.
Final alignment and appearance checks
Step back and examine your work from different angles. Check that everything sits flush with the wall surface.
Ensure the grille aligns perfectly with surrounding features. Any misalignment might draw unwanted attention.
Test the magnetic connection one last time. It should feel secure yet accessible when needed.
The difference between hidden and found often lies in these final details.
Here’s my quick checklist for perfect finishing:
- Verify all fake screws sit uniformly
- Check paint coverage for complete darkness inside
- Test magnetic strength from all sides
- Ensure perfect alignment with wall surface
These professional touches complete your hidden storage space. The right finishing work ensures nobody will ever suspect what’s behind that ordinary-looking vent.
Alternative Hidden Safe Options to Consider
While wall vent safes offer excellent concealment, they’re just one approach to discreet security. Many creative solutions exist for protecting your valuables throughout your living space and beyond.
Each option serves different needs and preferences. Some work better for specific items or locations. I love exploring these alternatives for comprehensive protection.

Other wall-based hiding solutions
Wall spaces offer numerous possibilities beyond vent concealment. Hidden mirrors with sliding mechanisms provide excellent storage behind reflective surfaces.
Picture frames that swing open reveal secure compartments. These work particularly well in hallways or living areas where artwork belongs.
Electrical outlet safes mimic real power points perfectly. They’re ideal for smaller items like jewelry or important documents.
Each wall-based solution maintains that crucial hidden-in-plain-sight advantage. They blend seamlessly with your home’s existing features and decor.
Furniture-based concealed storage
Furniture pieces often provide perfect hiding spots. Ottomans with locking compartments offer both seating and security in one unit.
Bookshelves with secret compartments behind false backs work wonderfully. These can accommodate larger items like important files or electronics.
Nightstands with hidden drawers keep items close at hand. This approach works well for bedside protection of personal valuables.
Furniture-based solutions move with you if you relocate. They don’t require permanent modifications to your living space.
Vehicle hidden storage options
Vehicle security becomes crucial when traveling through uncertain areas. Under-seat lockboxes provide excellent protection for on-the-go needs.
Console safes fit neatly between front seats. They’re easily accessible yet completely hidden from view.
Spare tire well compartments offer generous storage space. These work well for larger items that need transportation security.
Vehicle solutions ensure protection wherever your travels take you. They’re perfect for keeping important items secure during daily commutes or road trips.
The best security system adapts to your lifestyle rather than forcing you to adapt to it.
Here’s a quick comparison of popular alternative hiding solutions:
| Option Type | Best For | Security Level |
|---|---|---|
| Wall Mirrors | Medium items | Medium-High |
| Furniture Compartments | Various sizes | Medium |
| Vehicle Lockboxes | Travel security | Medium |
| Floor Safes | Permanent storage | High |
Each alternative offers unique advantages for different situations. Consider what you need to protect and where you need protection most.
Your security approach should match your lifestyle and needs. The right solution keeps your valuables safe without complicating daily life.
Multiple approaches often work best for comprehensive protection. Layered security ensures your items remain protected in various scenarios.
Conclusion
Creating your own hidden storage space transforms ordinary home features into extraordinary security. This project offers brilliant protection that remains completely invisible to unwanted eyes.
The right location between studs ensures perfect concealment. Proper tools and patience make the installation smooth. Your valuables stay secure behind what appears to be a simple air vent.
This approach keeps your important items in plain sight yet completely protected. Burglars typically overlook common household features during quick searches.
I love how this DIY solution enhances home security without obvious boxes or complex systems. The magnetic closure provides quick access when needed while keeping everything securely in place.
Ready to build your own discreet storage? Share your results or questions below – I’m always excited to see creative security solutions!