How can I create a homework station inside a kitchen cabinet?
I turned an unused cupboard into a tidy work nook that keeps supplies at hand and frees the kitchen table for family meals.
My approach focuses on smart storage and quick setup. Organizer bins, a paper tray, and a portable caddy hold pencils, markers, glue sticks, scissors, and paper so nothing is missing when study time starts.
Small changes make a big difference. I build a pull-out surface or flip-down desk that tucks away when dinner is ready. Good lighting and an ergonomic seat keep kids comfortable through different grade levels.
We set a regular time, limit screens, and break big projects into steps. That routine, plus labels and flexible storage, helps every child find what they need fast and keeps clutter out of our living space.
Key Takeaways
- Use bins and a portable caddy for fast access to supplies.
- Install a pull-out or flip-down work surface to save table space.
- Set a consistent study time and reduce distractions.
- Label storage so each child knows where things belong.
- Design lighting and ergonomics for comfort across ages.
Plan the perfect spot: choosing the right kitchen cabinet and setup
I scout quiet corners and underused cupboards to carve out an efficient study nook. I look for a spot that stays calm after dinner and keeps the TV sightline out of view. This helps reduce distractions and supports learning routines for my kids.
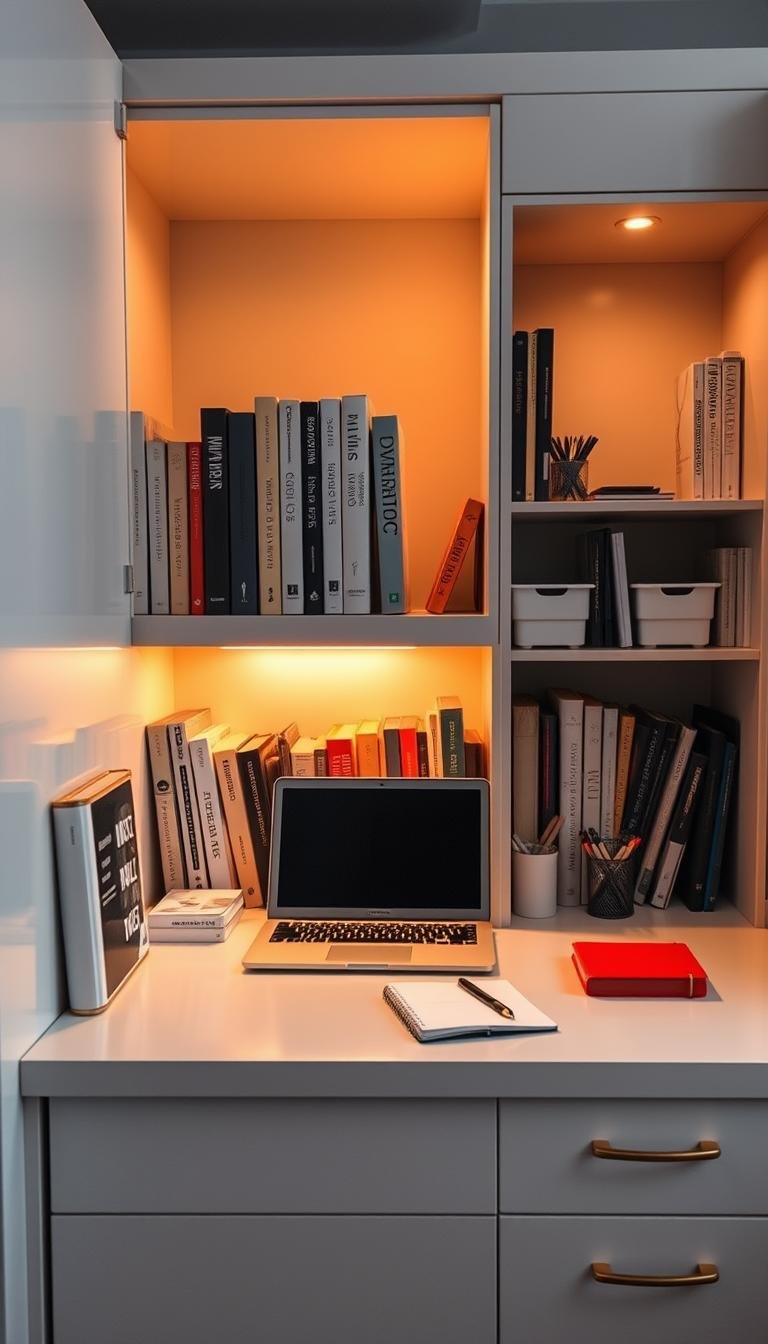
Lighting and location matter. I make sure task light is available and, if possible, natural light nearby. I add dimmable LED puck lights so the area works day or night.

Ergonomics and layout choices
Measure the footprint before you build. A single-wall layout fits in a narrow run. A corner option tucks the desk out of traffic, and a closet conversion hides the workspace when not in use.
- Keep supplies within reach with jars or a central tray so a child stays seated and focused.
- Plan power at the back or side wall and use grommets for neat cord routing.
- Allow knee and leg room so elbows sit near 90°, and feet rest on the floor or a footrest.
| Layout | Best for | Pros | Cons |
|---|---|---|---|
| Single-wall | Narrow spaces | Compact, easy install | Limited storage depth |
| Corner | Secluded nook | Tucked away, less traffic | Tight for larger chairs |
| Closet/flip-down | Multi-use room | Conceals mess, full shelves | Requires door clearances |
Final check: think through traffic from the living room to the fridge and pick a location that won’t force people to squeeze behind a chair. Small choices like vertical door storage save interior shelf depth and help make space feel organized for family use.
How can I create a homework station inside a kitchen cabinet? Step-by-step
I begin with a clear plan: tools at hand, supplies sorted, and a safe place for charging devices. This helps me build a compact workspace that fits our routine and keeps clutter out of living areas.

What I gather first
Tools and parts: tape measure, stud finder, drill, level, jigsaw, grommets, soft-close slides, piano hinge, L-brackets, LED puck lights, adhesive cable clips, and a surge-protected power strip rated for cabinets.
Build the workspace
I pick one option: a pull-out desk on full-extension slides, a flip-down door with support stays, or a wall-mounted floating shelf set at writing height. I top the surface with laminate or masonite so pens glide smoothly.
Add smart storage and power
I sort supplies—printer, graph and construction paper, pencils, markers, stapler, tape, glue, scissors, sharpener, ruler, and clips—into clear bins and a labeled paper tray. I route cords through a grommet to a surge strip and add vertical dividers for device parking.
Finishing touches
I install dimmable LED pucks, mount a magnetic panel on the door for scissors and tape, and add kid-friendly labels so every child returns things to their spot. A portable caddy makes it easy to move from the cabinet to the table and back in minutes.
Keep homework on track: organization, routines, and comfort that work
Good habits, neat supplies, and the right seat make study time easier. I use a clear routine and small rituals so the space shifts from play to work without argument.

Stock a portable caddy to move from cabinet to table without clutter
My caddy holds pencils, highlighters, sticky notes, scissors, tape, glue sticks, and a small sharpener. Kids grab it and take tools to the kitchen table or living room, then return everything to the cupboard when done.
Daily rhythm: set homework time, minimize distractions, and encourage focus
I set a consistent time that suits school demands and each child’s energy. Phones and TV stay off; short breaks help keep attention steady.
Comfort matters: supportive chair options and a smooth writing surface
Choose a good chair or add cushions and footrest. For rough tables I add a smooth writing surface so handwriting is neat and tasks finish faster.
| Tip | Why it helps | Quick action |
|---|---|---|
| Portable caddy | Makes moving easy, reduces lost supplies | Label and refill weekly |
| Set study time | Builds habit and focus | Pick after snack or activity |
| Comfort seating | Reduces fidgeting, improves posture | Use cushion or wobble stool |
Conclusion
With a few simple changes, spare inches became our go-to homework hub. I turned unused storage into a compact homework station that gives my family a reliable, clutter-free setup every day.
The essentials are clear: a smooth desk surface, labeled bins and a paper tray for supplies, smart door storage, and tidy charging so devices rest safely when not in use. Portable caddies and a supportive chair make work time faster and more comfortable for kids and child alike.
Keep routines simple—set study time, grab the caddy, then spend two minutes resetting. If you want a quick reference, check this helpful build guide for a compact setup: compact homework station. This flexible solution adapts over years and fits neatly in small living spaces, giving families more calm at the end of the day.