How Do I Design Island Seating That Encourages Family Gatherings?
I set the intention for my kitchen island to be the heart of my home. I want casual meals, homework, and long talks to happen around inviting seating that fits my space.
My plan is practical. I share simple measurement rules, people-first layouts, and choices that work in rentals or large kitchens. I use examples from Jessica Nelson Design, Becca Interiors, Kate Marker Interiors, and Home Consultant to show real solutions.
I outline step-by-step checks: how I assess use, map traffic, pick counter height, and place stools so faces stay visible for good conversation. Comfort and connection come before cramming in extra seats.
Expect quick tips on cozy benches, three-side seating for crowds, peninsulas when a full island won’t fit, and family-friendly finishes that last.
Key Takeaways
- Plan seating around real use, not just maximum capacity.
- Measure clearances and sight lines before choosing stools or benches.
- Prioritize comfort, durable finishes, and safe edges for kids.
- Use mobile islands or peninsulas for small rentals or flexible needs.
- Balance seating with hidden storage to keep the space tidy.
My Step‑By‑Step Plan to Turn the Kitchen Island into the Heart of the Home
First, I list the everyday tasks the island needs to handle. I note weekday breakfasts, after-school homework, coffee with guests, and meal prep so my seating choices match real life. This helps me avoid adding more chairs than we actually use.
Next, I map the room. I trace traffic flow to the sink, fridge, and range and mark clear walkways with painter’s tape. I test footprints so stools or chairs won’t collide when pulled out.
I check sightlines to the adjacent dining area and living room to make sure faces can see conversation rather than a wall. For compact kitchens, I often place stools on adjacent sides so people can chat while I’m cooking.

Where flexibility matters
I consider a mobile island on wheels for rentals or tight spaces to keep functionality without a permanent footprint. A long edge breakfast bar serves quick meals, while larger square or U-shaped islands give more seats without blocking flow.
- I align seat counts with our typical headcount and plan overflow at the dining table for guests.
- I assign zones—prep on one end, seating on the other—so tasks don’t compete for the same area.
- I place outlets or a charging shelf near seating for homework and recipe tablets.
Getting the Measurements Right for Comfort and Connection
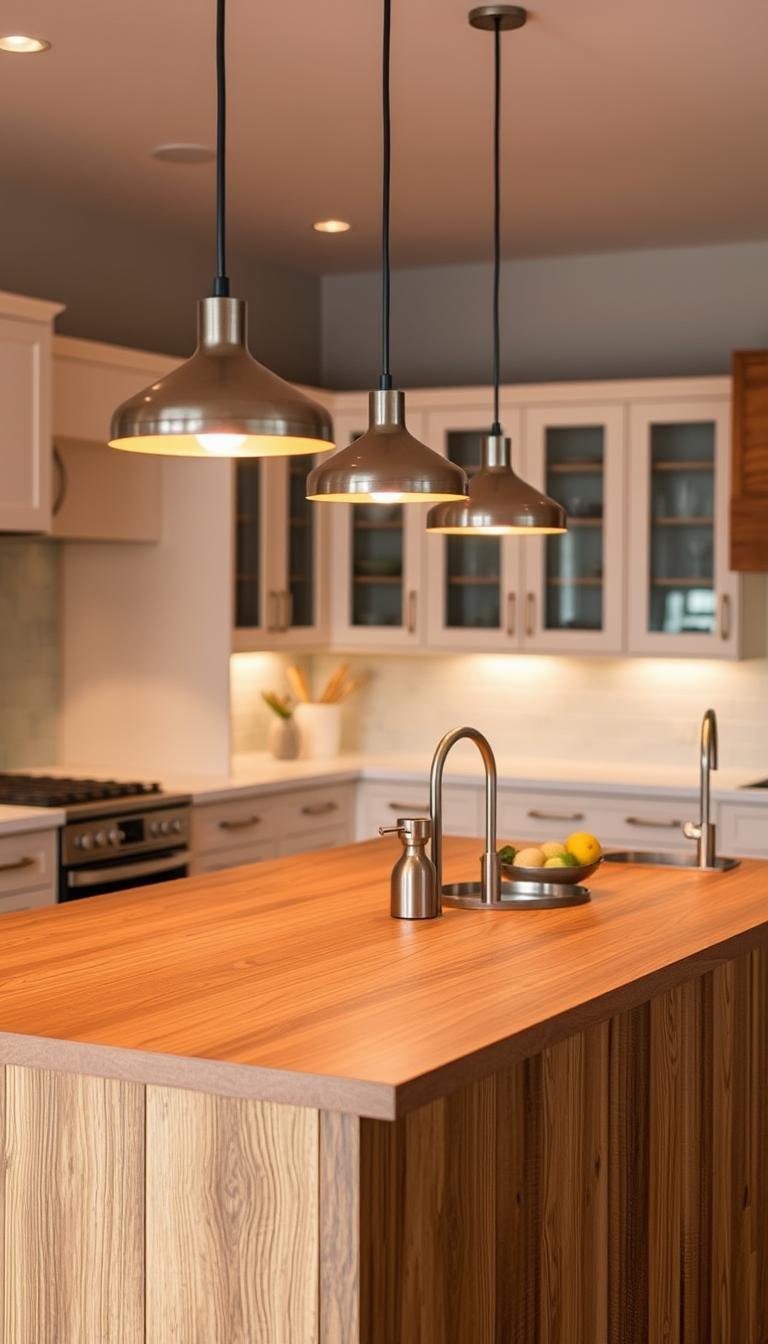
Getting the measurements right keeps everyone comfortable and conversation flowing. Start by confirming whether your surface is a 36-inch counter or a 42-inch bar so you can match the correct seat height and avoid dangling knees or hunched shoulders.

Counter vs. bar height
Standard counters sit at about 36 inches and pair best with 24–26 inch stools (roughly 60–66 cm). For a bar-height top near 42 inches, choose 29–32 inch bar stools (75–80 cm) to keep posture relaxed.
Seat spacing and overhang
Allow roughly 24 inches per person so elbows do not clash and seats feel private. Plan a 12–18 inch overhang for knee room; deeper overhangs make tucking stools easier but need proper support under the countertop.
Walkways that work
Keep clear paths of about 36–43 inches in high-traffic kitchens so backpacks, pets, and hot pans pass without near misses. Test a stool in place before committing to confirm shins clear panels and the seat tucks in fully.
- Tip: Mark seat centers with tape at 24-inch intervals to visualize how many seats truly fit the span.
- Consider swivel stools if space is tight to ease entry and exit.
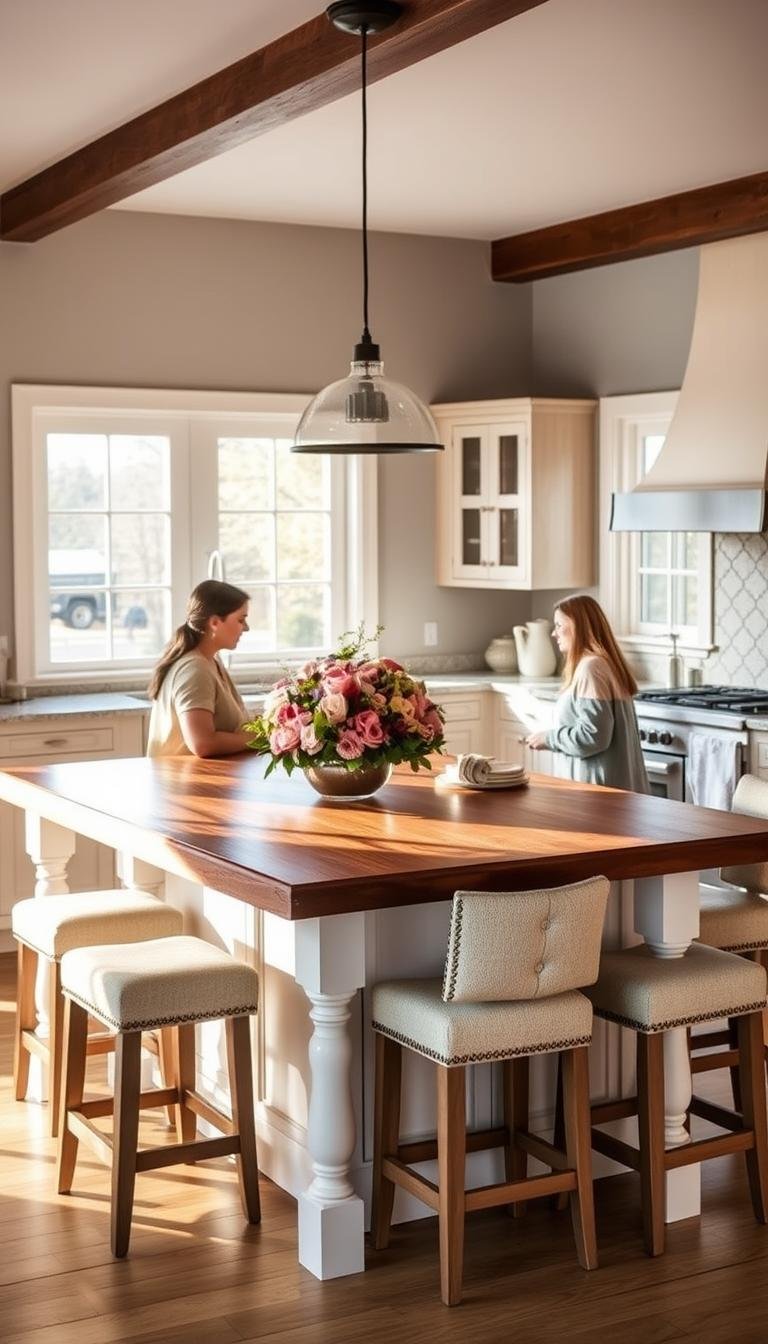
Layouts That Invite Gathering: From Small Spaces to Crowd‑Friendly Islands
Smart placement of seats turns a tight kitchen into the most social room in the house.

Seating on adjacent sides helps small islands serve two or more without crowding. In compact plans like Dazey Den, people face each other while I cook, so conversation stays easy and natural.
Seating on adjacent sides for small kitchens and rentals
Try stools on two edges when space is limited. This keeps the main walkways clear and makes a cozy spot for homework or coffee.
Three‑side overhangs and U‑shapes to seat a crowd without blocking flow
Three‑side overhangs and U‑shaped islands add many seats while keeping the work area open. The Olga Dean Houzz project shows a 5-by-10-foot example seating eight to twelve and keeping faces visible.
Peninsulas and mobile islands when a full island won’t fit
A peninsula can gain two to four seats without narrowing circulation. For rentals, a mobile island on wheels adds prep space and two tuck‑away stools when the floor needs to be clear.
- I place the primary prep zone opposite the most used seats so serving feels safe and smooth.
- I balance storage and seats at the ends, swapping a stool for drawers when needed.
- I pick slim stools or swivels so seats fully tuck under overhangs and traffic keeps moving.
“Three‑side overhangs and U‑shapes create conversation while preserving flow.”
How Do I Design Island Seating That Encourages Family Gatherings?
A thoughtful layout makes the kitchen island the heart of the home. I focus on sightlines first so people talk face to face, not over shoulders.
Choose arrangements that keep faces visible for easy conversation
Overhangs on three sides let diners see one another, like a table. A 5-by-10-foot example seats eight now and adds four more for parties.
Adjacent sides or a gentle curve help everyone stay in the loop while someone cooks at the counter.
Blend prep and dining zones so I can cook while we connect
I keep a clear prep strip opposite the main dining edge. This separates hot pans from where kids and guests sit.
Anchoring a banquette on one edge creates a cozy dining spot while the other sides stay open for stools and extra people.

- Position seats to keep sightlines to the living room or a window.
- Center pendants over seat spans so lighting feels even.
- Add outlets and a small landing for chargers and homework.
| Option | Best for | Seats |
|---|---|---|
| Three‑side overhang | Conversation and parties | 8–12 (5×10 example) |
| Banquette + open sides | Formal dining + casual perches | 6–10 |
| Peninsula / mobile island | Small kitchens, rentals | 2–6 |
“The island’s job is connection first, capacity second.”
Choosing Stools and Chairs: Comfort, Safety, and Style
Picking stools and chairs means balancing posture, kid safety, and how the space feels. I match seat type to surface height first so people sit comfortably during meals or homework.

Counter vs. bar: Counter stools pair with ~36-inch counters (about 60–66 cm seat height). Bar stools suit ~42-inch bars (75–80 cm) to keep posture relaxed.
Backed stools support longer sitting and add safety for kids. Backless stools save sightlines and tuck fully under the overhang. Swivel seats ease entry when space is tight, while fixed bases mean fewer moving parts to maintain.
- I consider adjustable-height stools so one purchase grows with kids.
- I test seat depth, cushion firmness, and footrest position before buying.
- Benches or a banquette give flexible counts and built-in storage along a long edge.
- I choose wipeable performance fabrics or leather for easy cleaning and verify sturdy bases and weight ratings for lasting use.
“Comfort and durability beat fads—measure from the countertop underside to the seat to ensure knees clear.”
Materials, Finishes, and Easy‑Care Choices for Real Family Life
Choose materials that stand up to daily use without losing their look. I pick options that wipe clean, hide wear, and stay safe for kids and pets.

Durable woods and low‑maintenance finishes
Solid oak and walnut resist dents and patina nicely over time. I prefer hardwax oils and natural waxes because they refresh easily without harsh chemicals.
Performance fabrics and mixed materials
Leather and performance textiles wipe up spills and hide smudges. Pairing warm wood seats with powder‑coated metal frames gives strength and a consistent look across modern homes.
- Repeat one element—a wood tone or metal finish—to tie the room together.
- Consider a split‑level countertop to keep prep mess contained while people still sit and chat.
“Practical finishes mean less worry and more time around the table.”
| Material | Best for | Care | Size / Notes |
|---|---|---|---|
| Oak | High‑traffic kitchens | Oil, light sanding | Durable, hides scuffs |
| Walnut | Warm tone in homes | Oil refresh | Shows rich color |
| Performance fabric / Leather | Active seating | Wipe clean | Dark/textured hides marks |
| Powder‑coated metal | Structural frames | Wipe; durable | Makes mixed designs cohesive |
Smart Storage and Multi‑Use Features That Make Space Work Harder
Smart storage turns an island from a single surface into a compact command center for daily life.
Built-in drawers and open cubbies keep the kitchen tidy and items within reach. I add deep drawers under the seating side for napkins and art supplies so the top stays clear.
Open cubbies under the overhang make a quick home for backpacks and sports gear. This keeps tripping hazards off the floor and the room safer during rush hour.

Flexible tops and charging zones
Drop-leaf and pull-out surfaces add extra table space for visiting relatives, then disappear when not needed. Split-level tops give a high prep strip and a lower dining area for laptops and homework.
- I build a small charging shelf with outlets and USBs near seats to corral devices during study time.
- Soft-close slides and safety latches protect little fingers and cut kitchen noise.
- Trade one stool for a vertical drawer bank when daily storage beats another seat.
| Feature | Best for | Benefit |
|---|---|---|
| Deep drawers under seating | Everyday storage | Keeps placemats and art supplies handy |
| Open cubbies | Kids’ gear | Clears floors, reduces trips |
| Drop-leaf / pull-out table | Small apartments | Extra seats on demand |
| Charging shelf | Homework zones | Manages devices, keeps counters clear |
Plan zones for trash, towels, and lighting so traffic stays smooth when the area fills. For more inspiration, see island kitchen seating ideas.
“The best islands balance storage and flexibility so the space works for every day.”
Safety and Accessibility: Design Details I Never Compromise On
Small choices in joinery and hardware prevent big accidents and years of wear. I start with robust construction: reinforced joinery and weight ratings near 150 kg per seat for any high-use family kitchen.
Rounded corners and anti‑tip anchors reduce bumps and hazards. Soft‑close drawers and doors cut noise and protect little fingers during meal rushes.

I keep walkways about 36–43 inches so strollers, pets, and busy feet pass safely. Seats get a bit more room when boosters or clip‑on chairs are used.
- I choose sturdy stool bases and check weight ratings rather than fads.
- Outlets sit above counter height at seating edges so cords don’t dangle into reach.
- I anchor tall storage and confirm overhang supports to prevent tipping at the island edge.
- I test stool stability on my actual floor and add felt pads to protect hardwood and prevent slips.
“Durable joinery and smart hardware keep the kitchen calm, safe, and ready for daily life.”
Finally, I pick certified, low‑offgassing finishes so the space we use all day stays healthy for homes and kids for years.
Style Ideas and Current Trends in Kitchen Island Seating
Mixed materials and soft shapes are the hallmarks of current kitchen trends. I prefer solid wood seats with powder‑coated metal frames for durability and easy cleaning. These pair well with painted cabinetry or a neutral palette to keep the look calm.

Three‑side seating is on the rise for conversation-first layouts. A 5-by-10-foot island can seat eight comfortably and add more for parties. That shape keeps people facing one another and keeps a clear prep area opposite.
- I try three-side seating for lively chats and even distribution of seats across the area.
- Mix contrast: leather or rattan stools against a painted island, but repeat one finish to unite the scheme.
- Curved corners and bullnose edges offer a welcoming touch and safer edges for active homes.
- Stagger stool types—high-back in the center, low-profile at the ends—to balance comfort and visual weight.
- Consider a slim waterfall countertop for a clean line, while leaving proper knee clearance at seating sides.
Texture and finish matter. I add woven or bistro patterns for interest and choose wipeable fabrics for easy upkeep. Pendant groupings echo stool metals or island hardware to make the whole area feel intentional and collected.
“Natural materials and mixed metals keep kitchens warm while staying practical.”
Conclusion
A practical recap keeps the focus on comfort, clearance, and long-term use.
Measure first: match seat height to counter or bar height, give roughly 24 inches per person, and leave 36–43 inches for clear walkways.
Favor adjacent or three-side layouts so faces stay visible and meals feel natural. Choose adjustable stools for comfort and pick finishes that clean up easily to look fresh for years.
Build in smart storage like drawers, cubbies, and a charging spot. Add soft-close hardware and rounded edges for added safety.
Ready for more ideas? See these kitchen island seating ideas to fine-tune your plan.
Now I’ll put tape on the floor, pick my seats, and turn the kitchen into the heart of my home.