How Can I Create a Wine Display That Adds Elegance to My Kitchen?
I set out to build a clean-lined wall feature that blends style with smart storage. I want a statement that protects my bottles while fitting my daily routine.
Proper storage matters: I keep bottles horizontal to protect corks, and I place the rack away from sunlight, heat sources, and vibration. That simple rule keeps flavors true as bottles age.
I preview options that suit my wall and my taste. Label-out Ultra HZ rails give a sleek, modern look and use vertical space well. Cork-out Ultra ST rails work in tight spots for easy grabs, and floor-to-ceiling posts make a dramatic, high-capacity display.
Fusion Panels let me add soft LED backlighting in a recessed channel so labels pop without UV harm. For installation, I use studs or anchors, a level, and test-load a few bottles before filling the whole system.
With a little planning, the result is a practical, curated display that brings real elegance to my kitchen and keeps my collection ready to share.
Key Takeaways
- Keep bottles horizontal and away from heat and sunlight for proper storage.
- Choose label-out HZ rails for sleek display or cork-out ST rails for tight spaces.
- Floor-to-ceiling posts maximize capacity and create a bold wall feature.
- Fusion Panels add LED backlighting without exposing bottles to UV.
- Install using studs or anchors, a level, and test-load before full use.
My plan for an elegant, functional wine display in the kitchen
My approach focused on a slim, modular rack layout that fits the wall and scales with my taste. Modern wine racks blend into the room and act as décor while offering solid storage for daily use.
I start by measuring the wall and setting a bottle-capacity target so the design matches how I live. That helps me decide whether metal, wood, or acrylic will pair best with cabinets in the kitchen and the adjacent living area.

Function drives choice: label visibility, easy removal, and stability matter. I compare modular rails and floor-to-ceiling posts, aiming for a system that lets the collection grow without crowding the space.
- Measure first: wall width, usable height, and bottle count.
- Pick a style: metal for contemporary, wood for warmth, acrylic for minimalism.
- Plan placement: keep the rack away from heat and high traffic, yet visible from the dining area.
What I decide first: storage rules, placement, and size for my wine collection
I mapped the ideal spot before buying rails, matching storage needs to the kitchen’s traffic and temperature.

Protecting quality is non-negotiable. I store bottles horizontal and label-out so corks stay moist and oxidation is avoided.
Temperature swings and direct sun are harmful, so I pick a wall away from ovens, dishwashers, and south-facing windows. Low-vibration areas keep flavors steady.
Placement and access
I choose a calm wall or nook with easy access but out of main traffic paths. That keeps the display visible without crowding prep zones.
Right-sizing the display
I count current bottles, then add a 20–30% buffer for growth. For narrow walls I prefer floor-to-ceiling racks to use vertical space.
| Consideration | Action | Benefit |
|---|---|---|
| Orientation | Horizontal, label-out | Protects corks and flavor |
| Location | Away from heat and sun | Stable temps, preserved wine |
| Capacity | Audit bottles + 20–30% buffer | Room to grow |
| Mounting | Mark studs, use anchors, test-load | Safe, level installation |
Modular racks are my final choice so I can add rows or columns without starting over. I organize by varietal or occasion so I grab the right bottle fast.
Design paths I can take to display wine beautifully
I mapped several layout routes so each rack choice fits the room and daily use. Below are practical options that balance look, capacity, and access.

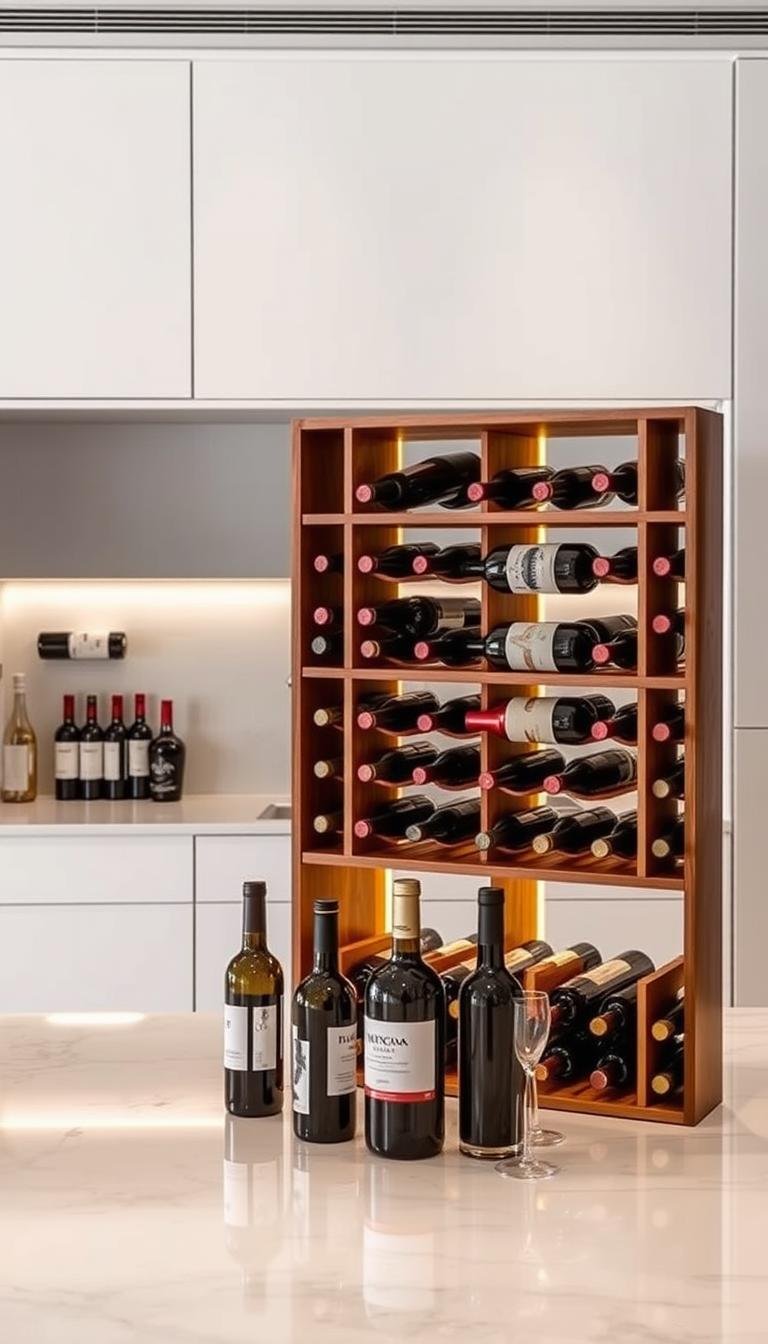
Wall-mounted wine racks: label-out HZ rails for a sleek focal point
Ultra HZ Wall Rails run 1–4 ft in sleek metal. They hold 3–36 bottles and are fully modular. Labels face forward, so the wall becomes a refined piece and a functional solution.
Cork-out wall rails for tight spaces
Ultra ST Wall Rails present corks out. They save depth and allow quick grabs in narrow alcoves. Use these where space is limited but capacity still matters.
Floor-to-ceiling racks for vertical impact
Posts mount from floor to ceiling, fit corners or under stairs, and come as single columns or double-sided towers. This option turns a slim wall into a bold statement.
Display rows and panel backdrops
Ultra Display Row highlights labels at eye level. Fusion Panels add depth and hide recessed LED channels. Finishes include Dark, Black Acrylic, and Alumasteel.
- Mix metal with touches of wood for warmth.
- Place a Display Row as the visual anchor.
- Keep modularity so the layout expands into a future wine cellar if the collection grows.
Materials and style choices that elevate my kitchen décor
Material choices set the tone for a kitchen rack that feels intentional and lived-in.
“The right finish turns a practical storage solution into a decorative focal point.”
Wood brings warmth and a classic tone. I use protective finishes and place wood away from steam and direct heat to prevent warping.
Metal offers slim profiles and strong modular options. It needs solid anchors, but it pairs well with stainless appliances and modern hardware.
Acrylic or glass keeps the look minimal and gallery-like. It improves label visibility but suits smaller collections because of lower weight capacity.

Matching designs and maintenance
- I coordinate Fusion Panel finishes—Dark, Black Acrylic, or Alumasteel—with cabinets and counters for cohesive décor and a refined touch.
- I balance rack density and open space so the wall reads as design-forward, not cluttered storage.
- For dining cohesion, I echo finishes from the dining area so the display feels like part of the home.
How Can I Create a Wine Display That Adds Elegance to My Kitchen? My step-by-step build
My build started with a clean wall, a tape measure, and a clear plan for spacing and reach.

Prep and layout
I clear and clean the wall, then measure full width and height so rows and columns fit standard and larger bottle sizes.
I mark studs and set elevations for daily-use rows, leaving higher rows for long-term storage. Dry-fit rails and test spacing with empty bottles before drilling.
Selecting the system
I pick the option that matches the room and load: label-out HZ wall rails for a sleek wine rack, floor-to-ceiling posts when studs are scarce, or stackable cabinets if I want freestanding wine racks.
Mounting safely
I use a level on every rail, pilot holes at studs, and heavy-duty drywall anchors when needed. For posts I measure floor-to-ceiling precisely and add ceiling brackets for a solid, plumb install.
Organizing bottles
I arrange by varietal, region, or occasion with labels facing forward so selection is fast and the display feels curated.
| Step | Action | Tools | Benefit |
|---|---|---|---|
| Prep | Clean, measure, mark studs | Tape measure, pencil | Accurate layout for different sizes |
| Mounting | Pilot holes, anchors, ceiling brackets | Drill, level, anchors | Safe, stable rack or posts |
| Test | Dry-fit and test-load bottles | Empty bottles, wrench | Confirms spacing and strength |
| Organize | Label-forward by type | Marker, inventory note | Fast selection and neat wine storage |
Lighting, accents, and smart add-ons that make my display a focal point
The right illumination and finishes transform a practical wall into an intentional statement. I use lighting to highlight labels and bring depth without risking bottle quality.

LED backlighting and gentle spotlights
Fusion Panels have a recessed channel built for LED strips so labels glow evenly. LED options keep UV low, protecting corks and flavor.
I add one or two small spotlights aimed at my Display Row for prized bottles. Dimmers let me shift from bright selection mode to a soft, intimate look during dinner.
Finishes, metals, and warm wood accents
I echo kitchen finishes with panel colors and mixed metals. A warm wood shelf or touch of wood softens the composition and ties the display to the dining room and living area.
- I route wiring discreetly behind panels for clean sightlines.
- I choose warm or neutral white for consistent color temperature across the area.
- I consider a temperature-controlled unit with anti-vibration for premium storage.
| Feature | Benefit | Placement | Notes |
|---|---|---|---|
| Fusion Panel LEDs | Even backlight, low UV | Behind Display Rows | Ideal for label visibility |
| Spotlights | Focused emphasis | Above eye-level rows | Use dimmers to avoid glare |
| Mixed finishes | Coordinated style | Panel edges and shelves | Match metal with wood accents |
| Temp-controlled unit | Premium bottle protection | Dedicated cabinet or wall niche | Anti-vibration systems available |
“Lighting turned the rack from storage into a designed piece.”
I step back and tweak angles so labels, finishes, and lighting read as one cohesive addition. The result is a refined focal point that showcases my bottles and complements the room.
Keeping elegance practical: access, maintenance, and room-to-room cohesion
My priority is placing the rack so it’s handy during prep but shielded from ovens and windows. That balance gives daily convenience without sacrificing long-term storage quality.

Easy access near prep zones while keeping heat and sunlight at bay
Place the unit within reach of cooking areas for fast selection, yet keep it off hot walls and away from direct sun. Floor-to-ceiling posts or cork-out rails work well in tight corners and small space layouts.
Cleaning, stability checks, and expanding modular racks as my collection grows
I dust panels and rails regularly and tighten fasteners during a quick stability check. I test-load any new module and re-level the rack so every section stays secure.
- Modular expansion: add another rail, column, or post so the system grows with the collection without a full redo.
- Organize for use: store daily bottles low and center; keep special vintages higher for long-term care.
- Room cohesion: echo cabinet finishes so the wall feels like part of the home’s design and a great way to connect rooms.
- Future plans: choose components that can migrate into a dedicated wine cellar later for a seamless upgrade path.
| Task | Frequency | Benefit |
|---|---|---|
| Dust rails & panels | Monthly | Clean finishes, clear labels |
| Stability checks & test-load | Quarterly | Safe, level storage |
| Expand modular pieces | As needed | Scales collection without remodel |
Conclusion
I finish by choosing a stable wall and a simple system that fits daily life and future growth.
Modern options like Ultra HZ and ST rails, floor-to-ceiling posts, Display Row, and Fusion Panels give modular ways to scale a wine display while protecting bottles. Thoughtful lighting and finishes lift labels and add a curated touch that ties into the dining and living areas.
For safety and longevity I follow solid install steps—mark studs or use anchors, level every rail, and test-load before filling. Regular dusting and quick stability checks keep the display crisp.
This solution grows with my collection and can evolve into a wine cellar later. The result is a practical, stylish addition that works day to day and reads like intentional design.