How Can I Install Custom Closet Systems on a DIY Budget?
I trimmed a five-figure quote to a weekend-friendly plan and built a sturdy, neat closet for about $2,000. I sketched my layout, ripped Baltic birch into dividers, used ¾-inch MDF for spacers, and nailed sections into studs for strength.
The result looked like a designer finish without the designer price. I prepped by removing old wire shelving, patching holes, sanding, and priming. Final touches—molding, caulk, and two spray coats of Benjamin Moore Chalk White satin—made the build feel polished.
I also tested a rail-based route that hangs units on a steel rail, anchored to studs or toggles, and set rails so top shelves sat near 84 inches. I followed common heights for rods, shelves, shoes, and boots so my storage fit my clothes and life.
This piece previews both build paths, the core materials and tools I used, and realistic time and cost benchmarks so you can choose the route that fits your space and timeline.
Key Takeaways
- I saved thousands by building plywood built-ins and finishing them like pros.
- Prep—clear, patch, sand, prime—makes finishes last and look high end.
- Rail systems offer a faster install; anchor rails to studs or use toggles.
- Follow standard rod and shelf heights so storage works for your wardrobe.
- Trim, caulk, and paint give a polished, durable final look.
My DIY Game Plan: Budget, Layout, and What I Really Need
Before cutting wood or buying rails, I emptied the closet and counted every item to see what truly needed storage.
I sorted clothes, shoes, and accessories into keep, donate, and maybe piles. That simple audit told me where to devote most shelf and rod space.
Next I mapped priorities: more hanging for dresses, doubled rods where suits fit, and deep open shelves for shoes I wear often. Drawers went where small things belonged.

- I sketched a short list of section widths, shelves, drawers, and rods.
- I weighed two design paths: a wall-hung track that adapts over time or a floor-built run for a built-in look.
- I blocked time to empty and prep the space so measuring and painting stayed simple.
“Purge first; design around what you actually own, not what you imagine.”
| Option | Cost | Flexibility | Finish |
|---|---|---|---|
| Wall-hung track | Lower | High | Modular |
| Floor-built | Higher | Low | Seamless |
| Hybrid | Mid | Medium | Custom look |
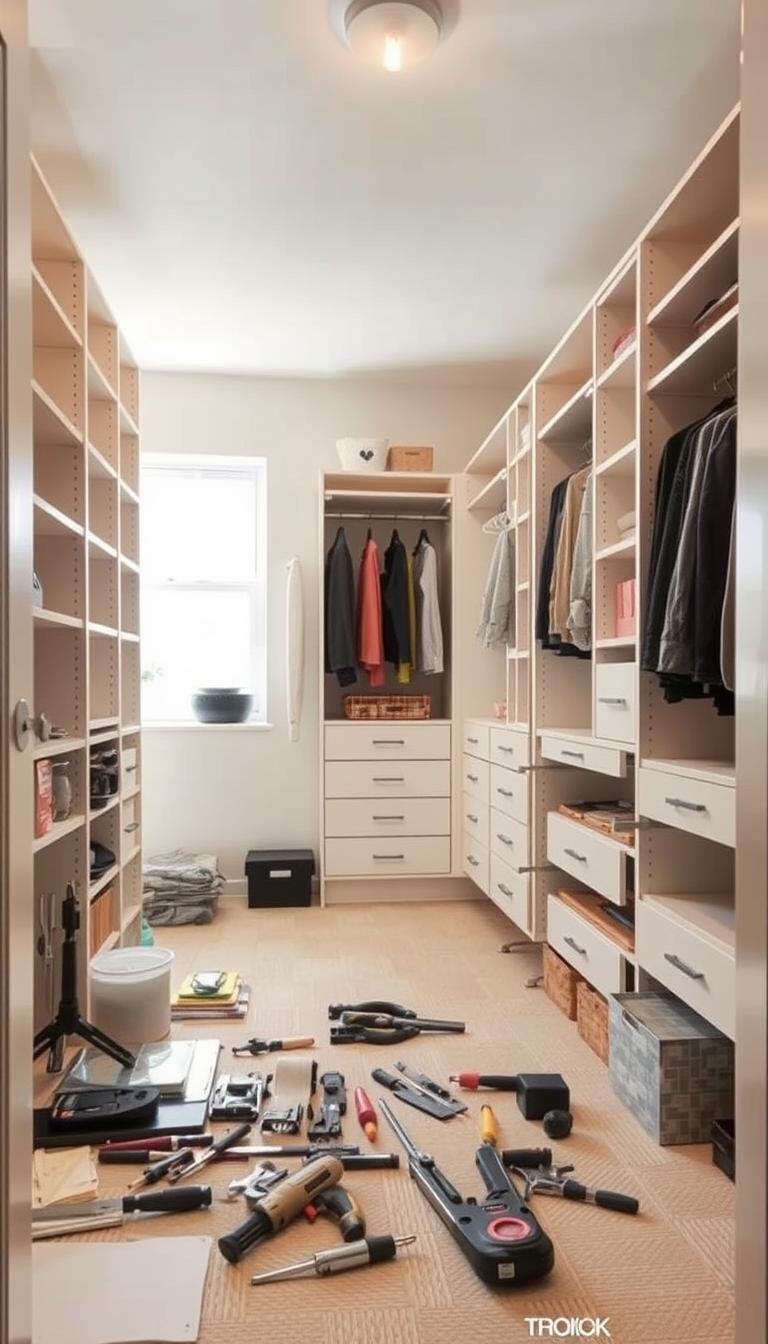
Tools, Materials, and Hardware I Actually Used
My workbench lived with the essentials—measured, labeled, and ready—so each step flowed without surprise.
Core tools I used were practical and repeatable: a trusted stud finder, a two- and four-foot level (I also used a laser level for longer runs), table saw or circular saw with a straight guide, nail gun, and an impact driver. A sharp tape measure made tight cuts simple.
Materials and parts included 4’x8′ Baltic birch plywood ripped to 16″ strips, ¾” mdf spacers, finish trim, wood glue, and 1″ brad nails. I kept closet rods, rod cups, drawer slides, and screws in one bin so I never lost track of small hardware.

Optional system parts
- Rail/track kits for hanging units; mount the rail at measured heights (example: 75¾” for an 84″ top shelf) and anchor to studs or use drywall toggles.
- Cam shelves to lock sections square, plus common drawer slides and the small pieces that come with many kits.
- Extra toggles, spare screws, and a small parts box so assembly never stalls.
Quick tip: stage each shelf and piece by section, dry-fit before final fastening, and check your level often. Straight, plumb lines make every shelf look pro.
Prep the Space: Clear-Out, Patch, and Paint Before I Build
With the closet emptied, I stripped out the old wire shelving and inspected every inch of the room. Removing the fasteners and clipping anchors flush revealed the usual drywall holes that needed attention.
Remove, patch, sand. I filled anchor holes with drywall mud, let it dry, then sanded smooth and wiped the dust. I primed any raw spots so paint would bond and give a consistent finish.
Pick a wall color that helps the unit stand out. Light gray made my white pieces pop. Bright white will make a small space feel larger. I snapped level lines with a laser and marked studs with a magnetic finder before anything went up.

Quick checklist before hanging or building
- I protected floors with drop cloths and taped crisp edges.
- I checked lighting and airflow so finishes cured well.
- I staged my cut list nearby to avoid dings to fresh paint.
“Patching and priming first saved time and made the final look professional.”
| Task | Time | Materials | Why it matters |
|---|---|---|---|
| Remove wire shelving | 30–60 min | Pliers, screwdriver | Expose holes to patch cleanly |
| Patch & sand | 1–2 hrs + dry | Drywall mud, sandpaper | Creates a smooth base for paint |
| Prime & paint | 2 coats + dry time | Primer, paint, roller | Improves adhesion and final look |
| Mark studs & level | 15–30 min | Magnetic finder, laser level | Ensures secure anchoring for rails |
Build Path One: DIY Plywood Closet System That Looks Built-In
My approach used repeatable cuts and simple joinery to make the run look intentional and solid. I ripped 4’x8′ Baltic birch into 16″ strips for vertical dividers and 3½” strips for shelf hooks and the base. Using consistent pieces kept cuts efficient and edges clean.

Prep, studs, and MDF spacers
First I located studs and set ¾” mdf spacers at the wall. The spacers let trim cover exposed edges and let the side of each divider read thicker. The stacked mdf also creates 2″ faces when needed.
Assemble base and verticals
I built a bottom from 3½” front and back strips with a 15″ center support. Then I fastened vertical shelf hooks to studs, glued hooks to drywall, and nailed dividers into the base and hooks so the whole shelf run felt solid.
Fixed shelves, top shelf, and trim
The shelving is fixed to save time and cost. I ran a continuous top shelf and nailed it into each divider for rigidity. Finish with 2½” crown and 1¾” divider trim so the system reads like a single built-in piece.
| Feature | Dimension | Notes |
|---|---|---|
| Small hanging | 36″ | Shirts, short garments |
| Medium hanging | 40″ | Blazers, folded trousers |
| Tall hanging | 60″ | Dresses, long coats |
| Shoe shelf | 6½” | Standard shoes |
| Boot shelf | ≥10″ | Tall boots clearance |
Quick tip: measure twice, keep edges square, and pre-plan where each piece lands so the closet feels original to the room. For a full how-to I linked my diy custom closets guide.
Build Path Two: Wall-Hung Rail or Track Systems to Save Time and Money
For a faster, modular route I used a rail that carries finished units from the wall and keeps the floor clear for easy cleaning.

I set a level line at 75¾” for an 84″ top shelf and cut the steel rail to length. Where studs aligned I anchored the rail into studs; where they didn’t I used drywall toggles and tightened fasteners with an impact driver.
Vertical panels notch onto the rail, then cam shelves lock each section square so shelving feels rigid. Drawer slides attach to frames and rod holders press into pre-drilled holes for quick hanging rods placement.
Work smart: use a magnetic stud finder and laser level, pre-fit units, and confirm level as you go so doors and drawers track true. The included hardware usually simplifies the process.
This wall-hung system cost less than a built-in run and lets units be swapped later for a fresh look without demolition.
Measurements That Matter: Hanging Rod Heights, Shelf Spacing, and Shoe Storage
To confirm proportions I taped outlines on the floor and checked clearances before any final cuts. This quick mock-up saved adjustments later and made the design feel right in the room.
Rod heights set the rhythm. I used 36″ for short hanging, 40″ for medium pieces, and 60″ for long garments so each item hangs free without brushing the floor.

Shelf depths and spacing
I picked shelf depths of 16–20″ so folded clothes stack neatly and stay visible. Consistent vertical spacing makes reaching and organizing simple.
Shoe and boot storage
Shoe shelves sit near 6½” tall for most pairs, while boot shelves keep at least 10″ of clearance. That avoids scuffing and keeps the space tidy.
- Align the top shelf across sections for a clean line; set it near 84″ if possible.
- Plan rod widths by wardrobe categories and leave room for future additions.
- Tape outlines or mock up units to confirm the shelving proportions before drilling.
| Item | Dimension | Purpose |
|---|---|---|
| Short hanging | 36″ | Shirts and short jackets |
| Medium hanging | 40″ | Blazers and folded trousers |
| Tall hanging | 60″ | Dresses and long coats |
| Shoe shelf | 6½” | Standard shoes |
| Boot shelf | ≥10″ | Tall boots clearance |
Finishing Touches: Trim, Caulk, Paint, and a Polished Custom Look
Small trim choices transform raw panels into a polished built-in piece. I used measured molding and careful seams to make the run read like original millwork.

Trim and seams: I nailed on clean divider trim and a slightly larger top molding—about 2½”—and 1¾” divider trim so gaps vanish from top to bottom. Then I ran a fine bead of caulk along every inside and outside joint.
Fill nail holes and sand lightly so paint lays down smooth over raw mdf and wood. I prime all raw surfaces first because primer evens absorption and helps finish coats bond.
Finish coats and options
- I prefer spraying two light coats for an ultra-smooth finish, but rolling with a high-density foam roller works well if you mask carefully.
- Paint every shelf edge and shelf face so the whole unit reads cohesive when opened.
- Clear coats are optional if I want natural wood grain; otherwise paint gives a durable, wipeable finish.
- Watch for caulk shrinkage and drips; touch up after the first coat for crisp lines.
Final checks: remove tape while paint is slightly wet, protect hardware until cured, and let ventilation do its work before loading heavy bins. I step back and confirm the overall design and look against adjacent rooms so the shelf run feels intentional and finished.
“Good finishing hides simple materials and makes the project read like professional work.”
Organization, Lighting, and Style on a Budget
For daily ease, I focused on small upgrades that multiply capacity and polish the room’s look.

Double hanging rods, matching hangers, and clear shoe organizers
Start with simple swaps that change how the space functions. Double hanging rods in short-hanging sections nearly double usable storage without crowding. Matching hangers and labeled bins help organization stick and make everything feel intentional.
Clear, drop-front shoe organizers keep pairs visible and protect shelves. Corral small items into drawers or dividers to reduce visual clutter and speed daily choices.
Under-shelf LEDs, a pendant or chandelier, and hardware upgrades
Good lighting lifts both style and function. I added under-shelf LED strips for task light and, where wiring allowed, a small pendant to give the room a boutique vibe.
Swapping standard knobs for antique pulls or crystal knobs is an inexpensive upgrade that changes the whole look.
Back panel paint or peel-and-stick wallpaper for boutique vibes
Refreshing the back panel with bold paint or peel-and-stick wallpaper adds personality with little effort. Replacing old wire shelving or covering it with wood panels instantly refines the space without a full rebuild.
| Upgrade | Cost | Benefit |
|---|---|---|
| Double hanging rods | Low | Increase storage capacity |
| Under-shelf LED strips | Low–Medium | Improves visibility and ambiance |
| Clear shoe organizers | Low | Protects shoes and reduces floor clutter |
| Peel-and-stick back panel | Low | Instant boutique look |
| Hardware swap | Low | Big visual impact for little spend |
Final tip: keep walkways clear, group items by category, and revisit the layout after a few weeks to tweak organization and lighting so the space truly works for you.
How Can I Install Custom Closet Systems on a DIY Budget? My Cost, Time, and Smart Shortcuts
Rather than improvise, I booked the weekend, pre-cut panels, and treated the project like a short sprint. That focus saved hours and kept mistakes low.
Cost and schedule at a glance: a plywood built-in ran me roughly $2,000 versus a quoted $10,000 custom closet. For a large walk-in, compressing work into one focused weekend is a realistic time frame when stages are planned.
Rail kits speed the way I work. They arrive labeled with cam shelves, drawer slides, and hardware. Set the rail at 75¾” for an 84″ top shelf, anchor into studs or toggles, then hang verticals to finish fast.

- Plan measurements up front: rod heights at 36/40/60″, shelf depths 16–20″, shoe shelves 6½”, boot shelves ≥10″.
- Pre-cut or pre-order parts to avoid idle time during the project.
- Batch tasks—cut, sand, paint—to protect both time and budget.
- Skip adjustable hardware where not needed; upgrade daily-touch parts like drawers and rods.
- Anchor into studs or use quality toggles to prevent rework later.
“Trim, caulk, and paint unlock a custom closet look without a custom-shop price.”
| Option | Cost | Time |
|---|---|---|
| Plywood built-in | $2,000 | Weekend |
| Rail-based kit | Lower | Shorter install |
| Full custom quote | $10,000+ | Weeks |
Conclusion
I finished by walking each wall and confirming that rods, shelves, and drawers held real weight without wobble.
Simple rules guided the close: 16″ dividers and 3½” hooks, ¾” mdf faces, fixed shelf runs, and crisp trim with caulk and paint made the run read built-in.
Before final loading I removed old wire, patched walls, and set a level line. A stud finder found strong anchor points so rods and drawers stay secure when packed with clothes and items.
Good lighting, matching hangers, and clear boxes turned storage into calm space. I kept spare hardware and a couple extra units for future tweaks. The diy project looks designer-made because planning, measured heights, and careful finishing mattered.