How Do I Build a Home Library Wall That Doubles as Storage?
I wanted a wall that actually held my books and day-to-day items, not just looked pretty. My plan mixed closed cabinets with framed shelves and clean lines so the piece fits my living room without feeling heavy.
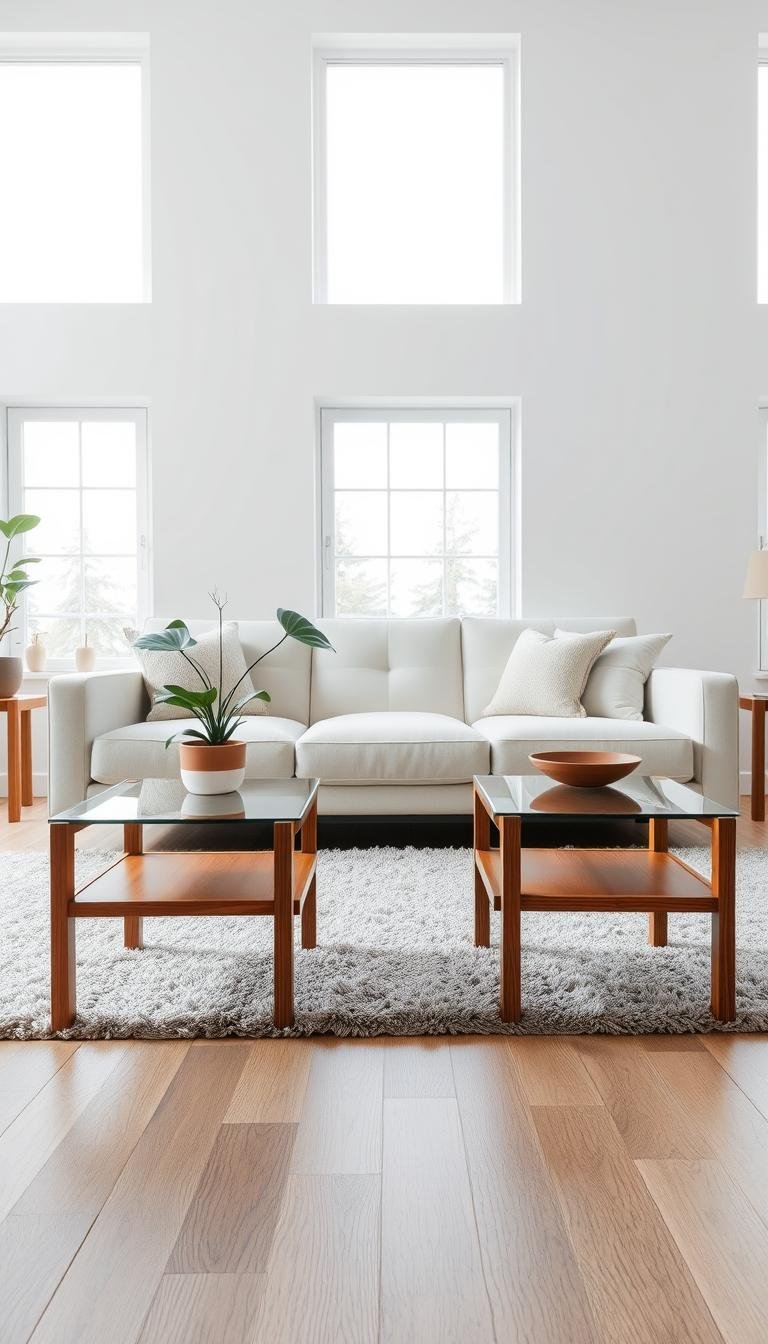
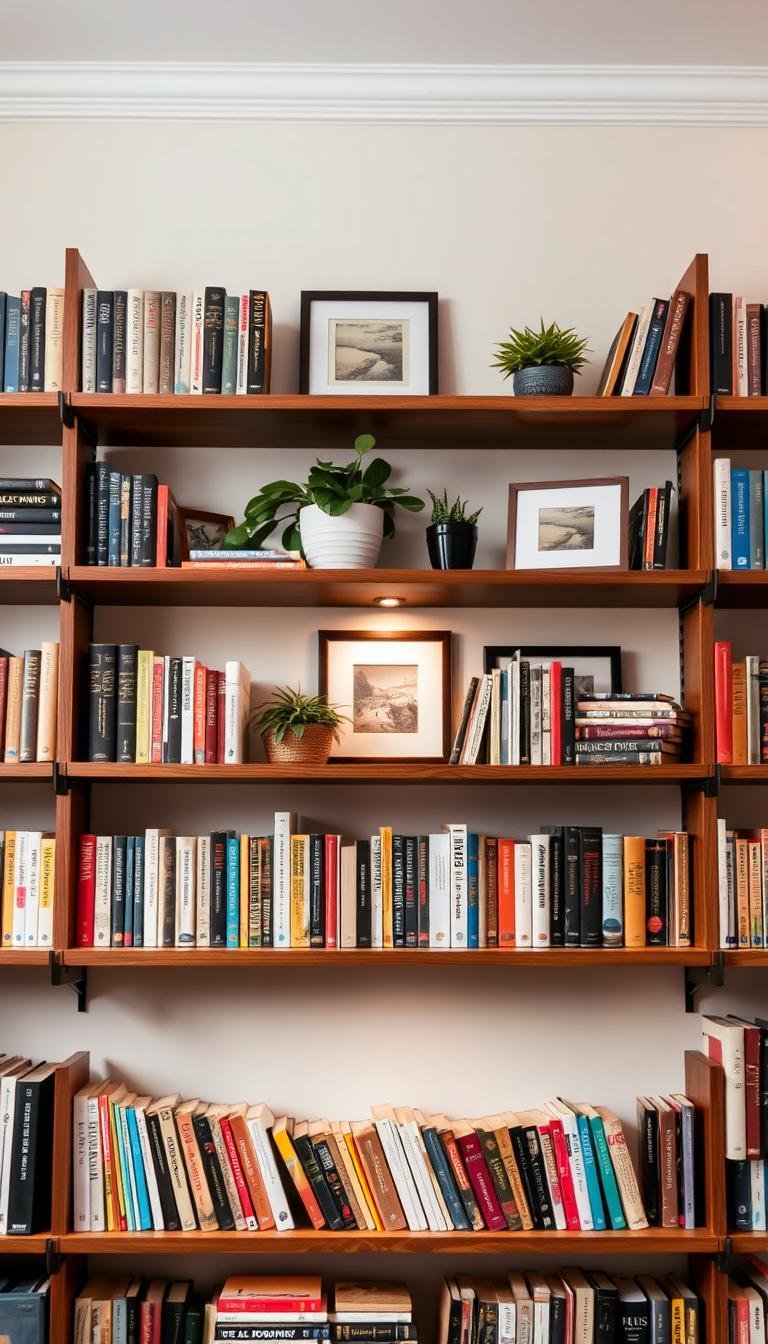
Strength and safety came first: I used hidden steel brackets that run deep into the wood and anchored each shelf into at least one stud, plus quality anchors. In practice, 10-inch-deep shelves and 13–14 inches of vertical spacing handled most of my collection, and one taller bay fits oversized volumes.
I planned with painter’s tape, a laser level, and a stud finder to avoid surprises. For a faster route, I considered IKEA hacks like Ivar or Billy with fillers, crown, and paint to get a built-in look on a budget.
Key Takeaways
- Use hidden steel brackets and hit studs for strong, sag-free shelves.
- 10″ depth and 13–14″ spacing work for most collections; leave one taller section.
- Plan with tape and a laser level for accurate layout and clean lines.
- Combine base cabinets and framed shelves for extra closed storage and a custom feel.
- IKEA hacks can save time and money while achieving a built-in look.
Project overview: my plan for a library wall with real storage
My initial sketch showed where cabinets and open shelves would live, then I refined it to fit the room’s scale. I wanted closed cupboards for daily clutter and open shelves for books and display, so the piece reads like furniture and not just storage.

What “doubles as storage” meant for my space
Closed base cabinets became the go-to for games, cords, and office supplies. Open bookshelves above keep the collection visible and light. I sized the lower run after mapping what I actually store so the room wouldn’t feel heavy.
Floating shelves vs. built-ins: my decision process
I compared the clean look of floating shelves with the anchored presence of built-ins. A successful floating install I studied used custom wood with recessed steel frames and stayed sturdy for years. The cabinet route I admired ran about 13½ feet, used pine/ply assembly, a custom countertop, and crown to achieve floor-to-ceiling scale.
- I left TV and cable runs in the plan early to avoid clashes.
- I allowed enough clearance for a ladder only when ceiling height justified it.
- I considered an IKEA hack for a faster, budget-friendly option — then added fillers and crown for a tailored finish. See my detailed diy library guide for examples.
How Do I Build a Home Library Wall That Doubles as Storage?
My work split into two clear approaches: sleek floating shelves with hidden frames or sturdy cabinet runs that hide clutter. Each path trades profile for storage, so I chose based on how many books and daily items I planned to keep.
The two proven paths: hidden-bracket floating shelves or cabinet-based built-ins
Floating option: use recessed steel-rod brackets inside solid wood to get a clean profile. Hit at least one stud and add quality drywall anchors. That recessed-channel hardware is what keeps a shelf from drooping under heavy loads.
Built-in option: anchor a framed run into studs, add base cabinets, and finish with face frames, trim, caulk, and paint. This route adds the most closed storage and long-term strength.
Key success factors I learned from real-world installs
- Verify studs before any drilling; layout with painter’s tape and a laser level.
- Set weight limits per shelf and keep heavier books toward the wall for better support.
- Test one shelf at eye level to refine hardware, then repeat the installation.
- Decide early on materials—solid wood, plywood, or MDF—based on finish and budget.

| Feature | Floating shelves | Built-in cabinets |
|---|---|---|
| Profile | Slim, modern | Furniture-like, substantial |
| Load capacity | Recessed steel: 80–110 lbs (depends on anchors) | High when tied to studs and frames |
| Storage | Open display | Mix of closed and open |
| Finish | Visible joinery, paint or stain | Face frames, trim, seamless paint |
Measure the room, audit obstacles, and design to the inch
I began by mapping the room in precise inches, then marked every outlet, vent, and trim piece.
Start with full-span measurements. Measure wall width, ceiling height, and floor level to the nearest 1/8 inch. Sketch zones for base cabinets, open shelves, and any TV area.
Mark all interruptions: outlets, switches, vents, and baseboards. Then find studs and note 16-inch or 24-inch spacing so supports line up with real structure.

Finding shelf depth and vertical spacing
Test layouts with painter’s tape. Ten-inch shelves work for most books. Plan 13–14 inches between shelves for regular volumes and one or more bays at 15+ inches for tall art books.
Final checks before cutting or ordering
- Use a laser level to project lines across the room; view from multiple points.
- Place painter’s tape rectangles for cabinets and live with the layout a day.
- Transfer every critical inch mark to the wall so the installation step is straightforward.
| Measure | Typical value | Why it matters |
|---|---|---|
| Shelf depth | 10 inches | Supports most books without excess forward load |
| Vertical spacing | 13–14 inches (one bay 15+) | Fits common book heights and tall volumes |
| Stud spacing | 16 or 24 inches on center | Dictates bracket and cabinet anchor locations |
Choose your build path: floating bookshelves or cabinet-plus-shelves
My decision settled on either crisp, hidden‑bracket shelves or a cabinet run with a countertop. Each path trades profile for storage, so I matched choice to daily needs and the room’s scale.

Floating bookshelves with hidden steel brackets for a clean look
Floating shelves give a slim, modern look with no visible hardware. I used custom walnut and recessed steel frames to run 56 linear feet of shelf that reads light but holds weight.
Keep depth near 10 inches and spacing at 13–14 inches for most books. That balance limits forward stress and keeps the look crisp.
Base cabinets with a custom countertop and bookcases to the ceiling
Cabinet-plus-shelves wins when I need enclosed storage. My builds used pine and birch plywood, face frames, and a wood countertop to reach the ceiling for a furniture-like finish.
Scribing and consistent face frame profiles hide gaps and stiffen the run for long-term durability.
When an IKEA hack makes sense for speed and budget
I choose an IKEA route (Ivar or Billy) when time or budget is tight. With fillers, crown, and paint, they can pass for custom in the dining room or living room and speed up a diy library project.
“Match the path to your comfort level: brackets need precision; built-ins need carpentry.”
Tools, hardware, and materials I actually used
For this install I gathered the exact tools and fasteners that saved me hours on the job. Staging everything up front kept the install calm and predictable.
Core tools: I used two drills—one for pilot holes and one for driving screws—so I didn’t waste time swapping bits. A laser level and two lightweight magnetic levels kept long runs straight. My tape measure, carpenter’s square, and painter’s tape helped me transfer marks and set layout lines.

- I trusted a Wirecutter top-pick stud finder and always verified studs by tapping before drilling into drywall.
- Quality anchors were on hand for non-stud points and to share load with studs when needed.
- I used a mix of screws: long wood screws for studs and smaller fasteners where a clean face mattered.
- Wood shims fixed tiny wall irregularities before final fastening; lay out pieces and hardware in order to keep momentum.
Materials I picked: walnut for stained floating shelf runs with recessed steel brackets. For built-ins I used pine and birch plywood, 1×2 and 1×3 face frames, and a glued-and-screwed 1×6 plank countertop. I pre-sanded and primed boards to save finish time later.
| Wood | Use | Why |
|---|---|---|
| Walnut | Floating shelves | Finish quality and strength |
| Plywood | Face frames | Stability when painted |
| Pine | Base cabinets | Cost-effective and easy to trim |
Finally, I laid out every screw, tool, and small piece before starting. That little bit of prep saved time and kept the work smooth from first holes to final fit.
Plan for wall type, studs, and anchoring strategy
The first step was confirming whether the room had standard drywall, old plaster, or solid masonry. That decision shaped anchor choices, tools, and the whole installation plan.
Drywall, plaster, or masonry: why it changes anchors and process
Standard drywall is usually 1/2 inch thick and works well when you tie shelves into studs. Thicker 5/8-inch drywall gives slightly better hold, but it doesn’t replace a stud.
Plaster or masonry needs different hardware and often pro tools. For brick or concrete I used sleeve anchors or masonry screws and a hammer drill. For plaster, I paired stud fasteners with heavy-duty anchors where studs missed the bracket locations.

Stud layout expectations and how I verified them
I scanned walls to map studs at 16 or 24 inches on center, then marked them on painter’s tape so the bracket plan was visible from across the room.
- I verified studs by tapping and, when uncertain, drilling a small test hole.
- I planned each installation step so every shelf hit at least one stud and used heavy anchors elsewhere.
- I kept heavy items close to the wall and added paired anchors on long spans for extra support.
- I matched screws and anchors to the hardware specs and documented each fastener location for future work.
“Anchoring into structure first, then supplementing with high-quality anchors, saved me from costly fixes.”
Installation path A: floating shelves that truly hold books
My priority was a repeatable layout routine so each shelf lined up from end to end. I set solid reference lines first, then used tape to live with the layout before any holes were drilled.

Layout with painter’s tape and laser level for straight rows
I laid out every shelf line with a laser level and painter’s tape to create straight rows I could view from across the room. That made spacing decisions quick and saved time when I adjusted heights.
Bracket placement: minimum one stud plus high-quality anchors
Bracket alignment matters: I traced the shelf outline with the bracket inserted, measured the offset, and positioned each bracket so it hit at least one studs point. Where studs missed the mark, I added two high-quality anchors for extra support.
Set-screw and recessed-channel alignment tricks that saved me time
I measured the distance from the steel frame to the wood edges and transferred those inches to the wall. I pre-drilled, used the maker’s recommended screws, then slid the shelf onto the recessed channel and tightened the set screws so the shelf seated flush.
Load management: depth, weight limits, and keeping weight toward the back
Keep depth near 10 inches and place heavy books toward the back to reduce forward tilt. I kept loads under about 80 lbs per shelf on drywall to protect the wall even though the steel rods could handle more.
- I worked shelf-by-shelf from eye level, perfecting one before moving higher or lower.
- I stepped back often to confirm even spacing and clean alignment across the full run.
Installation path B: built-in library wall with closed storage
The project started at the floor, where level cabinets set the tone for the entire unit. My goal was a furniture-like run that blends closed storage with open display.
Building or hacking base cabinets and anchoring them
Begin with sturdy lower runs: I used eight pine and birch plywood cabinets across about 13½ feet and anchored them plumb to studs. An IKEA hack works the same if you add filler panels and shim to get them perfectly level.
Creating a countertop and framing up to the ceiling
I glued and pocket-screwed 1x boards into a 1×6 plank top with a slight front lip, then secured it from inside the cabinets. From that secure top I framed the tall unit up to the ceiling in place to avoid heavy lifting.
Shelf supports, trim, and finish for a seamless look
- Install 1×2 cleats on three sides and anchor back cleats into studs for strong shelf supports.
- Add 1×2 and 1×3 face frames to hide edges and stiffen the frame.
- Scribe fillers at side walls, caulk seams, and finish with one coat of primer and Behr Polar Bear paint for a seamless dining room-ready result.

| Component | Material | Why it helps |
|---|---|---|
| Base cabinets | Pine / birch plywood | Durable closed storage and solid anchor points |
| Countertop (top) | Glued 1x boards | Front lip and internal screws hide fasteners |
| Face frames | 1×2 & 1×3 trim | Creates custom bookshelf profile and hides gaps |
Final step: check door swings, load books slowly, and confirm each bookshelf bay holds level after a few days.
Design details that make it feel custom
Small design choices can lift a built-in from functional to finished. I used simple rules to shape the look so the unit reads like furniture, not a retrofit. That focus carries from the top reveal to the smallest cable grommet.

Integrated TV zone, ladder considerations, and cable management
Plan the TV footprint early. I mocked current and future screen sizes with painter’s tape so side shelves stayed clear by the measured inches needed for vents and cords.
I routed power and low-voltage cable runs behind the drywall or inside cabinets to keep the front clean. That choice preserves the look and simplifies future upgrades.
Rolling ladders need space and height. At about 9-foot ceiling height they start to feel practical; measure clear floor paths before committing.
Lighting options: sconces and LED strips for warm, even glow
Low-profile LED strips beneath each shelf give an even wash and prevent hot spots. I added wall sconces to anchor the run and add warmth to the room.
Keep a few open bays for art or plants to break up dense books and let the shelf composition breathe.
| Detail | Action I took | Why it helps |
|---|---|---|
| TV zone | Mocked sizes with tape; kept clear inches on sides | Prevents future rebuilds and keeps cords accessible |
| Cable management | Routed power behind wall and inside cabinets | Keeps face clean and reduces visible clutter |
| Lighting | LED strips under shelves + sconces | Warm, even glow and visual anchors |
| Ladder | Checked ceiling height (~9 feet) and floor clearance | Ensures safe use and proper scale |
“The small details—matching hardware finishes, a crisp top reveal, and neat grommets—are what make a shelf run feel built-in.”
Safety, testing, and long-term durability
Before I added decor, I ran simple load trials to confirm each shelf’s limits. That step kept surprises to a minimum and let me fix weak points early.

Anti-tip hardware and bracket checks: I anchored freestanding pieces with anti-tip hardware into studs and confirmed the bracket ratings matched expected loads. For floating shelves I kept loads conservative—about 80 lbs on drywall—and tested with heavy books before final styling.
- I tested each shelf and watched for wobble; any movement meant adding a stud fastener or better anchors.
- I corrected forward tilt by tightening set screws and keeping heavy items close to the wall.
- I checked every screw was seated; stripped holes were repaired or moved to fresh wood.
- I maintained a simple checklist for annual inspections so the run stays safe for years.
| Risk | Action | Result |
|---|---|---|
| Wobble | Add stud fastener or upgrade anchors | Stable shelves |
| Forward tilt | Tighten set screws; move weight toward back | Level shelf |
| Sag | Shorten spans or use thicker stock | Long-term support |
| Stripped holes | Repair with appropriate anchor or relocate | Secure fastening |
Conclusion
Small choices—consistent paint, neat trim, and secure anchors—made the difference between quick shelving and a lasting installation. With careful measuring and stud-first anchoring, the finished run felt solid right away.
I stuck to practical dimensions (about 10 inches deep and 13–14 inches of vertical spacing) so books sit well and shelves stay balanced. Floating shelves or built-ins both worked when matched to the room and my needs.
By taping layouts, testing one shelf at eye level, and finishing with paint and crown, I saved time and avoided rework. The end result is a living room library that looks intentional, holds daily items, and will serve me for years.