How Do I Install an Indoor Hammock for a Cozy Nap Spot?
I want to guide you step by step to create a safe, inviting hammock corner in my home. I start by choosing a spot that fits the room and my routine. That might be the living area, a sunny window, or a quiet reading nook.
Safety matters most. I always anchor into solid wood studs or ceiling joists, never drywall alone. I pick 3/8-inch eye hooks rated 300 lbs with 4-inch threads, plus carabiners or S-hooks that match that rating.
For comfort, I aim for a seat height near 18 inches, a ridgeline around 8–9 feet, and a roughly 30° suspension angle. Chains make fine height and sag tweaks; ropes work if my knots are secure. If drilling isn’t allowed in an apartment, a sturdy stand is my renter-friendly way to enjoy the hammock.
Before relaxing, I test the setup gradually with weight to confirm stability. This way, the space becomes a reliable, cozy place to unplug and breathe.
Key Takeaways
- Anchor only into solid wood studs or ceiling joists for safety.
- Use 3/8-inch eye hooks and carabiners rated to at least 300 lbs.
- Target seat height ~18 inches, ridgeline 8–9 feet, and 30° hang angle.
- Chains simplify adjustments; ropes are fine with strong knots.
- Use a portable stand in apartments where drilling is not allowed.
- Test weight gradually before regular use to ensure stability.
- Place the hammock where it enhances living and reading time.
For a detailed how-to guide and hardware tips, see this indoor hammock hanging guide.
What I’m Aiming For: A safe, comfy indoor hammock setup that matches my space
What I want is a reliable, comfortable hammock that fits the layout and daily flow of the room. I picture a seat near 18 inches high so getting in and out feels like a chair.
I plan anchor points based on available stud or ceiling joist locations and whether the hammock will be for reading, napping, or lounging. If the points sit close together, I’ll mount them higher to keep the proper sag and preserve comfort.
Success means the hammock supports me confidently and doesn’t turn the area into an obstacle. I pick a location that keeps walkways clear, leaves enough space from a wall, and keeps outlets in reach for a lamp or phone charger.
For style, I imagine neutral cotton or a patterned cloth with a small side table for books. I’ll use chain links or quick adjustments so the setup stays flexible and easy to tune.

- Ridgeline target: 8–9 ft for good sag.
- Seat height target: ~18 inches for easy access.
Plan and Protect: Safety basics before I drill or hang anything
My top priority is finding solid wood beams or studs before I touch a drill or hardware. I only anchor into real wood—wall studs or ceiling joists—and never rely on drywall alone. In buildings with metal studs, I avoid those metal members because they can bend under load and cause damage.
“A small pilot hole tells me more than a map ever will.”
Finding solid wood: studs and ceiling joists vs drywall and metal studs
I run a stud finder across the wall in several passes, then make a tiny pilot hole to confirm wood shavings. If I hit metal or a void, I move the point rather than risk a poor anchor.
Load limits, anchor strength, and why a 30-degree hang angle matters
I pick heavy-duty eye hooks about 3/8-inch with at least 4-inch threads and a 300 lb rating. I make sure two inches of thread bite into solid wood so the anchor can handle my full weight plus blankets or books.
A 30-degree suspension angle keeps force on the anchors reasonable; too steep a pull multiplies the load on each point and risks failure.
Ridgeline and height targets for comfort
I set the ridgeline length near 8–9 ft so the hammock has the right curve. Then I adjust anchor heights so the seat sits around 18 inches above the floor for easy entry and exit.
- I check all mounting points so the hammock ends line up cleanly with the wall or ceiling spots.
- I confirm clear space in the room so gentle swinging won’t hit furniture or walls.
- I total the expected weight and verify every component—hooks, chain, carabiners—meets or exceeds that figure.

My toolbox and materials checklist
I start by gathering everything on a single surface to keep the work tidy and safe. This saves trips across the room and helps me check ratings and fit before I drill.

Hardware and supports: eye bolts, chains, carabiners, rope
I bring my hammock, measuring tape, drill with bits, and a pencil. I also lay out 3/8-inch eye bolts rated 300 lbs, rated carabiners or S-hooks, and chain.
Chains make fine height changes link by link. If knots aren’t my strength, I stick with chain and connectors. Rope works if I use proven, load-bearing knots and inspect them often.
Using a stud finder correctly to locate secure anchor points
I run the stud finder in several passes at the height I plan to mount. Then I mark with a pencil and drill a small pilot hole to confirm solid wood.
- I mark anchor points so the hammock hangs evenly in the space.
- I pick connectors and bolts that all show a 300 lb rating.
- I keep a hammock stand option ready if drilling isn’t allowed in the rental.
- Final tip: work calmly, wear eye protection, and vacuum wood shavings when done.
Step-by-step: How Do I Install an Indoor Hammock for a Cozy Nap Spot?
Start by locating the exact center of each ceiling joist or wall stud with a stud finder, then confirm with a tiny pilot hole that produces wood shavings.
Marking anchor points
Measure the distance between points to match your hammock length and desired sag. Aim for a ridgeline near 8–9 ft and a seat height of about 18 inches.
Drilling and eye bolt installation
Drill 3/8-inch pilot holes at your marks. Thread heavy-duty eye bolts until at least 2 inches embed into solid wood. Tighten by hand, then finish with a wrench.
Attaching and adjusting
Clip chain or rope loops to each end and use rated carabiners at the eye bolts. Adjust chain link-by-link to set seat height and a ~30° suspension angle for lower anchor stress.
Safe testing before use
Test gradually. Pull hard on each side, then add incremental weight like books or weights. Only sit once the system shows no creaks or movement.
| Step | Tool | Target |
|---|---|---|
| Locate anchors | Stud finder, pencil | Center of stud or joist |
| Drill holes | 3/8″ drill bit | 2″ thread embed |
| Attach | Chain/rope, carabiners | 18″ seat height, 30° hang |
| Test | Books/weights | Gradual load up to full weight |

Hanging a hammock chair from the ceiling
One solid anchor point turns a simple chair into a flexible, space-saving seat. I mount into a load-bearing ceiling joist (beam) and use a heavy-duty eye bolt with at least 2 inches of thread in the wood.
Quick tweaks matter. I add a short length of chain and a rated carabiner so height changes are fast. This helps the seat reach true chair height for easy entry and exit.
Single-point anchor setup and easy height tweaks
- I pick a joist that lines up with my ideal spot and leaves room for a gentle swing without hitting walls or lamps.
- I center the chair under the anchor to avoid side-loading and keep motion smooth.
- I tug-test firmly and then add weight in steps, confirming no movement at the ceiling before I sit for longer.
- For tight spaces, a swivel or soft tether limits spin and protects nearby shelves.
| Task | Hardware | Target |
|---|---|---|
| Anchor | 3/8″ eye bolt | 2″ thread in beam |
| Adjust | Short chain + carabiner | Chair height comfortable |
| Safety check | Pull test, incremental weight | No ceiling movement |

Apartment-friendly ways to hang without headaches
A freestanding stand turns a hammock into movable furniture I can place anywhere in my apartment.
If drilling is off-limits, a hammock stand lets me enjoy the swing without anchors or wall damage. Portable VISTA-style frames assemble quickly and move from room to room, so the piece feels like part of my living area rather than a temporary gadget.

When a hammock stand is the better choice for renters
I measure the space first. That makes sure the frame has enough clearance for gentle motion and access around the frame, just like other furniture.
- I skip drilling completely by picking a portable stand that fits my hammock size and room, which saves patching holes later.
- I check the weight rating and connector compatibility so the hammock fits snugly without extra adapters.
- I protect floors with rubber feet or a mat, and I place the setup away from vents or heaters to keep fabric in good shape.
- I keep a small tool pouch handy so the frame can break down fast when I want to move it to another room or apartment.
“A freestanding frame gives flexibility and a clean, renter-friendly way to enjoy a hammock at home.”
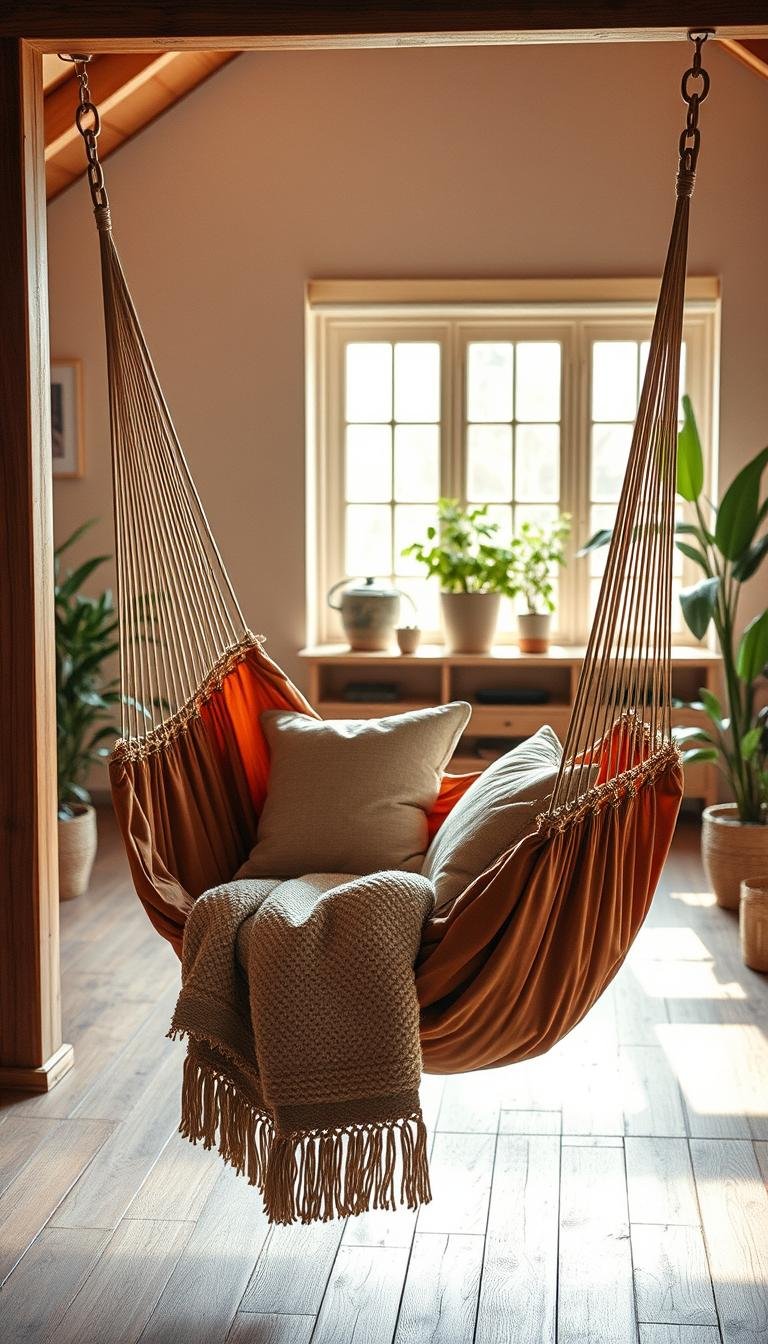
Dialing in comfort and style: placement, room ideas, and a cozy reading nook
Picking the right corner can turn unused space into a gentle, inviting retreat. I look for spots that suit how I live each day and welcome quiet moments.
Best indoor spots
Living rooms work well when the hammock faces a window or bookshelf. A bedroom corner offers privacy and calm. A sunroom brings morning light, and a closed balcony makes a breezy hideaway.

Design touches and wellness perks
I pick light cotton or linen to keep the fabric airy. Boho or striped patterns add character and make the hammock a focal point.
Gentle swaying helps with relaxation and eases pressure points. I frame a reading nook with a small lamp, a side table, and a soft throw so essentials stay close without clutter.
| Location | Best use | Style tip |
|---|---|---|
| Living room | Lounging, view | Face window; add side table |
| Bedroom corner | Private reading | Layer rug and cushion |
| Sunroom | Morning light | Light fabrics; plants nearby |
Troubleshooting and upkeep for long-term relaxation
Catching wear early prevents surprises and extends the life of my gear. I run a quick visual and tug test every few weeks to spot loose fittings or frayed fabric.
If I hear a new creak or feel shifting, I stop using the setup right away. I check the wall and ceiling points and retighten eye bolts or screws as needed.
I inspect chains, carabiners, and any metal for rust or deformation. If metal shows corrosion, I replace the piece with an equal or higher-rated part.

- I watch fabric for thinning or frays and retire the hammock if load-bearing areas weaken.
- I never exceed the posted weight limits and keep the hang angle relaxed to reduce stress on anchors.
- I check rope for glazing or abrasion and replace it at the first sign of wear.
- I confirm anchors remain in solid studs or beams after moves or seasonal changes.
Quick tip: add a quarterly routine to your cleaning day: visual check, firm tug test, and minor adjustments. A few minutes of upkeep saves time and keeps hammocks safe for years.
Conclusion
Final checks matter. Small steps turn parts into a safe, comfy corner. I confirm solid wood in studs or ceiling joists, use 3/8-inch eye bolts with at least 2 inches embedded, and aim for a 30° suspension angle and about 18 inches seat height.
Two clear paths work well in an apartment: mount into studs when allowed or use a portable hammock stand for zero holes. Chains and rated carabiners make fine adjustments, and a ridgeline near 8–9 feet sets the right length.
Keep the spot personal with soft fabric and warm light, test with gradual weight, and inspect fittings often. With these steps, my indoor hammock becomes reliable furniture for short sleeps, quiet relaxation, and easy moving between rooms.