How Can I Add Vertical Gardens to My Indoor Spaces Without Much Effort?
I wanted greener rooms without extra chores, so I picked simple solutions that suit my routine. Small pocket planters, modular panels with irrigation, and freestanding frames let me scale a living feature on my walls with little fuss.
The benefits are clear: cooler rooms, cleaner air, less noise, and an eye-catching design that lifts a home instantly. I match plants to light — ferns and philodendrons for shade, succulents and herbs for sunny spots — so the garden stays healthy with minimal care.
I set a practical way to care for the wall: quick moisture checks once a week, light trims, and a diluted feed every 4–6 weeks. For larger installs I use simple timers or modular systems with built-in sensors.
Key Takeaways
- Choose systems that fit your routine and space so upkeep stays light.
- Pick plants by light level to cut maintenance and disease risk.
- Group similar needs, check moisture weekly, and trim for a tidy look.
- Use simple irrigation or timers for larger setups to save time.
- Start small with renter-friendly options, then scale if you enjoy the design payoff.
Quick wins: the easiest ways I add green walls at home with minimal work
I favor projects that transform a blank wall into living art in an afternoon. Fast options give visible payoff and low upkeep.

Pocket planters use felt or fabric pouches that are cheap and DIY-friendly. They install quickly on an open wall space. Note they dry faster, so water well after planting.
Modular panels often include built-in drip irrigation and scale cleanly. Make sure the reservoir and lines are reachable for easy refills.
- Renter-friendly freestanding frames let me slide in pots or pockets without drilling.
- A light trellis or cable supports fast climbers like ivy and pothos for instant coverage.
- Hydroponic and aeroponic kits suit tech-minded setups and offer efficient watering with optional timers and sensors.
| System | Best for | Maintenance |
|---|---|---|
| Pocket planters | Small space, herbs | Weekly water, light trims |
| Modular panels | Clean look, scalable | Check reservoir, refill |
| Trellis / cables | Trailing plants | Light pruning |
| Hydro/aero kits | Soilless setup | Monitor sensors, top up |
Group like-thirst plants together. Expect the wall to knit in a month or two with light trims and diluted feed every 4–6 weeks.
Choosing the right wall space and purpose before I start
I start by matching a wall’s conditions—light, drafts, and access—to the garden role I want it to play. Defining purpose first makes the rest simple: edible rows near the stove, decorative foliage in the living room, or a privacy screen outdoors.
Indoor vs. outdoor placement: For indoor walls I watch for temperature swings near windows and vents. I leave a small gap behind mounted systems to prevent moisture buildup and maintain airflow. Outdoors, I plan for wind and rain and pick sturdier mounts and finishes.

Indoor temperature, airflow, and placement
I survey wall space for heaters, drafty windows, and vents so plants don’t get baked or chilled. I cluster like-thirst types together so watering stays efficient.
Reading light and plant selection
Deep shade suits ferns, philodendrons, and pothos. Bright indirect light is great for peperomia, peace lily, and spider plant. Sunny windows host succulents and Mediterranean herbs like rosemary and thyme.
Renter-friendly frames and access
If drilling is off-limits, I choose freestanding frames with stable bases and posts that carry water weight. I map access paths so I can reach every pocket quickly—this saves time when I prune or harvest vegetables.
For more on practical layouts and beginner setups, I link a short guide that helped me plan the first panel: beginner vertical gardening guide.
Picking a vertical garden system that keeps maintenance low
Picking the right system makes upkeep predictable and keeps surprises low.
Fabric pocket systems suit quick herb and houseplant displays. They’re low-profile and DIY-friendly, but pockets dry faster. I choose thicker felt so moisture lasts longer and holes for easy swaps.

Modular panels with built-in drip
For a clean design and easy scaling I favor modular panels. They hide drip lines, add rows without fuss, and match sleek interiors. Make sure brackets leave an airflow gap to prevent moisture buildup.
Trellis, treillage, and cable support
Simple trellis or cable grids work when I want climbers to form a screen. They use less soil and light frames. I pick corrosion-resistant metal or treated frames for long life.
Hydroponic and aeroponic options
When tech should handle watering, I go soil-free. Towers and panels use water efficiently and pair with timers and sensors for near set-and-forget care.
Tip: match system size to wall and your routine—start compact and expand as you learn.
| Type | Best for | Key feature |
|---|---|---|
| Fabric pockets | Herbs, small houseplants | Low-cost, DIY; choose thick felt |
| Modular panels | Large walls, clean design | Built-in drip, scalable rows |
| Trellis / cables | Climbers, screens | Lightweight support, metal options |
| Hydro/aero | Tech setups, efficient water use | Soil-free, timers and sensors |
Structure and support: how I keep walls and trellises sturdy with little fuss
A sturdy frame keeps plants steady and makes maintenance painless all season. I plan the structure so it matches the garden size and expected load. Simple choices prevent sagging and cut repair time.

The stability essentials: height, anchoring depth, and N-S orientation
Taller trellises work best—aim for at least six feet so climbers and vegetables don’t outgrow the frame midseason. I press posts or bases at least 12 inches into the soil for secure anchoring.
I orient frames north-south so both faces get balanced light. Plant along the outside edge to boost airflow and make harvests easier from the top to the base. I also tie stems loosely and prune lightly to reduce wind stress.
Low-cost DIY frames: welded wire, T-posts, cattle panels, and repurposed fencing
For budget builds I stretch welded wire between T-posts or bend cattle panels into arched tunnels over a garden bed. Metal and iron hold up to rain, wind, and heavy fruit better than wood.
I watch hole size on panels—smaller holes help tendrils grab, larger holes fit thicker stems without damage. When weight is a concern, I make sure anchors and bases handle wet soil and full foliage.
| Material | Best use | Key tip |
|---|---|---|
| Welded wire + T-posts | Quick trellis for beans | Anchor posts 12″ into soil |
| Cattle/hog panels | Arched tunnels over garden bed | Arch to save footprint, ease access |
| Repurposed fencing / gates | Sturdy freestanding frames | Use metal for long-term durability |
| Chicken wire / clothesline | Temporary nets for peas | Pack away after season |
Tip: Choosing metal supports and anchoring deeply helps plants grow up safely and reduces maintenance over time.
Plant choices that thrive in my space without extra babysitting
Choosing the right species for light levels makes maintenance nearly invisible in daily life. I match plants to each spot so they mostly care for themselves.

Low-light winners
Ferns, philodendrons, and pothos do well in deep shade. They handle dim corners and form lush layers of leaves with little fuss.
Bright-indirect champs
Peperomia, spider plant, and peace lily fill brighter rooms quickly. These choices recover fast from missed waterings and keep the wall looking full.
Sunny spots and patios
Succulents like sedums and Mediterranean herbs such as rosemary and thyme thrive in full sun. I also use snake plant or ZZ in high-traffic areas for durability.
- I group thirstier herbs away from drought-tolerant succulents to avoid mixed signals when I water.
- I give climbers a slim trellis or cable grid so they can grow vertically without tangling neighbors.
- I tuck compact vegetables like dwarf chiles or cherry tomatoes near the brightest spot for occasional fruit.
“Group by light and water needs; it reduces disease and keeps the display robust.”
| Light | Best plants | Care tip |
|---|---|---|
| Deep shade | Fern, Philodendron, Pothos | Weekly moisture checks |
| Bright indirect | Peperomia, Spider plant, Peace lily | Moderate water; rotate if cramped |
| Full sun | Succulents, Rosemary, Thyme, Snake plant | Well-draining mix; less frequent watering |
Watering made easy: from simple routines to set-and-forget systems
Targeted watering and smart timers cut guesswork and protect floors. For small walls I use quick habits. For larger installs I add hidden lines and timers so the system runs with little oversight.

Manual care that fits a busy week
A long-spout can lets me target the soil and avoid wetting the leaves. I water once or twice a week, depending on light and white vents nearby.
I place a shallow catch tray at the base to collect runoff and protect floors. A 10-minute weekly check helps me spot yellowing or crispy leaves before trouble spreads.
Automatic drip, wicks, and simple smart controls
For bigger garden panels I run a slim drip line with in-line emitters or capillary wicks. I hide tubing behind frames for a clean look and steady root support.
I use a basic timer for two short cycles a week and add a moisture sensor when I’m away. That combo cuts daily chores and lets me use time for pruning or harvests.
- Stagger emitters for thirsty herbs and reduce emitters for succulent pockets.
- Check soil with a finger or meter near vents or sunny windows.
- Clean filters and top off tanks on a monthly cadence so the system keeps plants healthy.
Watch leaves for clues: yellow means too much water, crispy edges mean too little.
How Can I Add Vertical Gardens to My Indoor Spaces Without Much Effort?
A simple planting map saves time and keeps each pocket happy from day one.
My no-stress planting layout: group by light and water needs
I map light across the wall, then cluster plants by need. This way I don’t overthink watering or move pots constantly.
I place thirstier herbs together and drought-tolerant picks in another band. Low-light ferns go lower, bright-indirect picks sit mid-wall, and sun lovers live near the window or at the top.
Grouping like this reduces disease and makes the garden fill in within a month or two.

The 10-minute weekly routine: trim, check moisture, and light feeding
My weekly ten-minute ritual keeps the wall tidy. I trim runners, check moisture in three spots, and top up the reservoir if a drip system runs.
- Water thoroughly after planting and make sure each pocket drains properly.
- Feed with a diluted, balanced fertilizer every 4–6 weeks.
- Wipe dust from leaves and rotate any lagging plant out rather than nurse it endlessly.
- Keep a small kit—scissors, moisture meter, funnel—nearby so the routine stays fast.
Tip: Small, steady care delivers the benefits of a fuller, low-effort garden and helps keep plants healthy for months.
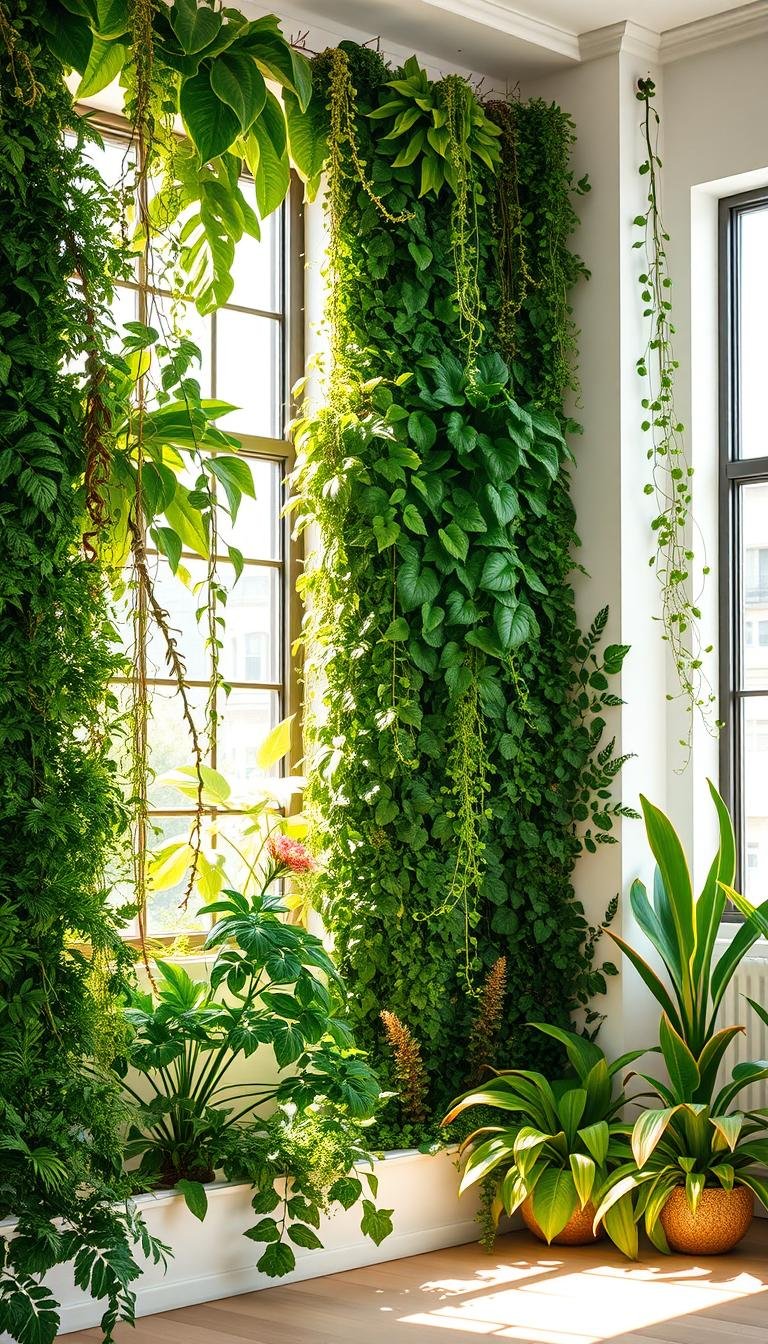
Design and benefits: why growing up saves space and looks amazing
Growing upward turns narrow corners into lively features that do more than look good. A thoughtful design makes these installations work as insulation, sound dampeners, and air filters while saving floor area.

Small-space magic: healthier plants, easier harvests, and added privacy
Stacking plants improves airflow and keeps leaves off wet ground, which cuts disease and keeps fruit and vegetables clean when they hang in view.
Raised screens also act as soft privacy panels on patios. They lower ambient temps and filter dust, so people notice the calm, shaded spot.
Style ideas I love: patterned panels, trailing cascades, and integrated lighting
Patterned panels—stripes, checks, or color blocks—give eye-catching rhythm that makes a small space feel intentional. Trailing cascades from top rows add movement and drama.
- I use slim trellis screens to lift foliage and ease harvests.
- Up-lights reveal texture at night and boost the beauty of the display.
- Layering shade-lovers low and sun-lovers high keeps the garden space dynamic and healthy.
Tip: Keep the structure simple but strong so the design stays crisp season after season.
Conclusion
A simple routine and the right frame make a living wall feel like part of daily life.
Choose a tall, well-anchored trellis or a modular panel oriented roughly north–south and plant from the outside edge for better airflow and easier access. For larger setups, pairing modular irrigation or hydro/aero systems with a basic timer reduces chores.
My maintenance plan is short: a quick weekly check and a diluted feed every 4–6 weeks. Match plants to light—shade for ferns and pothos, bright‑indirect for peperomia and peace lily, sun for succulents and herbs—and the wall stays healthy with little fuss.
Start with one vertical garden, rely on sturdy frames, and expand when you like the results. Small, steady care delivers cleaner air, fresh snips, and fruit or foliage right where you live.